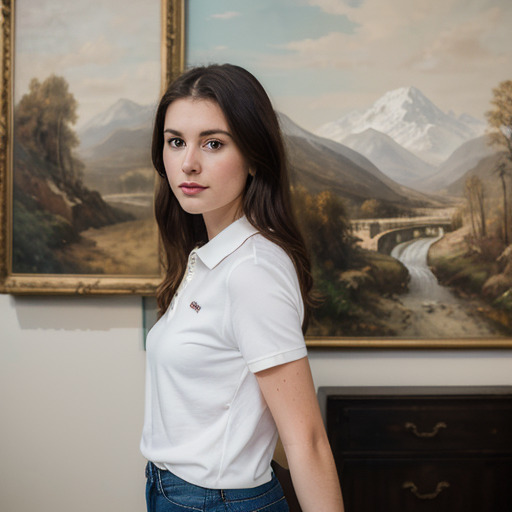
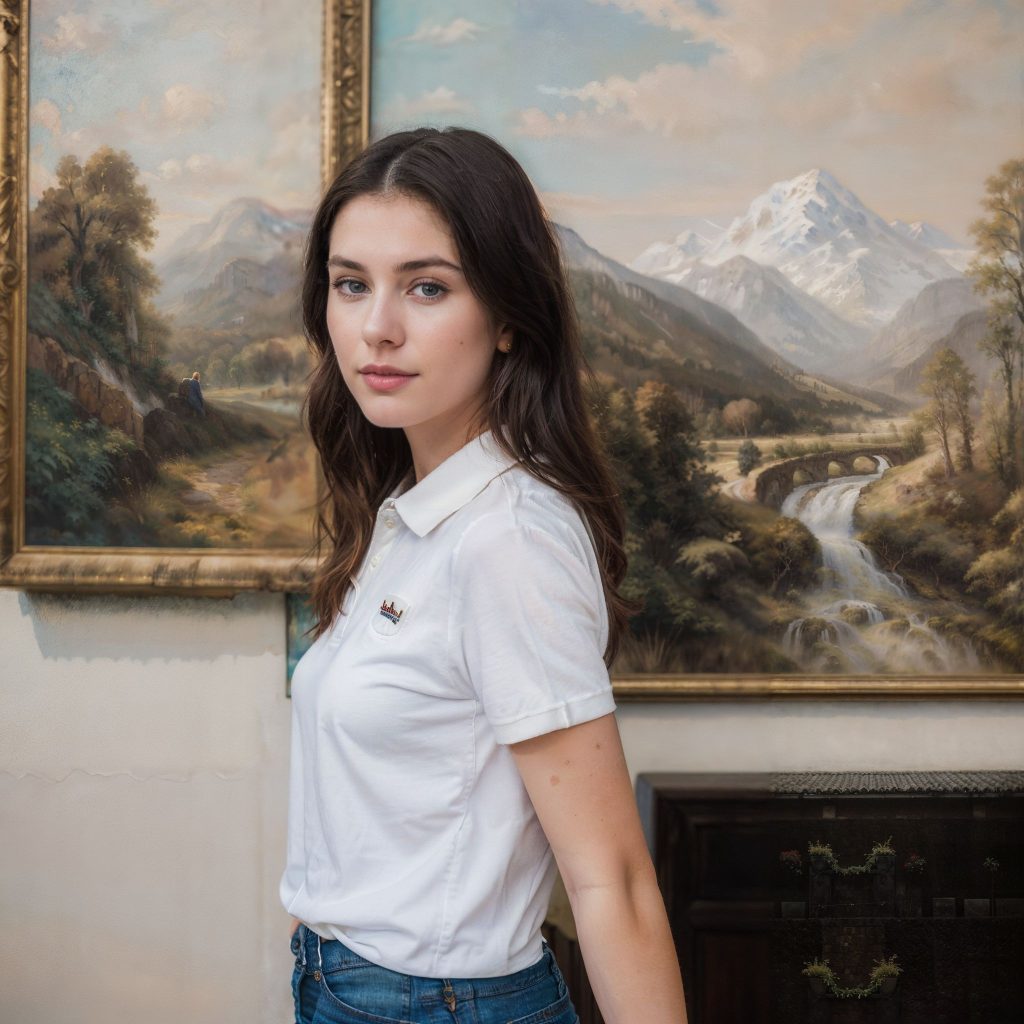
In our previous tutorial How to use Ultimate SD Upscale extension in Automatic1111, we saw a problem with Stable Diffusion generating a face for each tile when we use Ultimate SD Upscale with Image to Image denoise strength is set to 1. In case you haven’t read the tutorial, here is a brief recap. Let’s say if you try to upscale an image like below from 512×512 to 2048×2048.
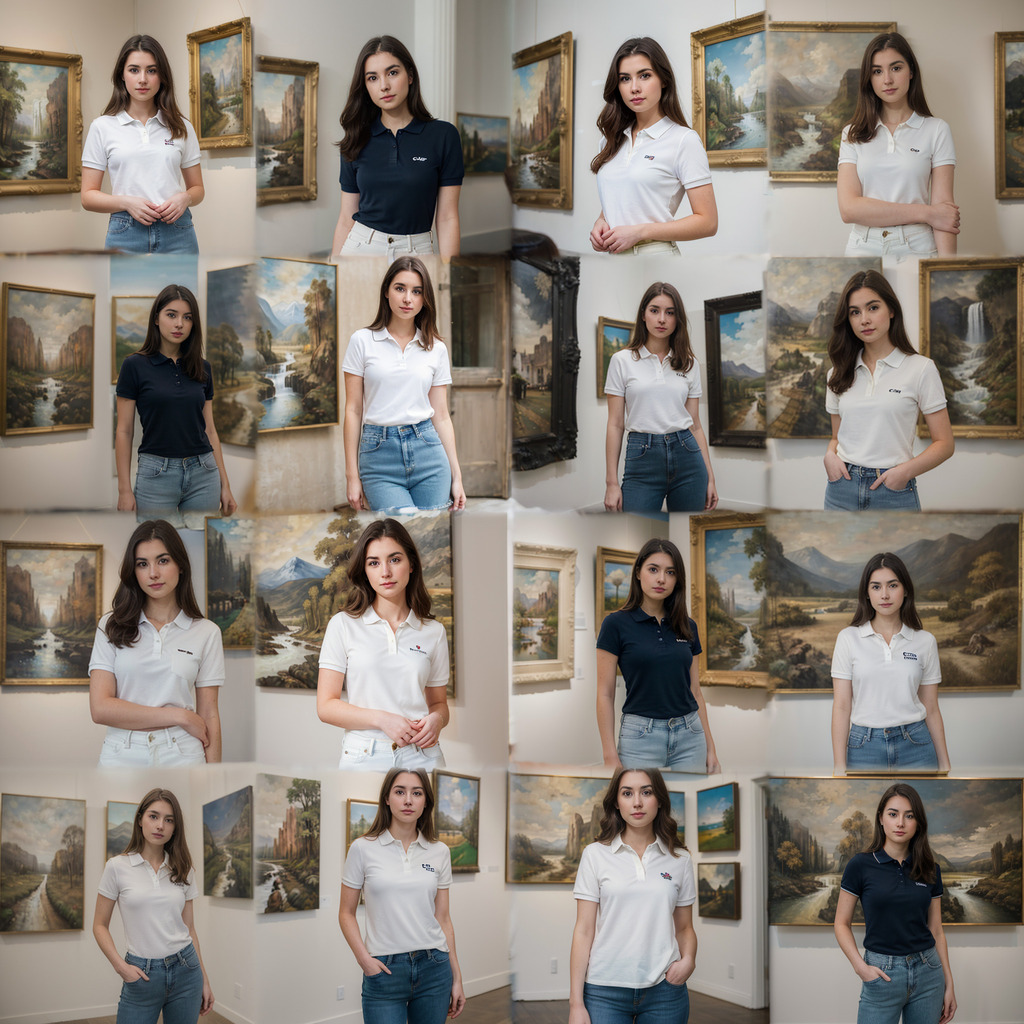
You would get this.
The solution that was discussed in the previous tutorial is to use a low denoise strength (e.g. 0.15). However, doing so would mean that we are missing an opportunity for img2img to potentially add more interesting details to the image. Is there a solution? Yes, a ControlNet tile model can come to your rescue. ControlNet tile model controls img2img so that each tile is not deviating from the original image on each tile while adding details. This could be a very powerful tool in some cases. Let’s dive in.
How to use Ultimate SD Upscale extension with ControlNet Tile in Automatic1111
This section assumes that you are already familiar with how to use Ultimate SD Upscale extension. If not, please check out How to use Ultimate SD Upscale extension in Automatic1111 before proceeding. We will start off with generating the above tile image (undesirable grid result). Before generating an image, you need to download and install control_v11f1e_sd15_tile model if you haven’t done so. If you are not familiar with how to download or install a ControlNet model, checkout How to use ControlNet in Automatic1111 Part 2: Installation.
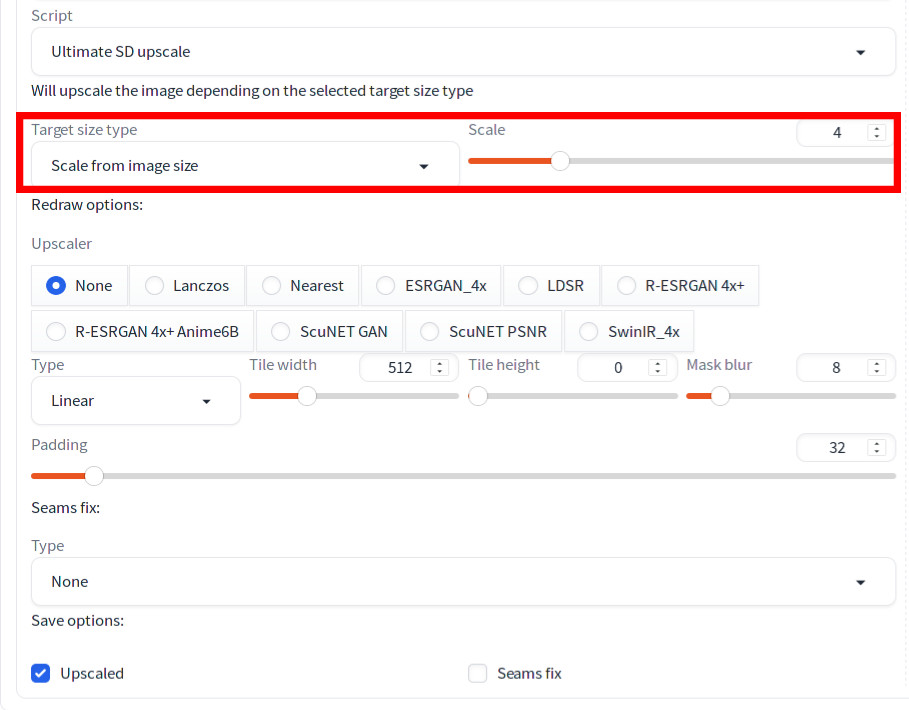
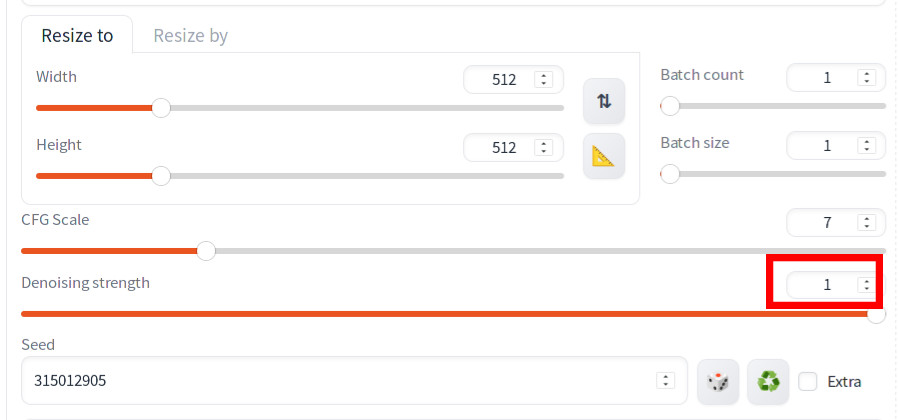
Our first step is to load the source image onto the img2img tab either from the txt2img tab or the PNG info tab. Then enable Ultimate SD upscale in the Script field and set 4 as the Scale factor as shown below. Note that Upscaler is set to None to use Lanczos below, but you can set to your preferred Upscaler here.
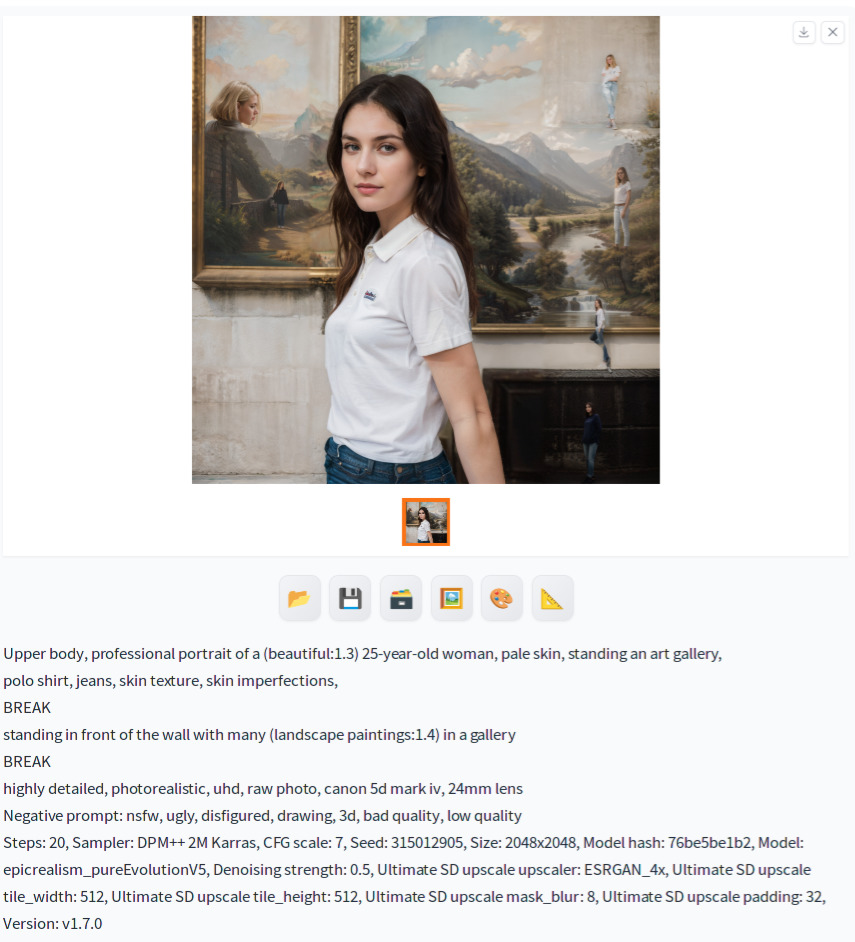
Set Denoising strength to 1 and hit Generate. You should see an image similar to the multiple-grid-like image above.
Now we established the baseline, let’s turn on ControlNet tile to see the difference.
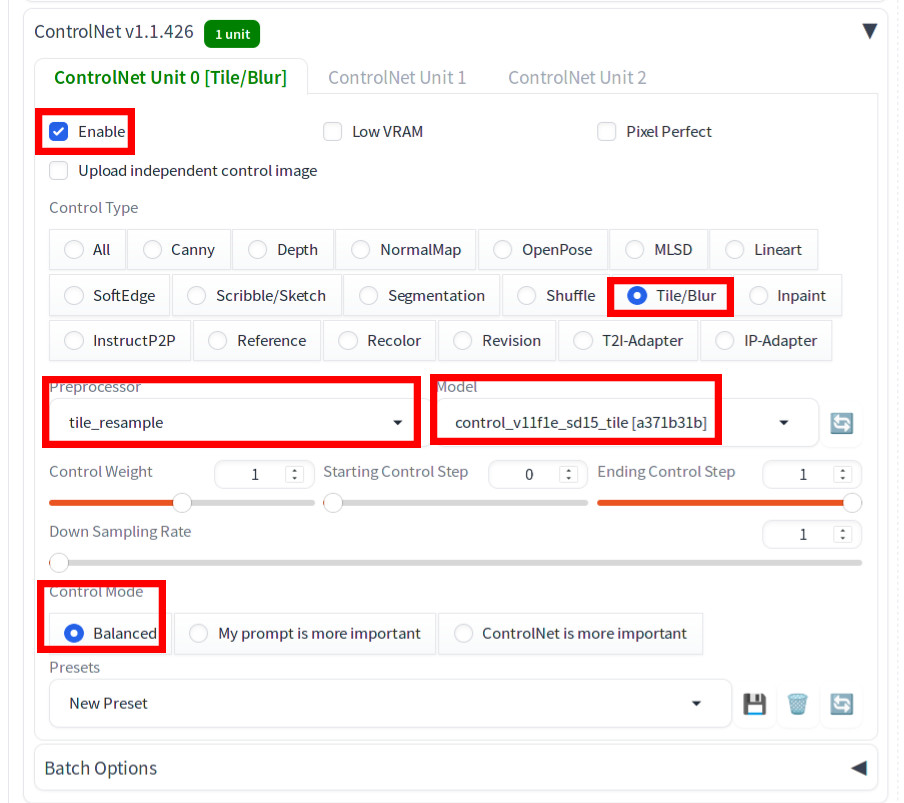
Expand the ControlNet section. Check Enable, and select Tile/Blur as Control Type. Make sure that tile_resample is selected for Preprocessor and control_v11f1e_sd15_tile is selected for Model.
Then hit Generate. Voila, the grid is gone!
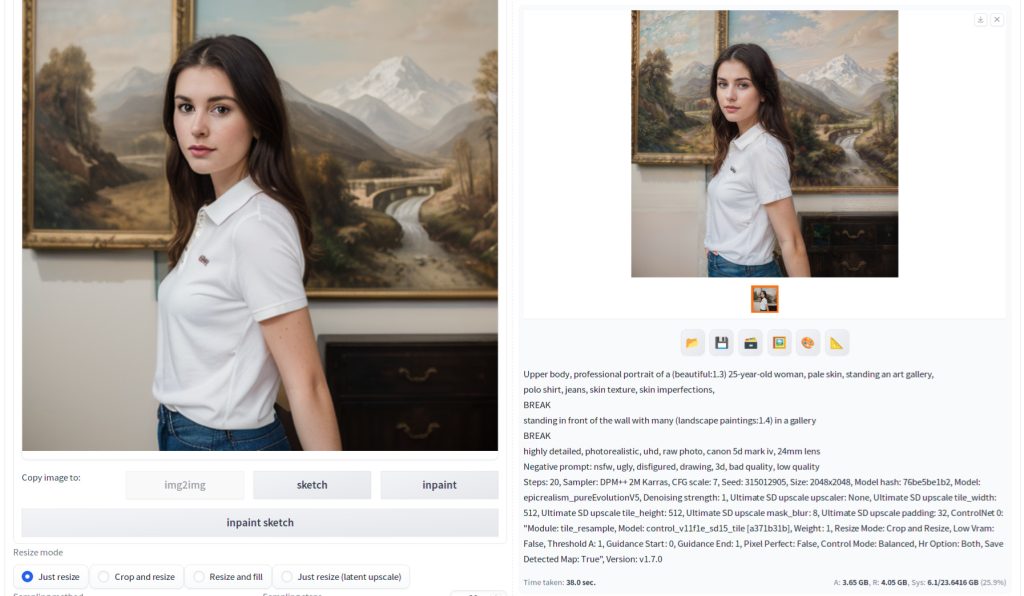
Here is the actual image.
The comparison between this and the original image highlights remarkable enhancements in the details of both the paintings and the figure. However, there are notable issues:
- Fingers appear on the person’s stomach.
- The facial features have changed.
- On the bottom-right of the image around the bottom of the right painting’s frame and the chest of drawers, the blur level differs between the left and right sides. The left side exhibits more blur.
- There is a pink band along the right edge of the left painting’s frame.
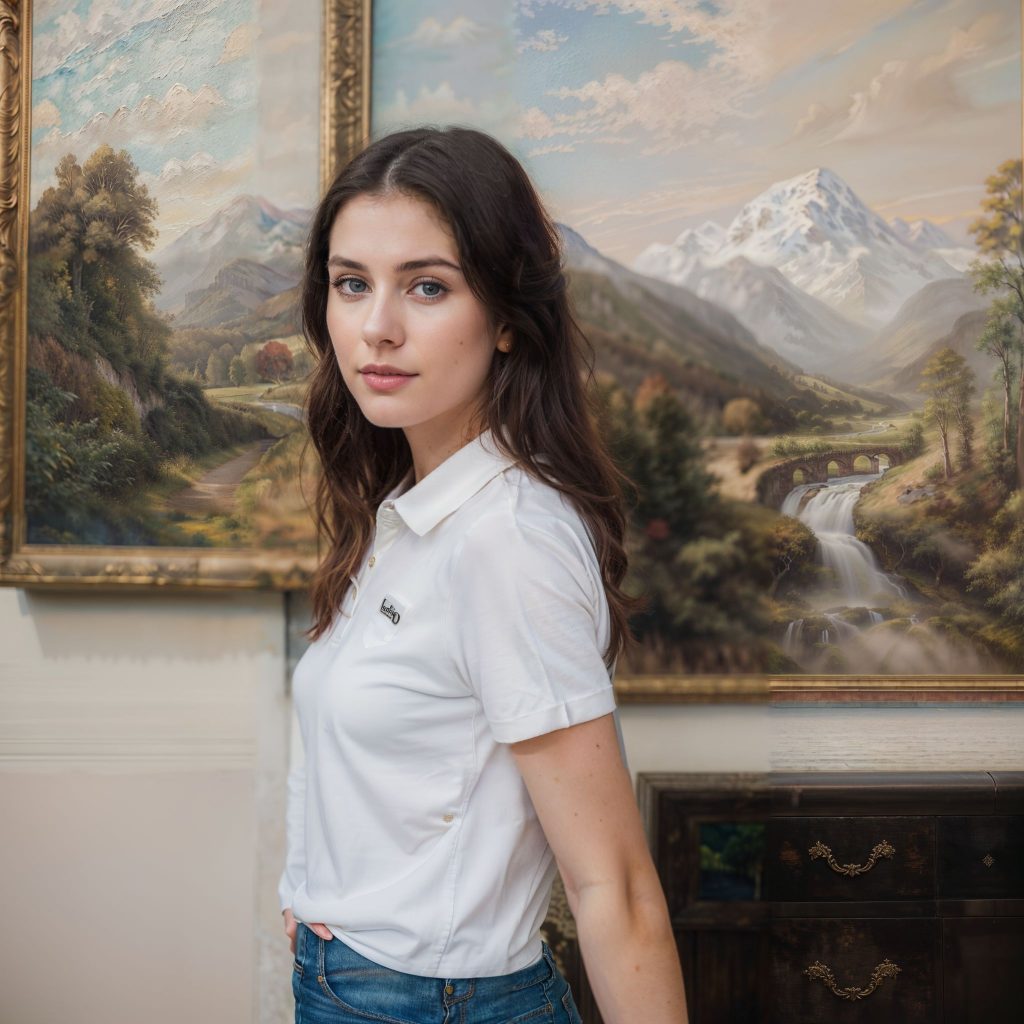
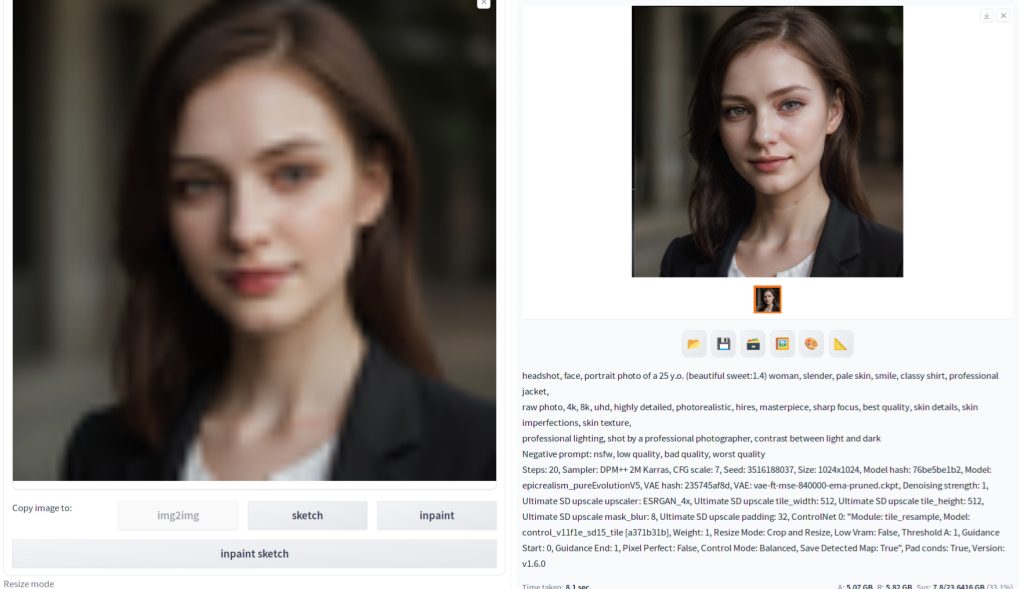
Let’s reduce denoise strength to 0.5 and also set Upscaler to ESRGAN_4x. Now in the new image below, the finger on the stomach is still there, but it’s much less noticeable. The difference in the level of blur on the bottom of the right art frame is also still there but is less conspicuous. At this point, you can determine if you want to continue lowering the denoising strength or touch up using Inpainting or a photo editing software. If you think you have a problem due to seams between tiles, you can also refer to https://github.com/Coyote-A/ultimate-upscale-for-automatic1111/wiki/FAQ.
For the sake of complete comparison, below image was generated with ControlNet tile turned off with denoise set to 0.5. You can still see the benefit of ControlNet.
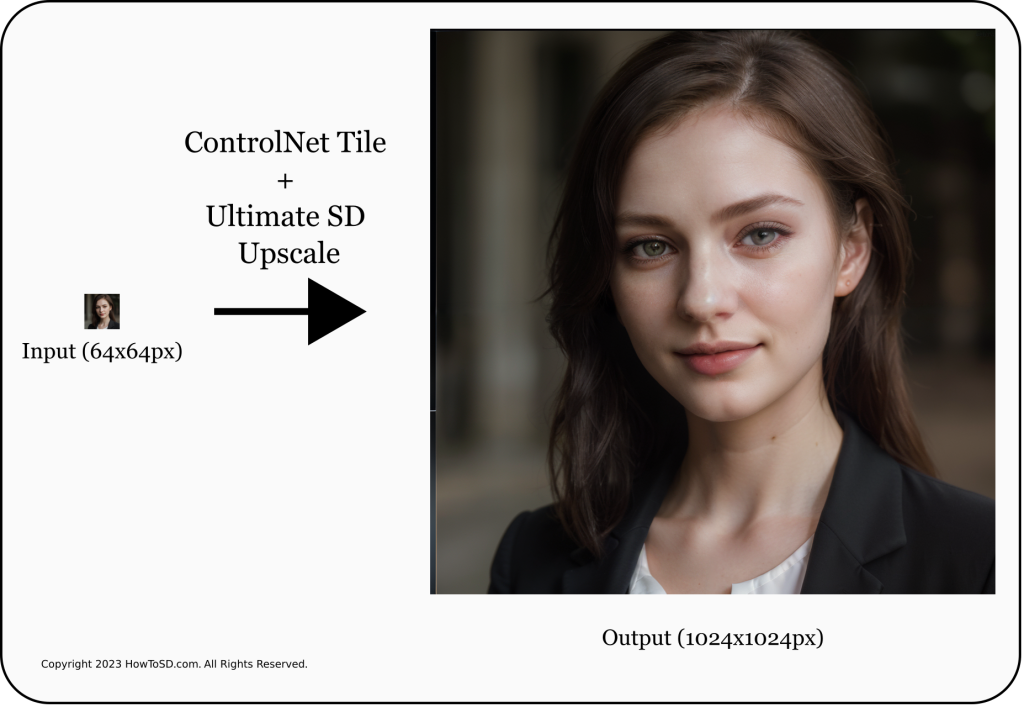
Note that the combination of ControlNet tile and Ultimate SD Upscale can also used to upscale a very low resolution image. Below is an example of upscaling a 64×64 image to 1024×1024.
References
[1] lllyasviel. [New Model] The finished tile model is released #1142. Retrieved from https://github.com/Mikubill/sd-webui-controlnet/discussions/1142.