Overview
The Ultimate SD Upscale extension is more than just a simple upscaler; it’s akin to a high-resolution fix. This tool first upscales an input image to the desired dimensions. Following the initial upscale, it uses the Img2Img process to enhance image quality. The key distinction between the Hires fix and the Ultimate SD Upscale extension lies in its approach to processing the upscaled image. Instead of processing the entire upscaled image in one go, the Ultimate SD Upscale breaks it down into smaller tiles and processes each tile individually with Img2Img [1]. This method significantly reduces memory usage during the Img2Img process and allows the Ultimate SD Upscale to support larger upscaling factors, such as 8192×8192 pixels. In this tutorial, we’ll explore the basics of using this extension. Note that you can also use ControlNet Tile model with Ultimate SD Upscale, and that will be covered in a separate tutorial. Let’s get started.
Installation
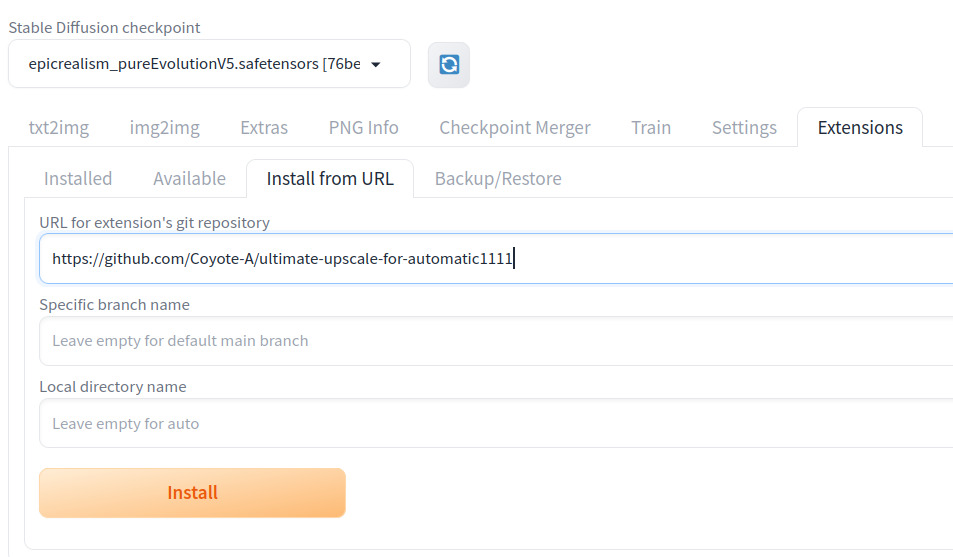
Installing Ultimate SD Upscale is straightforward. On Extentions | Install from URL tab, In the URL for extension's git repository , enter https://github.com/Coyote-A/ultimate-upscale-for-automatic1111 and press Install.
If you have never installed an extension, and you need more information, see this step by step guide: How to install an extension in Automatic1111
How to use Ultimate SD Upscale extension in Automatic1111
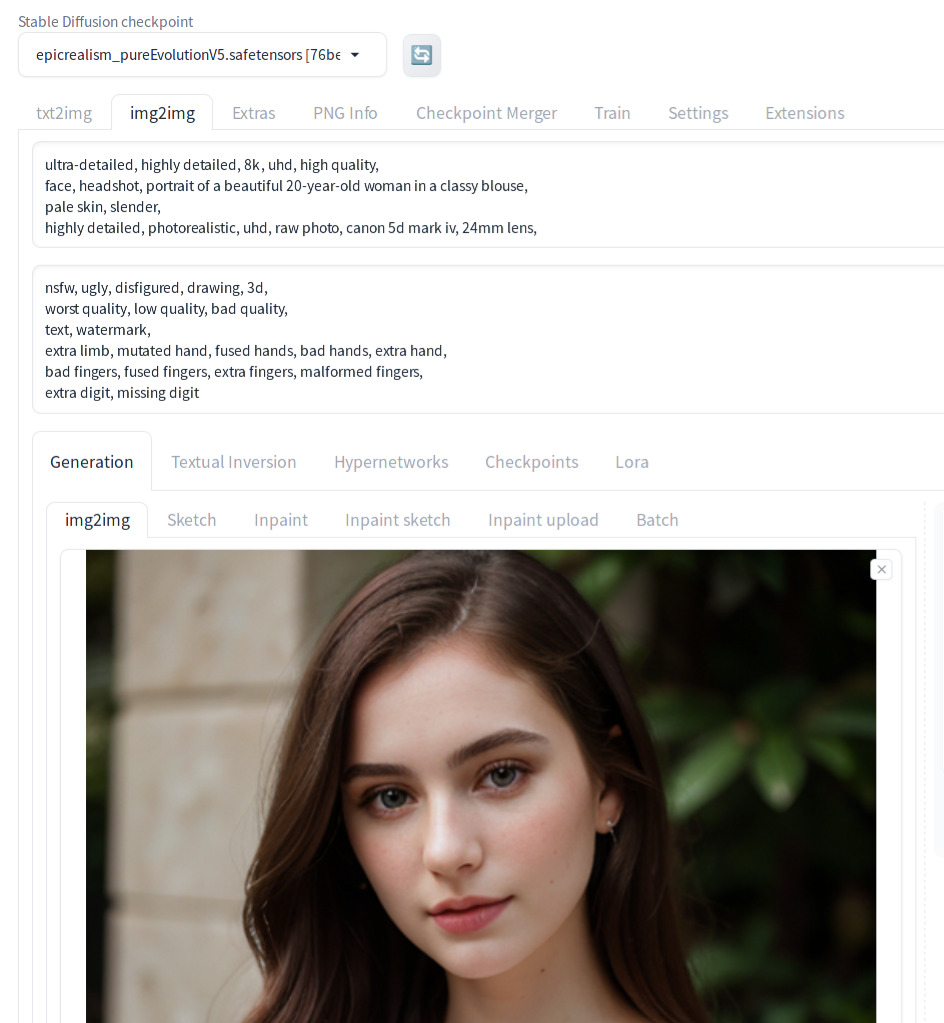
In order to use Ultimate SD Upscale, you need to load the image to the img2img tab. You can load an existing image from a disk, but generation parameters won’t be copied that way. So you can either generate an image on the txt2img tab, or load the image to the PNG Info tab first and move the image to the img2img tab. In this tutorial, we will be using the image generated in the txt2img tab. Once the image is sent to the img2img tab, you should see the following.
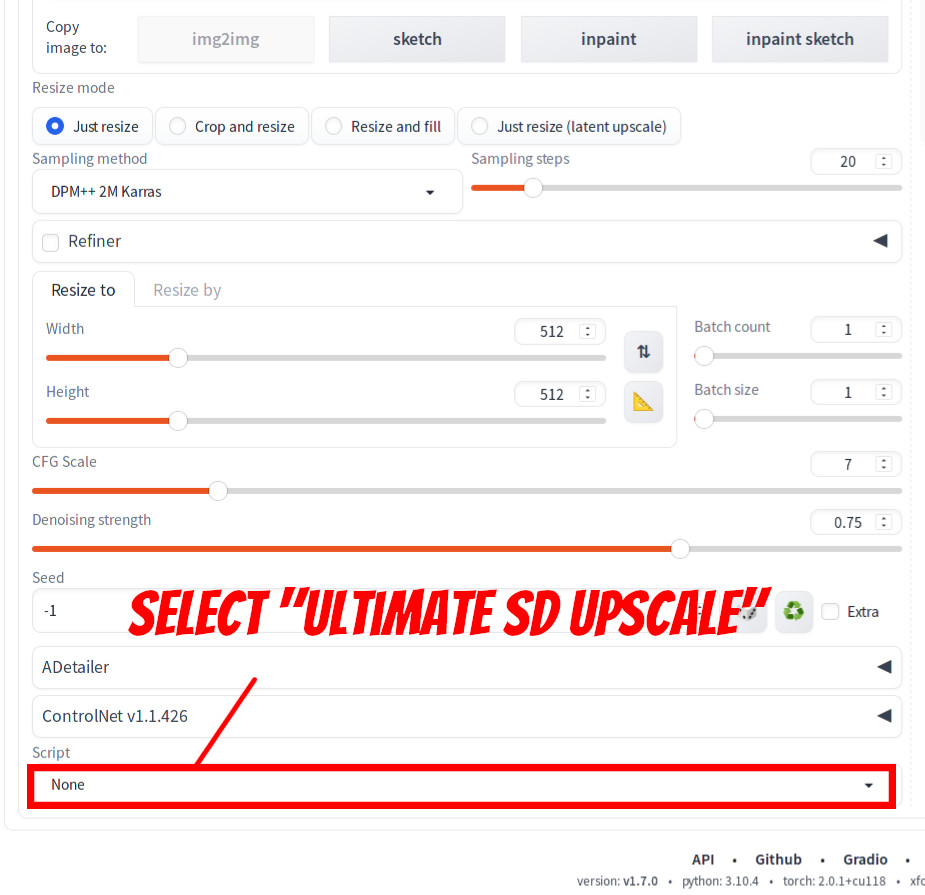
Now scroll down to the bottom of the page. You should see a drop down list called Script. Select Ultimate SD upscale from the list.
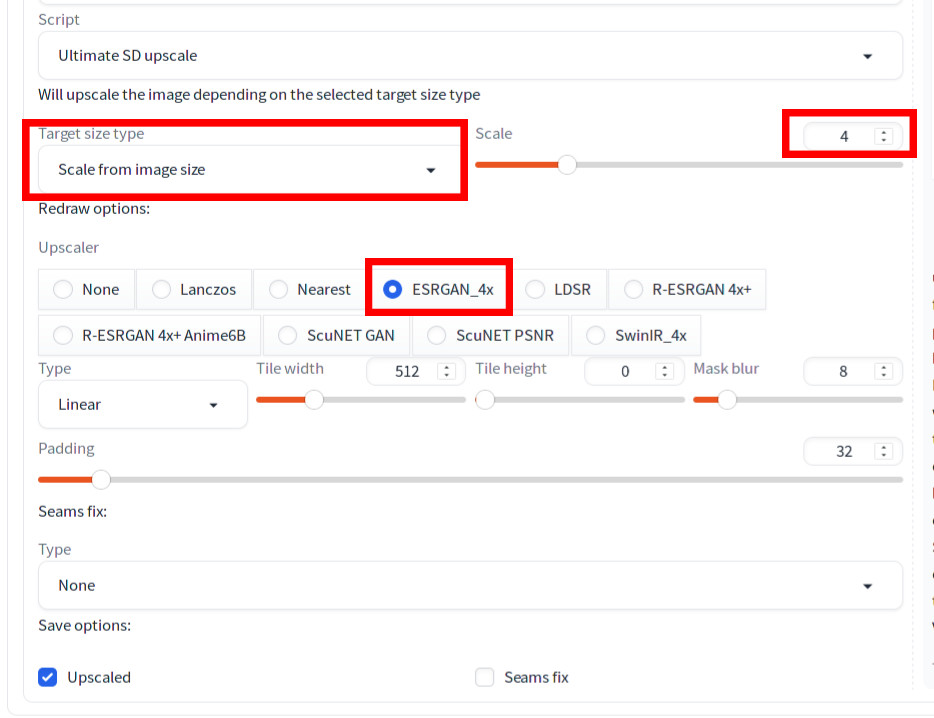
Then the Ultimate SD upscale opens up. Set the following values:
Target size typetoScale from Image sizeScaleto 4Upscalerto ESRGAN_4x
You can adjust the scale factor and upscaler type based on your preference. If you choose None for Upscaler, Lanczos will be used [1].
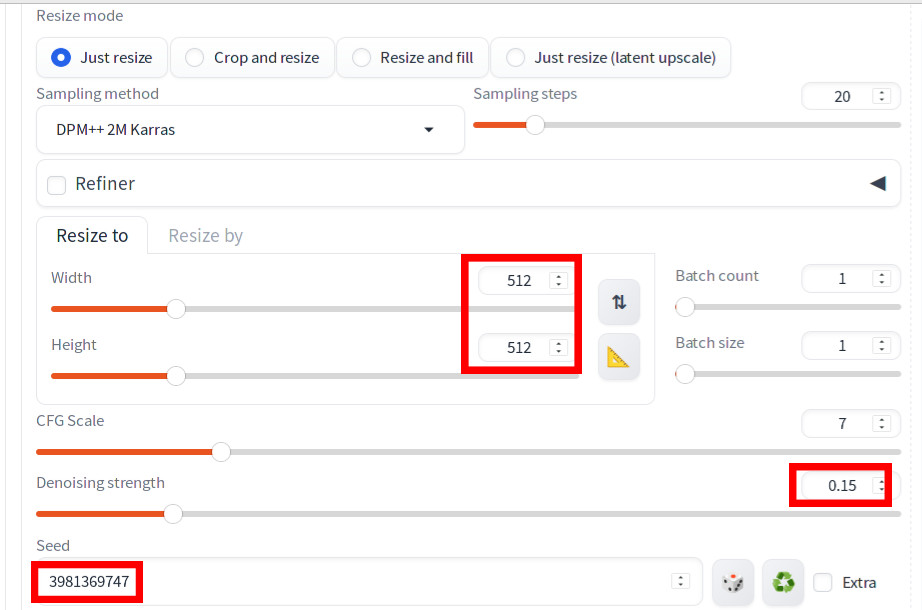
Scroll up and adjust the Denoise strength to 0.15. Make sure that you do not change the image size if you set the scale factor in the Ultimate SD Upscale setting (as we did in the previous step). Verify that you are using the same seed value as the original image.
Now you hit generate, you will see that the image is generated.
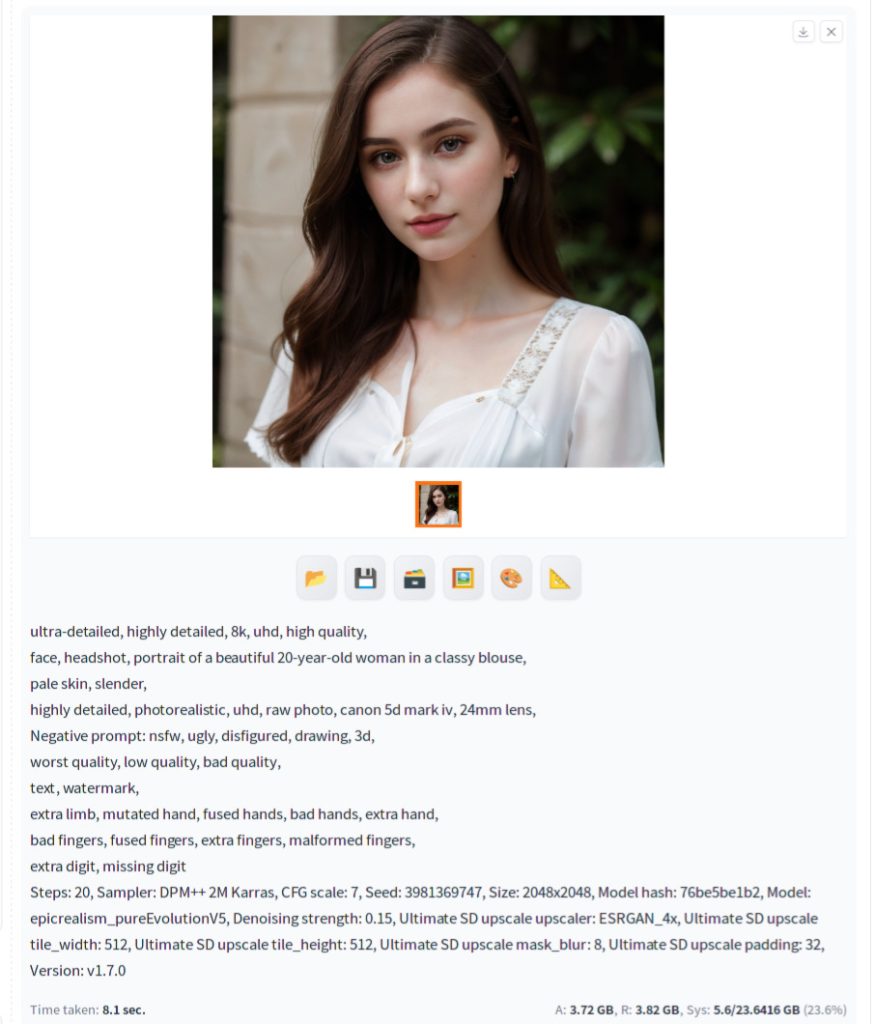
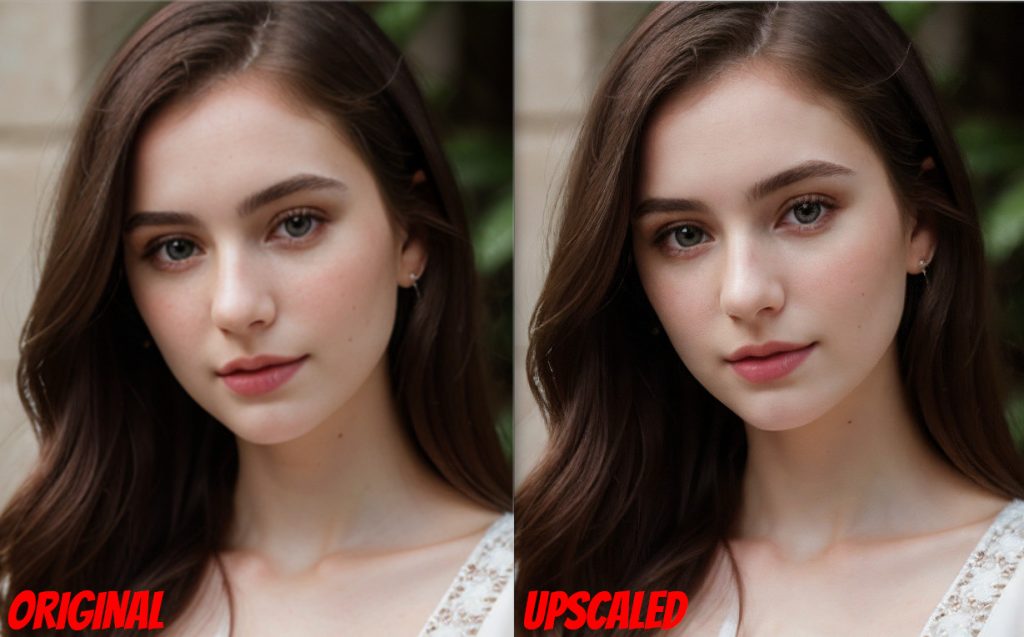
The top image of this page shows the comparison of this image (right) vs the original (left). To make the image size equal for easier comparison, original image was upscaled by 100% and the Ultimate Upscaler-generated image was downscaled by 50% to compare at 1024×1024. As you can see, the right image shows more details and overall look is enhanced.
Troubleshooting
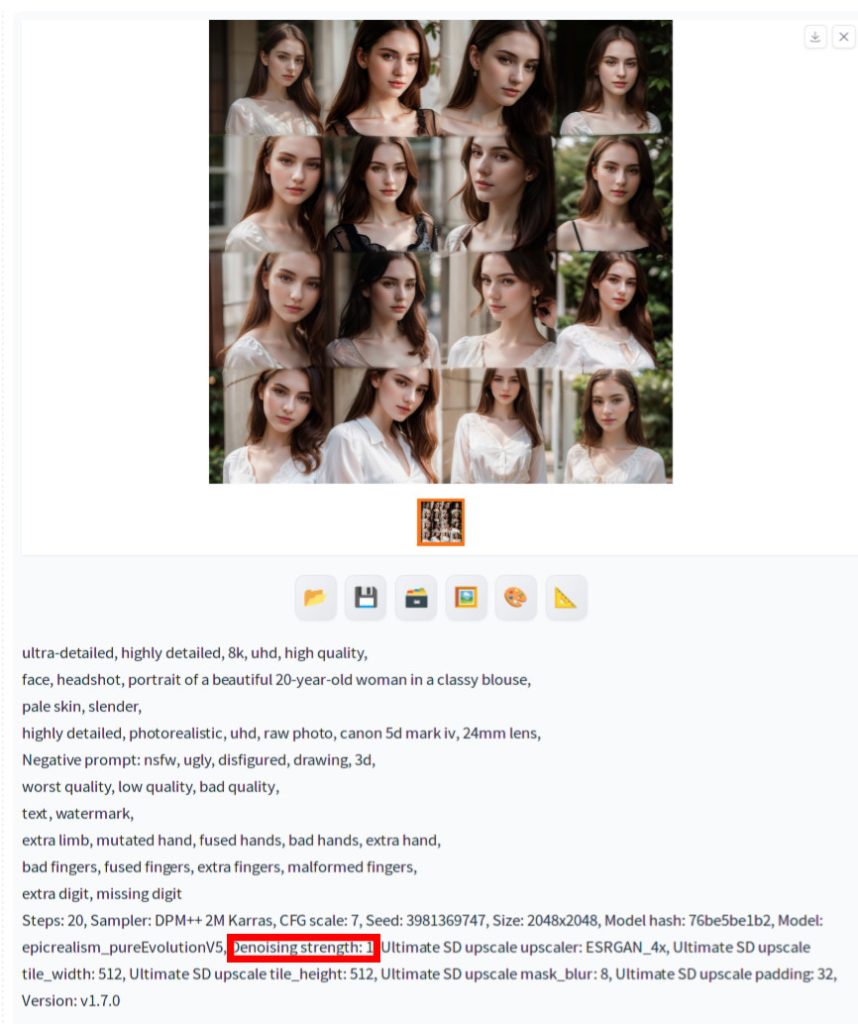
As we mentioned, Ultimate SD upscale calls img2img2 for each tile. In order to generate a 2048×2048 image from 512×512, img2img is called 16 times. If denoise strength is low, the img2img will not deviate too much from the image contained in the tile. However, as you increase the denoise strength, then it will denoise toward the fully denoised state as specified in the text prompt, which is a full headshot in our case. So at denoise level 1, each tile will contain the headshot as shown below. Therefore, you should start low denoise strength and when you increase the strength, watch out for any artifacts and pull back if you see any.
Another issue that you might want to be aware of is If you see seams between tiles, you can try Seams Fix dropdown. For more information regarding parameter settings, see References section below.
Note to Developers
You can access the code on Github. See reference [1]. You can see Script.run() contains upscaler.upscale() and upscaler.process() methods. The upscale() method calls the user-specified upscale method. You can see on line 76 that if None is specified for the upscaler, then LANCZOS is used to upscale the image. The process() method calls the method corresponding to the user specified redraw process (e.g. linear_process method) and this method contains the double loop of calling img2img for each tile.
References
[1] Coyote-A. ultimate-upscale-for-automatic1111. Retrieved from https://github.com/Coyote-A/ultimate-upscale-for-automatic1111/blob/master/scripts/ultimate-upscale.py
[2] Coyote-A. ultimate-upscale-for-automatic1111. Retrieved from https://github.com/Coyote-A/ultimate-upscale-for-automatic1111
[3] Coyote-A. FAQ. Retrieved from https://github.com/Coyote-A/ultimate-upscale-for-automatic1111/wiki/FAQ