Tiled Diffusion & VAE has multiple nice features. One of them is Region Prompt Control. To understand what it does. Let’s take a look at the following prompt:
a photo of a stream train with a panda standing by, on the tropical beach, beautiful ocean
best quality
The goal of the prompt is to have a panda standing next to a stream train on the beach on the tropical beach. However, if you generate an image with the prompt, you get this instead:
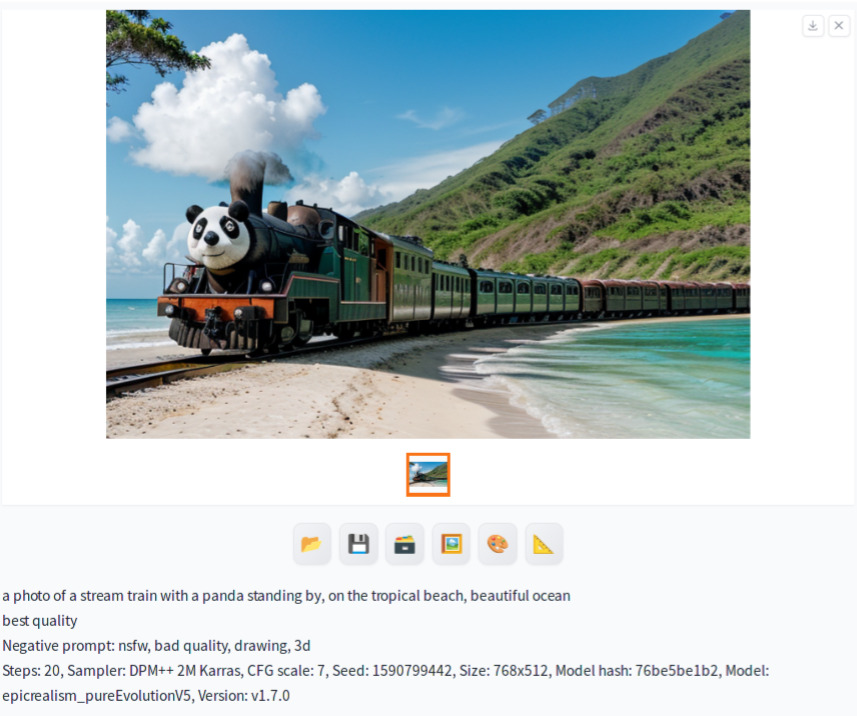
Regrettably, there are occasions when Stable Diffusion fails to fully grasp the intended concept, resulting in images where certain elements, like a panda in this instance, are misplaced. However, there is a solution for gaining finer control over element placement. ‘Region Prompt Control’ offers the capability to dictate the precise location of various components within an image. Intrigued? Let’s explore this further.
Installation
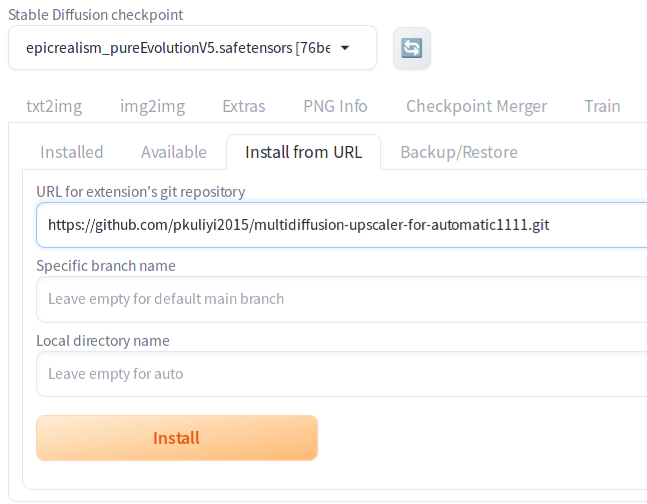
Installing Tiled Diffusion & VAE is straightforward. On Extentions | Install from URL tab, In the URL for extension's git repository , enter https://github.com/pkuliyi2015/multidiffusion-upscaler-for-automatic1111.git and press Install.
Once you restart the UI after the installation, you will see Tiled Diffusion and Tiled VAE sections now appear on txt2img tab.
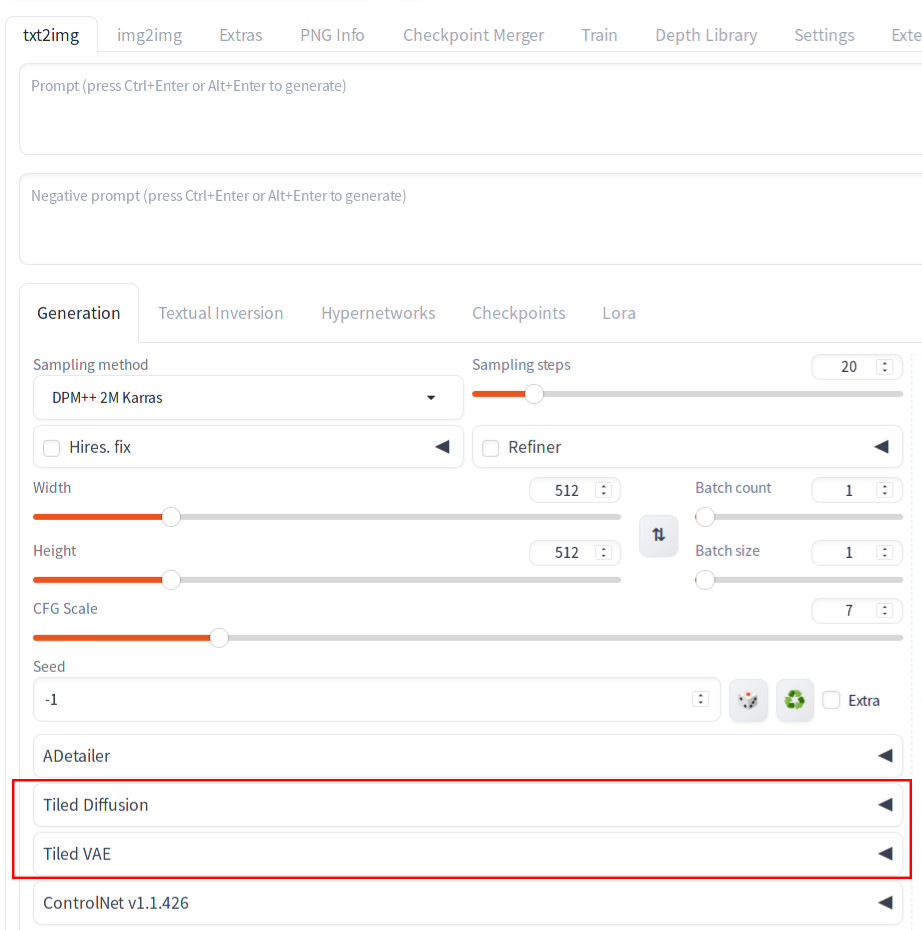
Expanding Tiled Diffusion and Tiled VAE sections by clicking the triangles on the right side of the sections should show below UI:
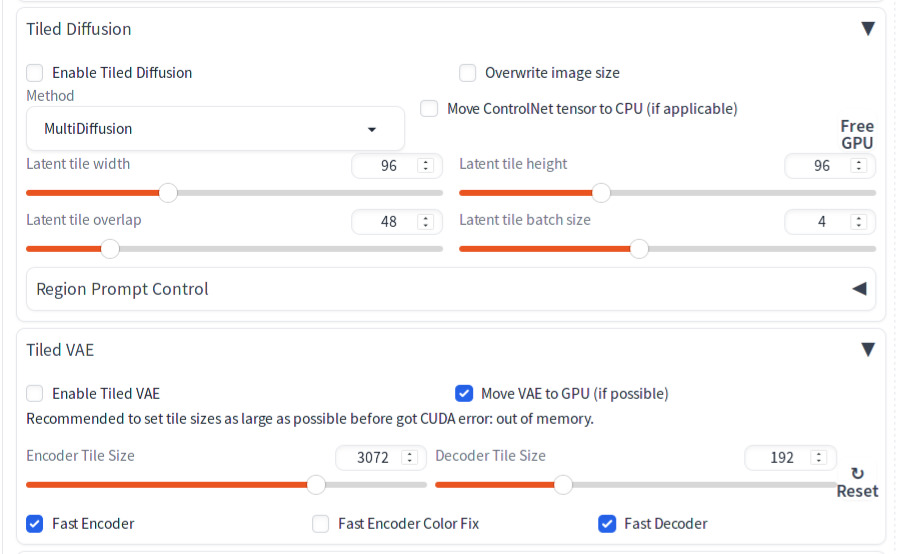
You are done with the installation. Let’s move onto learning how to use it.
Using Tiled Diffusion’s Region Prompt Control
Overview
Here is the summary of the steps needed to effectively utilize Region Prompt Control:
- List all the components you want to include in your image.
- Identify the background element and the foreground elements.
- Choose the specific positions for the foreground elements.
- Input the details gathered from steps 1 to 3 into the Region Prompt Control interface.
- Define a global prompt to guide the overall image quality (e.g., add ‘best quality’ tag to the positive prompt).”
- Clean up the image using img2img and Inpainting.
Step 1. List all the components you want to include in your image.
Once you have the image in your mind, you can write down the list of components. In this case, we want to have:
- A stream train
- A panda
- The tropical beach and ocean
Step 2. Identify the background element and the foreground elements.
In this step, we define which component should be in the background and which should be in the foreground:
- A stream train (foreground)
- A panda (foreground)
- The tropical beach and ocean (background)
Step 3. Choose the specific positions for the foreground elements.
In this step, we define the position of each foreground element. Let’s pick arbitrarily.
- A stream train (left)
- A panda (right)
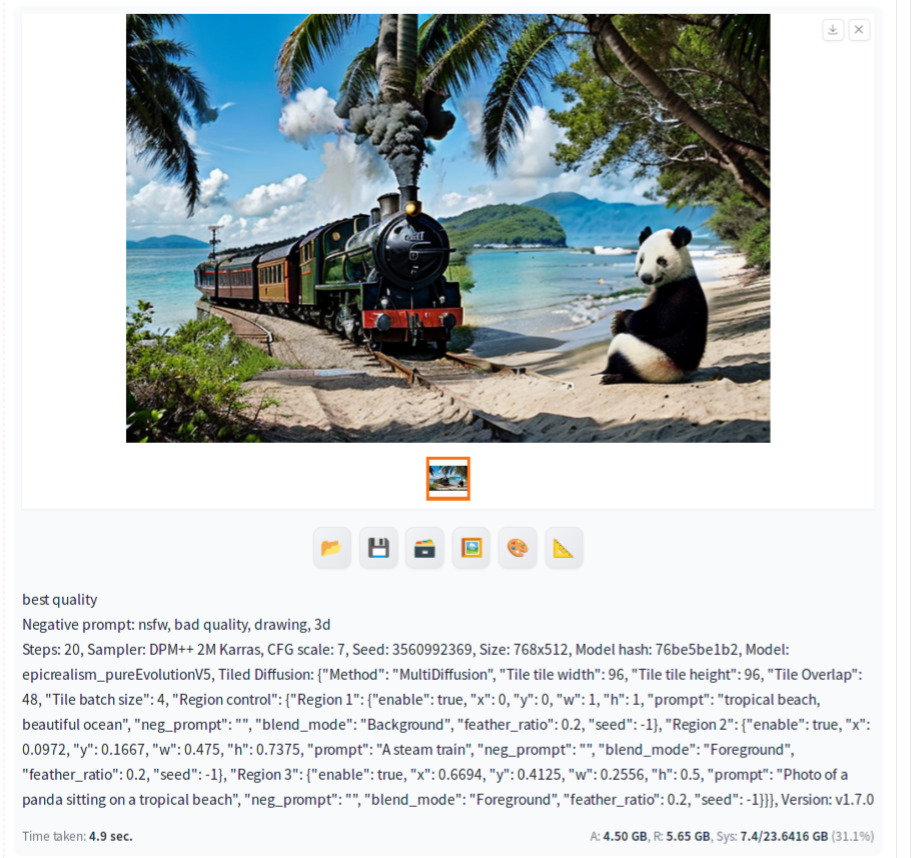
Step 4. Input the details gathered from steps 1 to 3 into the Region Prompt Control interface.
Now, we enter the information above into the UI.
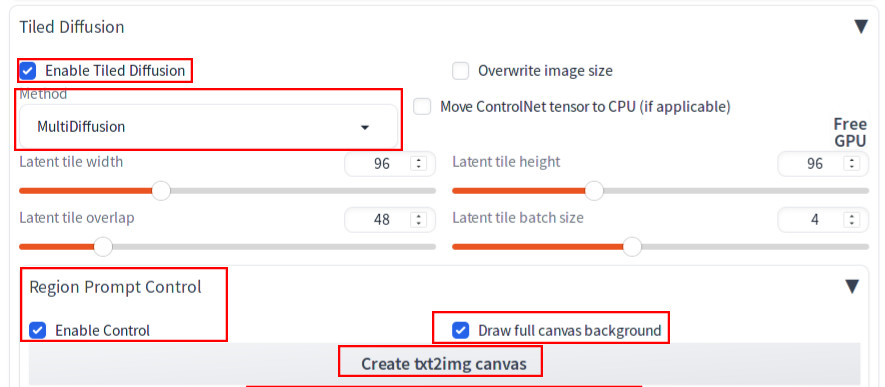
We enter one component to a subsection of the screen, which is called a region. So our tropical beach background goes to region 1, the train goes to region 2, and the panda goes to region 3. We will be defining each region in the UI. To do so, first click the triangle on the right of Tiled Diffusion to open up the section. Then do the following:
- Check
Enable Tiled Diffusion. - In
Method, selectMultiDiffusion. - Check
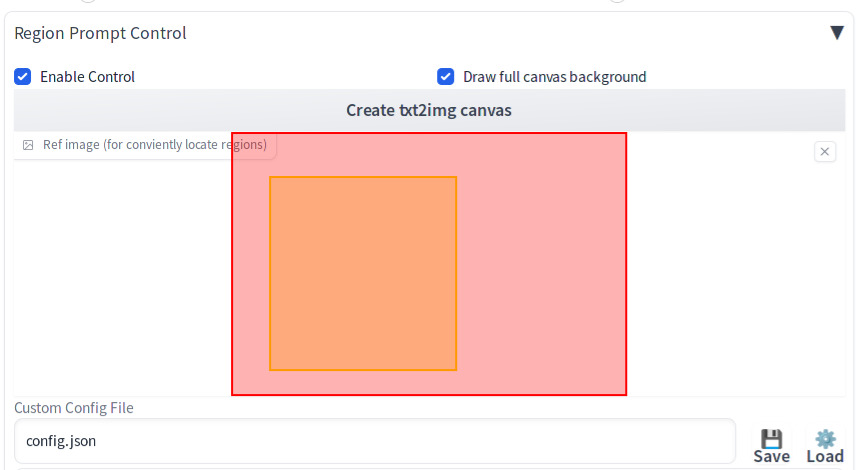
Enable ControlinRegion Prompt Control. - Check
Draw full canvas backgroundinRegion Prompt Control.
Then press Create txt2img canvas.
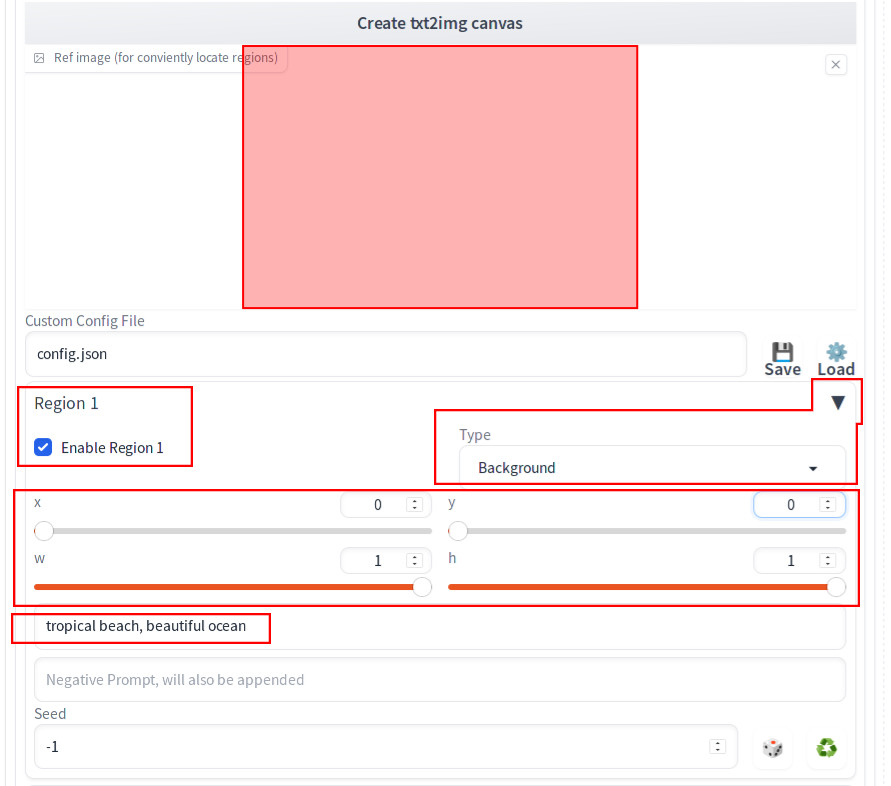
Now click the triangle on the right of Region 1 and open up the section.
- Check
Enable Region 1. - In
Type, selectBackground. - Set both
xandyto 0. - Set both w
- Enter your prompt for the background, which in this case is:
tropical beach, beautiful ocean.
Now let’s move onto Region 2. After checking Enable Region 2, select Foreground for Type this time. Enter your prompt A stream train. Do not manually specify x, y, w, h.
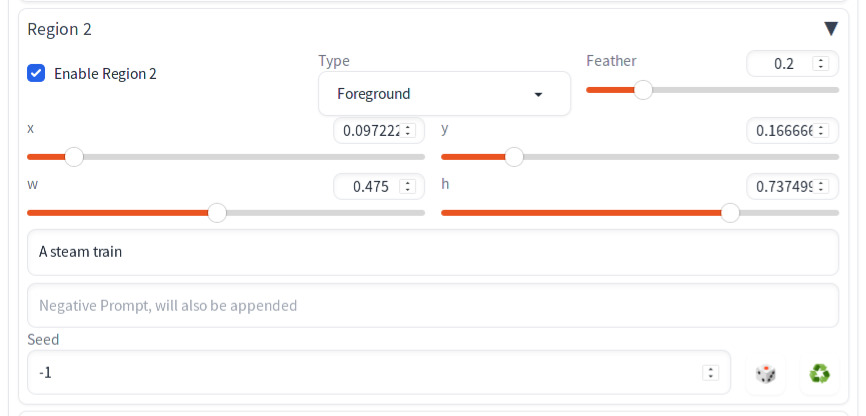
Instead, scroll up to see the canvas immediately below the Create txtimg2 canvas button. There, you should now see an orange rectangle. You can move and drag to change the size of the rectangle. Adjust the dimension to match what is shown below.
Repeat the same step for Region 3 for the panda.
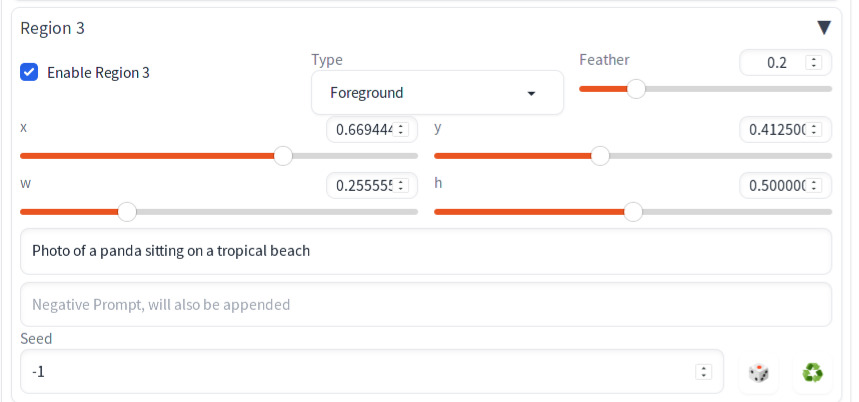
This time, adjust the yellow rectangle.
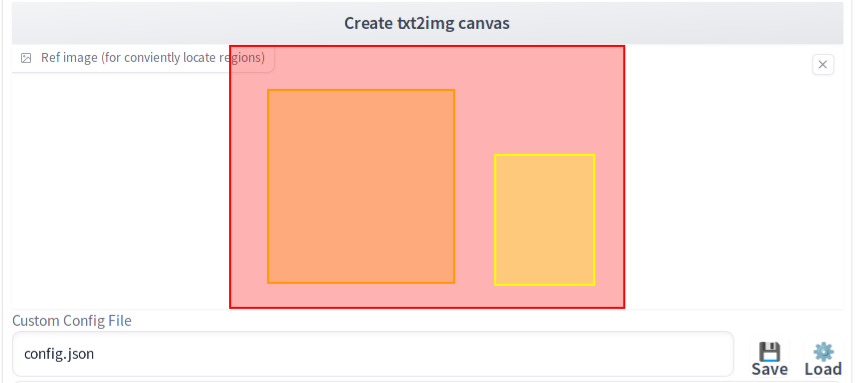
Depending on how generation goes, you may need to come back to this step and adjust the dimension of each foreground rectangle.
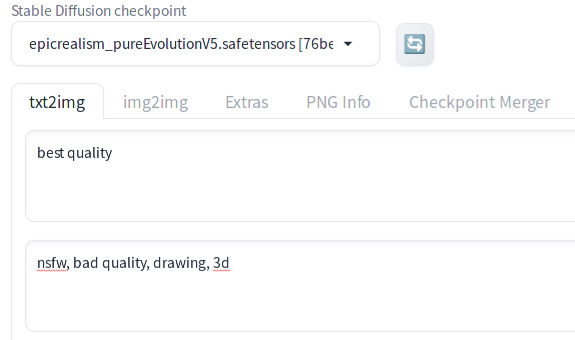
Step 5. Define a global prompt to guide the overall image quality
Enter image quality or type-related tags in positive and negative prompts:
Now hit generate.
Note that there is a good chance that you may not see the components in the foreground fitting nicely in the region that you specified in your first generation attempt. Therefore you may need to try generating images multiple times and possibly adjusting parameters (e.g. positions of the regions & prompts).
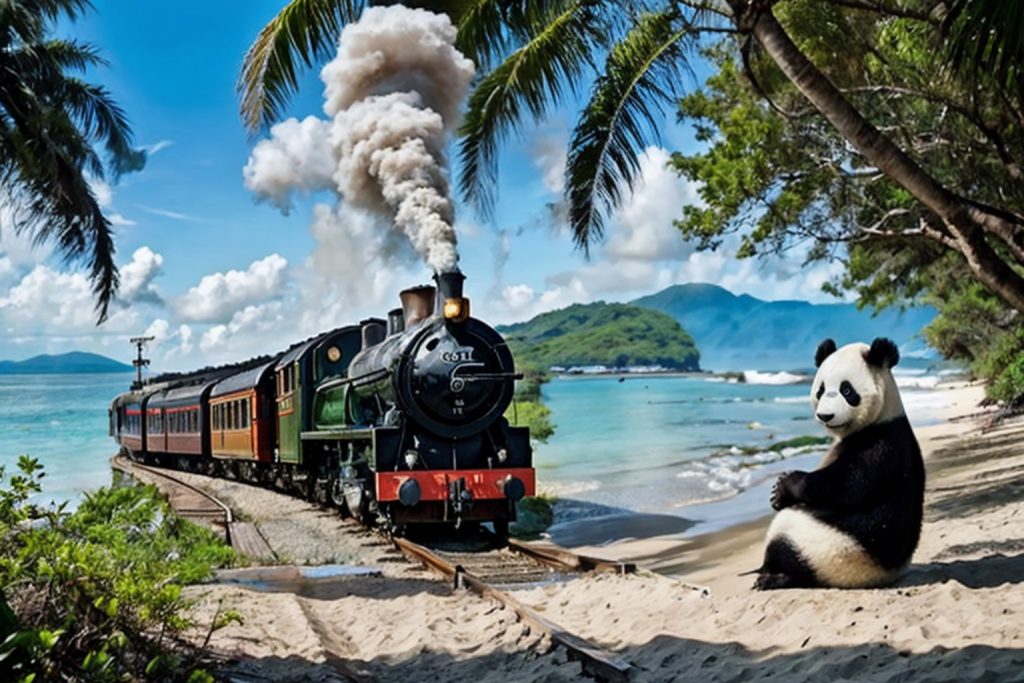
Step 6. Clean up the image using img2img and Inpainting
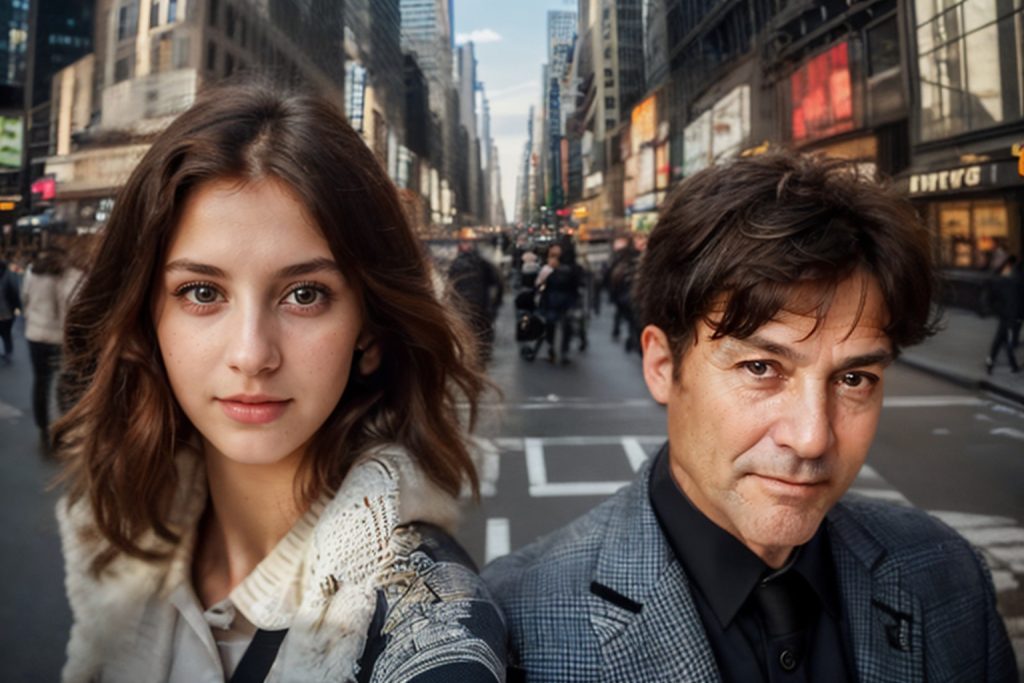
Final step is to clean up the image using img2img and Inpainting. After you generate an image, you may see that a region of a foreground object does not quite match the background. In those cases, you need to Inpaint the edge of foreground object to blend in. Refer to Step 2: Generating a Second Pass for Better Integration & Step 3: Third Pass for Refinement on our tutorial How to use Inpainting in Automatic1111 Part 3 : Large Area – Difficult Case. After that, you can use img2img to further enhance the image. Below is the result after doing some clean up:
References
[1] pkuliyi2015. multidiffusion-upscaler-for-automatic1111. Retrieved from https://github.com/pkuliyi2015/multidiffusion-upscaler-for-automatic1111 [WARNING: The page contains graphics that may not be appropriate for viewing in a work environment or by minors.]
[2]PotatCat. Tutorial for multidiffusion upscaler for automatic1111, detail to the max. Retrieved from https://civitai.com/models/34726. [WARNING: The hosting website contains graphics that may not be appropriate for viewing in a work environment or by minors.]