Why Doesn’t Inpainting Generate Anything? Overcoming Frustration with Implausible Objects
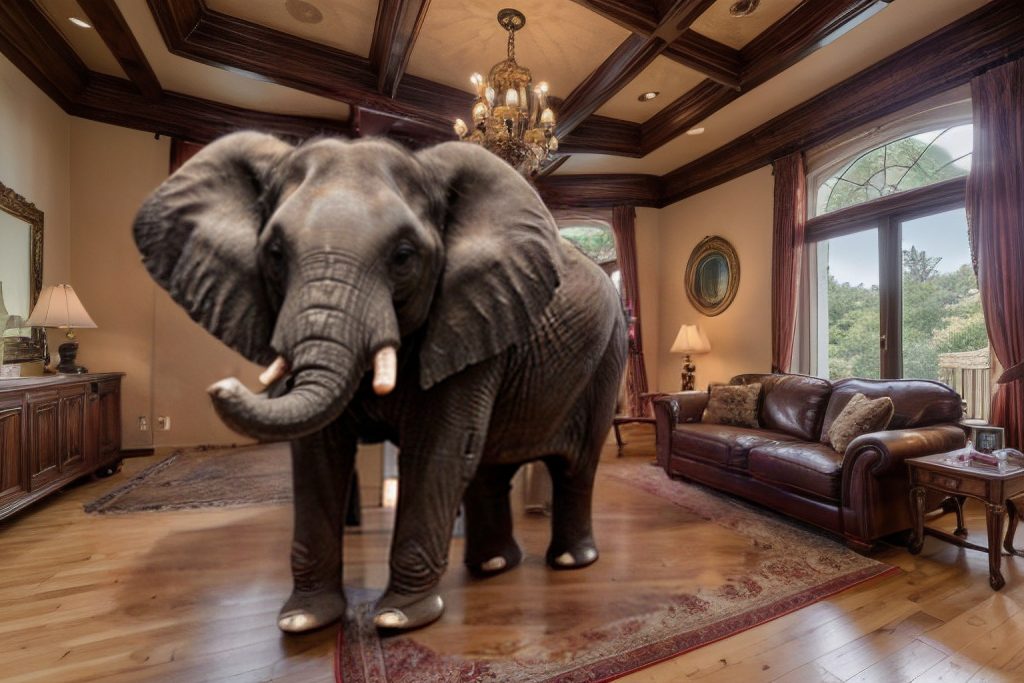
Have you ever been frustrated with Inpainting not producing any results, particularly when you’re trying to add something implausible to an image? This is a typical problem, often occurring when Stable Diffusion seems to perceive the desired addition as atypical based on common dataset observations. I’ve frequently faced this challenge and have developed a method to address some of the cases, which I’m excited to share. Below, you’ll find a step-by-step guide. However, it’s important to remember that this method isn’t foolproof; there are instances where it might not work. For example, Step 1 might result in a black spot or the Inpainted object may not align correctly with the masked area. In such situations, exploring other alternatives, like ControlNet, might be necessary.
Step 1: Force Drawing the Object (e.g., a Panda) for Inpainting
- Mark the area in the source image you wish to replace.
- Load a non-Inpainting model.
- Set Masked content to ‘latent noise’ and Inpaint Area to ‘Only masked’.
- Set Width and Height to 512.
- Adjust Denoise Strength to 1.
- Return the generated image to Inpaint.
Step 2: Generating a Second Pass for Better Integration
- Mask the edges of the generated object (e.g., the edges of the panda).
- Load an Inpainting model.
- Set Masked content to ‘fill’ and Inpaint Area to ‘Whole picture’.
- Use the original image resolution for Width and Height.
- Set Denoise Strength to 1.
- Return the generated image to Inpaint.
Step 3: Third Pass for Refinement
- Mark the entire object created through Inpainting or just a part of it.
- Load a non-Inpainting model.
- Set Masked content to ‘original’ and Inpaint Area to ‘Only masked’.
- Keep Width and Height at 512.
- Adjust Denoise Strength between 0.1 and 0.3.
The reason for starting with Step 1 is to prevent the model from focusing on the current pixels in the Inpainting region or surrounding areas, which is something the Inpainting model excels at.
I’ll guide you through each step in the sections below. Also if you haven’t, check out How to use Inpainting in Automatic1111 Part 1 : Small Area and How to use Inpainting in Automatic1111 Part 2 : Large Area – Easy Case.
Step 1 Force Drawing the Object (e.g., a Panda) for Inpaint
We will be using an image of the living room.
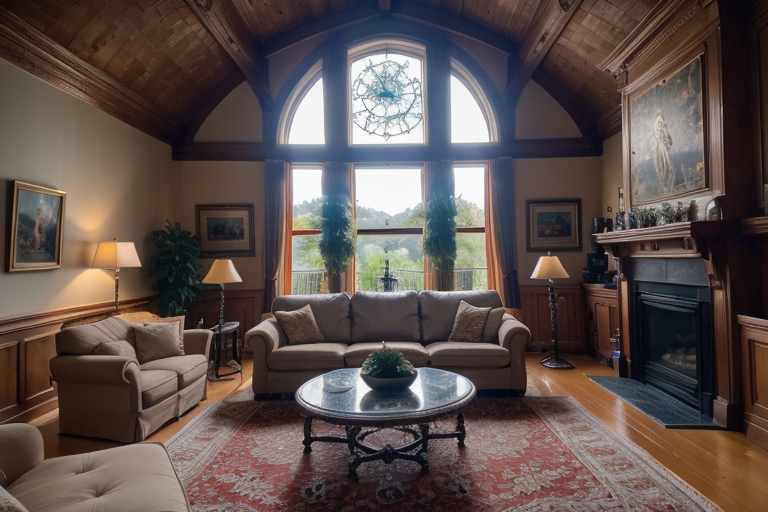
Here are the generation parameters:
ultra-detailed, highly detailed, 8k, uhd, high quality,
a nice living room with high ceilings,
highly detailed, photorealistic, uhd, raw photo, canon 5d mark iv, 24mm lens,
Negative prompt: drawing, 3d, worst quality, low quality, bad quality, normal quality
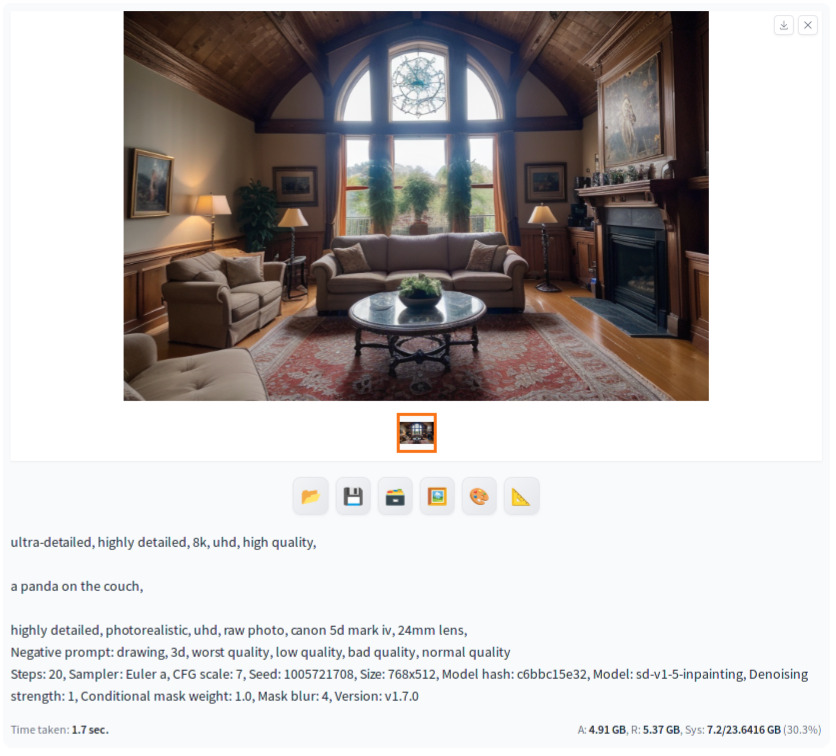
Steps: 20, Sampler: DPM++ 2M Karras, CFG scale: 7, Seed: 769127746, Size: 768x512, Model hash: 76be5be1b2, Model: epicrealism_pureEvolutionV5Now you send this image to Inpaint tab. First load sd-v1-5-inpainting.ckpt or other Inpainting model as you would do for regular Inpainting. Then update the positive prompt to say “a panda on the couch” instead of “a nice living room with high ceilings”. You also mask the area like below:
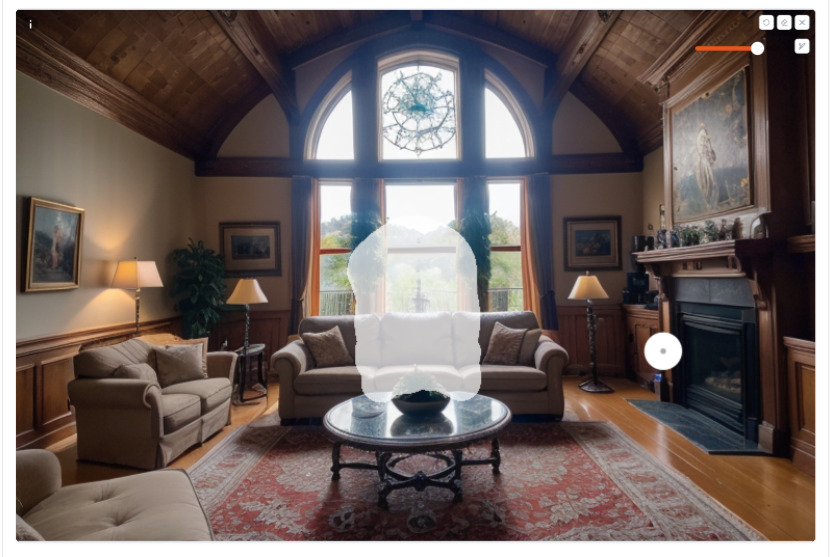
Then you set the parameters as below.
You eagerly await for the panda to appear … But where is the panda?
This is the problem that we are trying to address. Let’s go over steps to address this. First let’s load a non-Inpainting model instead of an Inpainting model we just used.

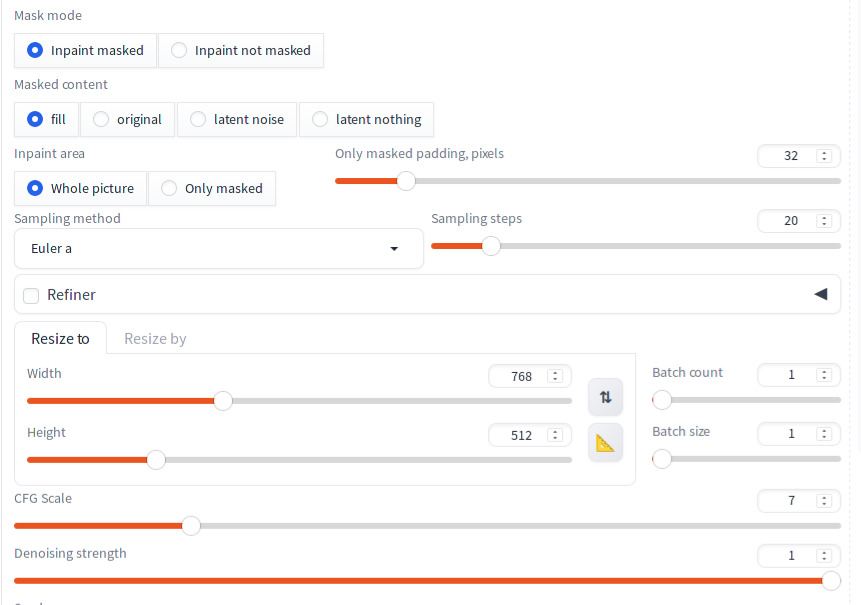
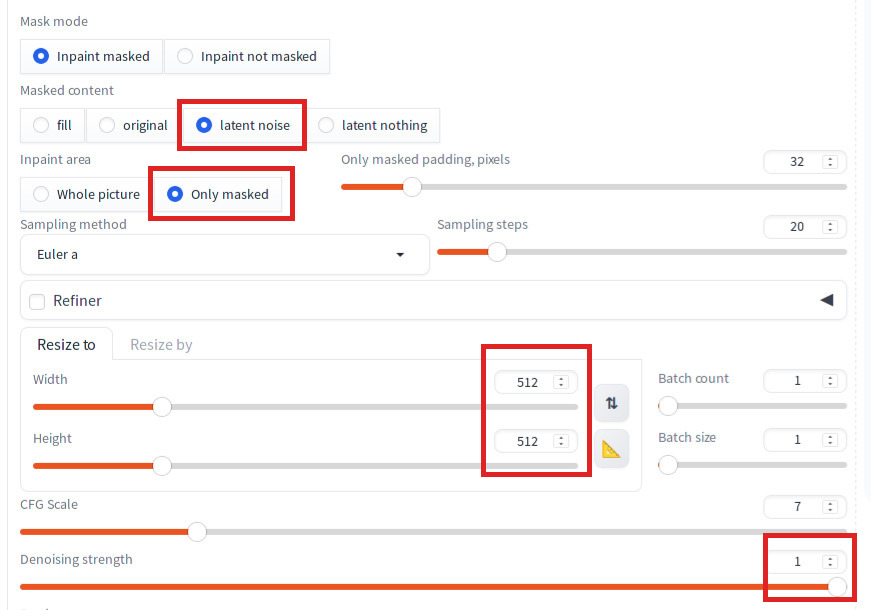
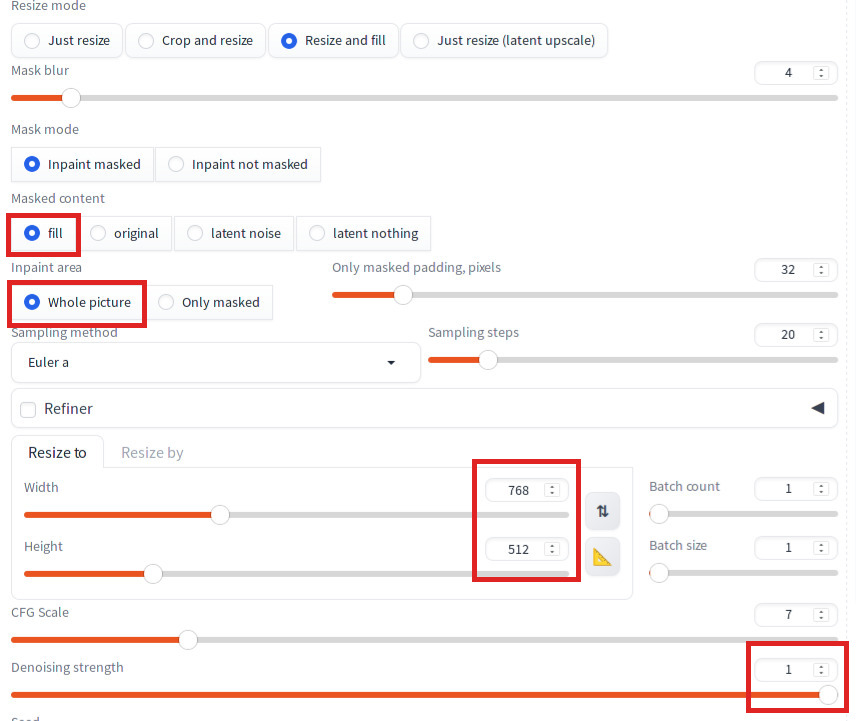
Set the parameters. Key parameters are marked in red:
- Set Masked content to ‘latent noise’
- Set Inpaint area to ‘Only masked’.
- Set Width and Height to 512.
- Adjust Denoise Strength to 1.
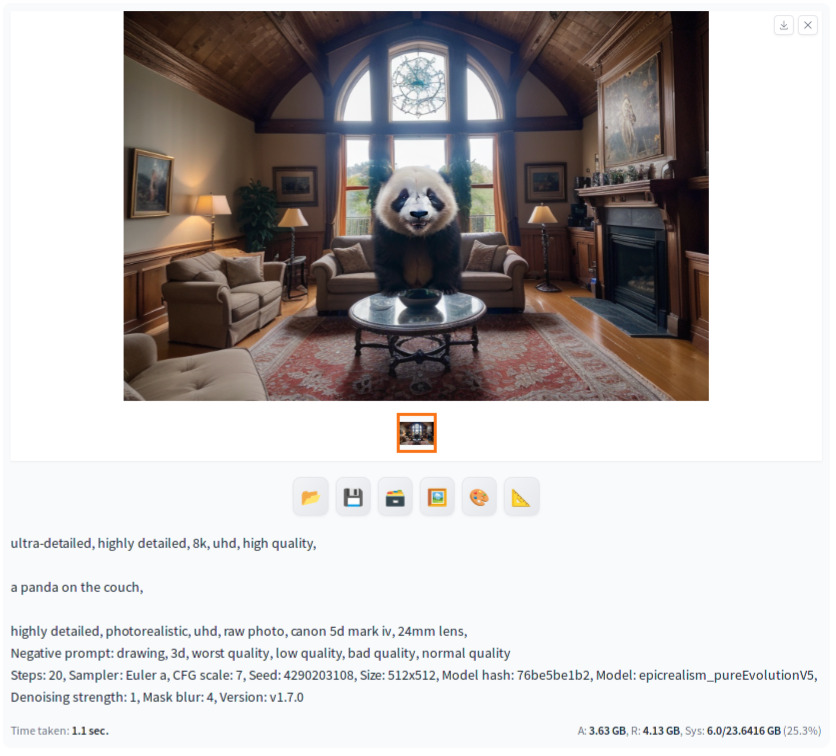
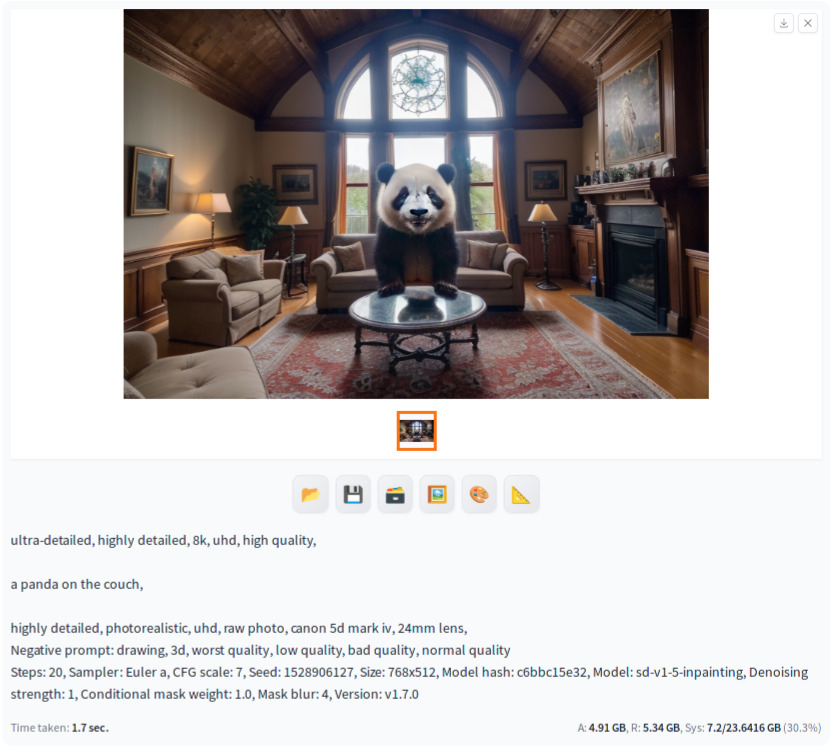
Now click ‘Generate.’ Congratulations, you’ve created a panda! However, you may notice that its ears appear translucent and the overall image seems superimposed. We’ll tackle these issues in the following section. Before we conclude this section, press the Send to Inpaint button below the image to send the image with panda back to the Inpaint source window so that we can use this as the base for the next step.
Note that you may need to try generating images multiple times if the Inpainted image is not aligned with the masked region or you do not like the image generated.
Step 2: Generating a Second Pass for Better Integration
The objective of Step 2 is to refine the image so that the panda blends seamlessly with the rest of the original scene. To achieve this, we will utilize an Inpaint model. Below are the key steps we need to follow:
- Load an Inpainting model.
- Mask the edges of the generated object (e.g., the edges of the panda).
- Set Masked Content to ‘fill’ and Inpaint Area to ‘Whole picture’.
- Use the original image resolution for Width and Height.
- Set Denoise Strength to 1.
- Return the generated image to Inpaint.
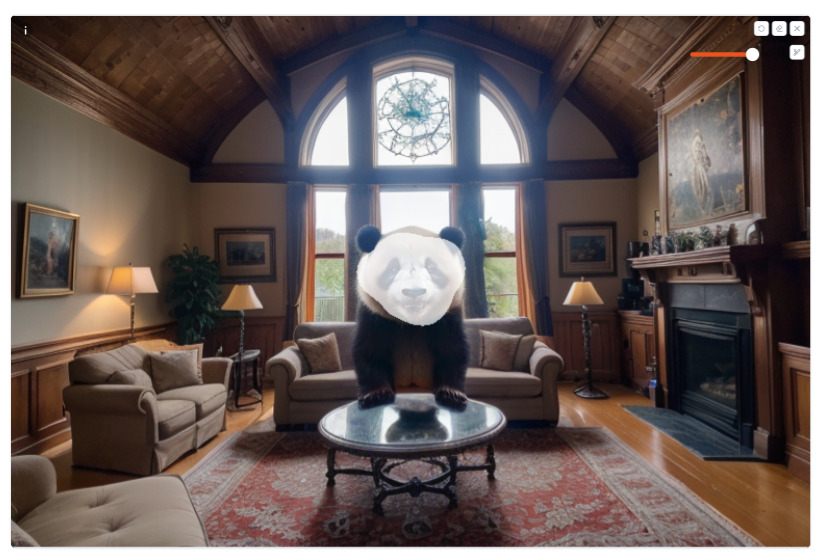
First load sd-v1-5-inpainting.ckpt or other Inpainting model again. Then mask only the edges of the panda. Do not mask the inside of the panda too much so that only the edge will be adjusted.
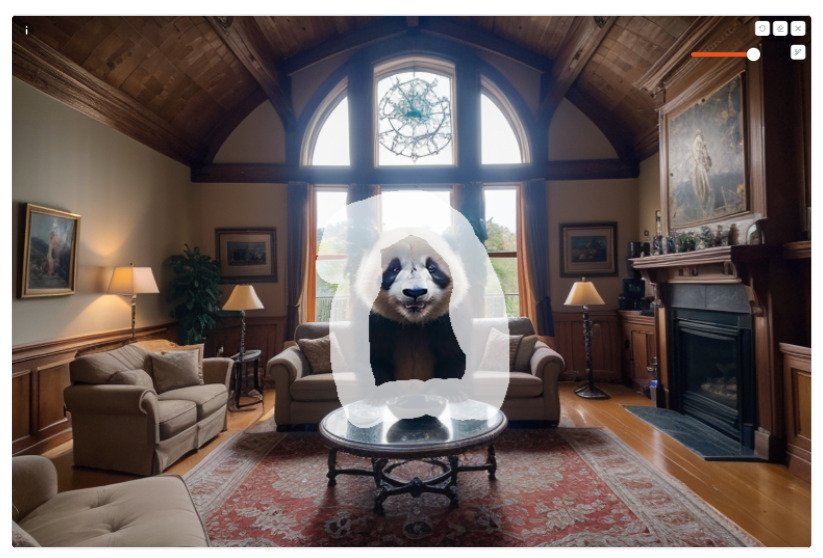
Set the parameters as discussed above.
Now when you hit Generate, you can see that the edge of the panda is much cleaner. As in the previous step, press the Send to Inpaint button to send the image with panda back to the Inpaint source window so that we can use this as the base for the final step.
Step 3: Third Pass for Refinement
If you are already happy with the image generated in the last step, you can skip. In our case, the face of the panda seems to contain some artifact so let’s clean that up. This step is identical with our previous tutorial How to use Inpainting in Automatic1111 Part 1 : Small Area. Required tasks are the following:
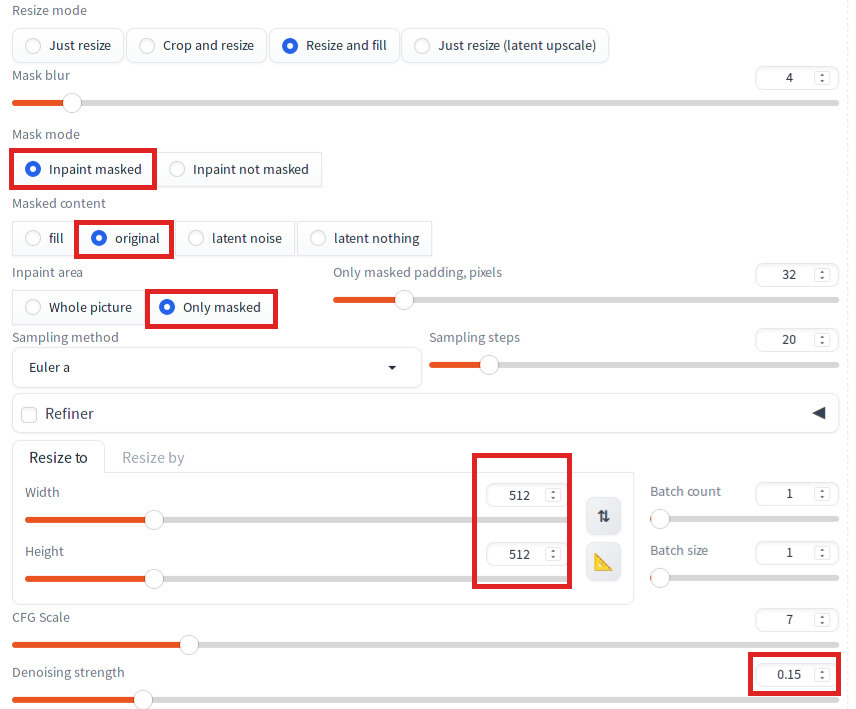
- Load a non-Inpainting model.
- Mark the entire object created through Inpainting or just a part of it.
- Set Masked content to ‘original’ and Inpaint Area to ‘Only masked’.
- Keep Width and Height at 512.
- Adjust Denoise Strength between 0.1 and 0.3.
First, let’s load the same model that we used in Step 1.
Then mask only the head of the panda this time.
Adjust the parameters as discussed above. Note that I started with Denoising strength from 0.1 and generated a few around 0.1, 0.2 and 0.3 and picked 0.15.
Now press Generate to produce the final image.

You can see that face looks cleaner.
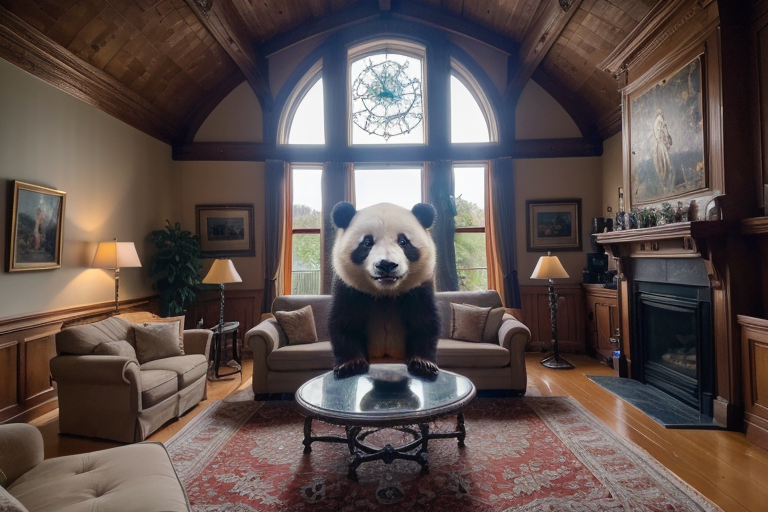
Congratulations on completing the tutorial! Hopefully, the techniques and knowledge you’ve gained here will enable you to use Inpainting more effectively in your future projects.