
What is Textual Inversion?
In the following section, we’ll delve into an overview of textual inversion and explore its practical applications. If you’re already familiar with the concept of textual inversion, feel free to skip ahead to the bottom of the page, where we discuss how to use textual inversion or custom embeddings with ComfyUI. Please note, this tutorial focuses on using pre-generated embeddings and does not cover the training process for Textual Inversion.
Textual inversion offers a method to tailor the behavior of Stable Diffusion models using custom data [1]. Let’s consider a straightforward example. Imagine you have a family dog named Biscuit. If you request Stable Diffusion to generate a picture of Biscuit, the model, not knowing ‘Biscuit’ refers to your specific dog, will produce a generic image of biscuit as food like the one shown on the left below.


To adjust Stable Diffusion for specific inputs, such as generating an image of your dog named Biscuit, it’s necessary to modify how the model interprets the word ‘Biscuit‘.
To understand what needs to be changed, let’s have a look at the top row of the figure below, which provides an overall Stable Diffusion architecture. To generate an image, the process begins with the conversion of a text prompt into a text embedding. This embedding is then fed into the compressed-image generation process, which involves both the UNet and Sampler. Finally, a Variational AutoEncoder (VAE) transforms the compressed image into the final visual output. This process is illustrated using the example of ‘biscuit’.”
In the context of Stable Diffusion, when representing a concept like ‘biscuit’, the CLIP model might conceptualize it as ‘multiple brown edible round flat objects’ within a text embedding. This embedding is then used by UNet as a clue or conditioning to generate a corresponding image. However, in our scenario, this interpretation isn’t what we need; instead, we want CLIP to generate a text embedding that suggests ‘a four-legged cute fluffy creature.’
Before delving into how this alteration is achieved, it’s crucial to understand the distinction between token embedding and text embedding. Text embedding, the output passed to UNet, encapsulates the entire prompt’s meaning. On the other hand, token embedding operates at a more granular level within CLIP, representing the meaning of each individual token.
In the CLIP Text Encoder process, every word in your prompt is translated into one or more numerical tokens. Common words are often mapped to a single number, while less common ones might be divided into multiple tokens due to the constraints of vocabulary size. Each of these tokens is assigned a token embedding, which essentially forms the building block of the word’s representation. These token embeddings undergo extensive processing within CLIP, including capturing the interactions and sequences of tokens, to create the final text embedding.
In the figure above, processing of token embeddings is done in Transformer blocks, which is used as a building block in many large language models including the CLIP model and ChatGPT.
In the illustrated figure, we hypothetically assign the token embedding for ‘Biscuit’ values such as 0.1, 0.2, 0.3, etc. These numbers represent the embedding for ‘multiple brown edible round flat objects.’ It’s important to note that these figures are purely illustrative and not actual values from the CLIP model. However, consider the possibility of adjusting ‘Biscuit’s’ token embedding to values like 0.4, 0.3, 0.2, which suggest the concept of ‘a four-legged cute fluffy creature’ in this hypothetical example. When this modified embedding is combined with embeddings for other contextual phrases like ‘Photo of,’ and factoring in the word interactions, it is then fed into the UNet. The result? Instead of generating an image of a biscuit, the model produces an image of Biscuit the dog.
The key question is how we can prompt CLIP to update this embedding value. The answer lies in model training. By presenting the phrase ‘A photo of Biscuit’ alongside an image of Biscuit the dog during training, the model can compare this with its initial output (a picture of biscuit as food) and identify the discrepancy. The model then employs a technique called gradient descent (detailed in my tutorial ‘What is a Model?‘) to gradually modify the token embedding value, which is the root cause of the discrepancy.
In textual inversion, a clever approach is used where only the token embedding of a particular word is updated during training [2]. The object that handles this custom mapping is called EmbeddingManager in the inventor’s source code [2]. Once the training is done, you can save a file that contains a word and its corresponding updated token embedding value, or just embedding itself. If you use an extension to Stable Diffusion that supports loading custom embeddings, you can use newly generated token embeddings to generate the image that you like. For more detailed information, refer to [1] and [2] in the References section.
Using custom embeddings in ComfyUI
Embedding file installation
Once you download a custom embedding file from a model website or create one by yourself, you can copy the file to models/embeddings under your ComfyUI installation directory. If you have already configured extra_model_paths.yaml file to include subdirectories under Automatic1111 installation directory, ComfyUI looks up your Automatic1111 directory as well and shows a message like below during start up. Make sure that the embeddings directory contains the custom embedding file you want to load.
Adding extra search path embeddings <Your Stable Diffusion installation directory here>/stable-diffusion-webui/embeddingsSpecifying the embedding file
Once the custom embedding file is in the right directory, you can specify in either of the below format:
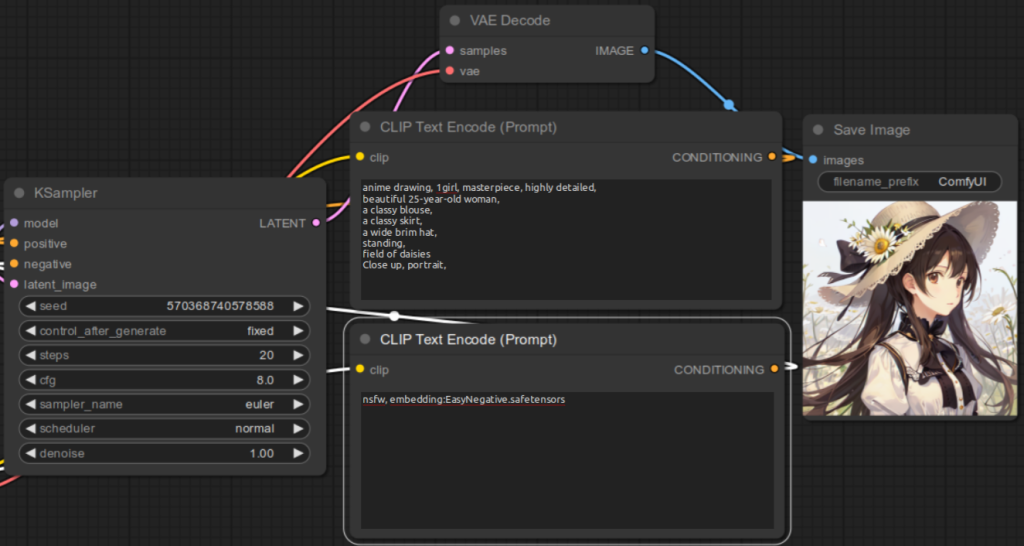
embedding:Custom embedding file name without file extensionembedding:Custom embedding file nameFor example, if the embedding file name is EasyNegative.safetensors, you would specify in the CLIP Text Encode (Prompt) for the negative prompt:
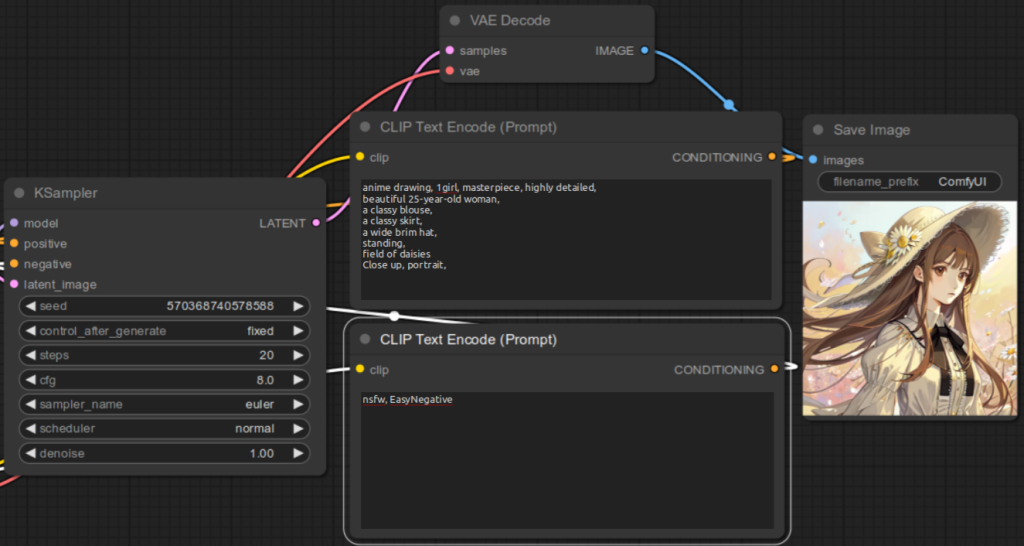
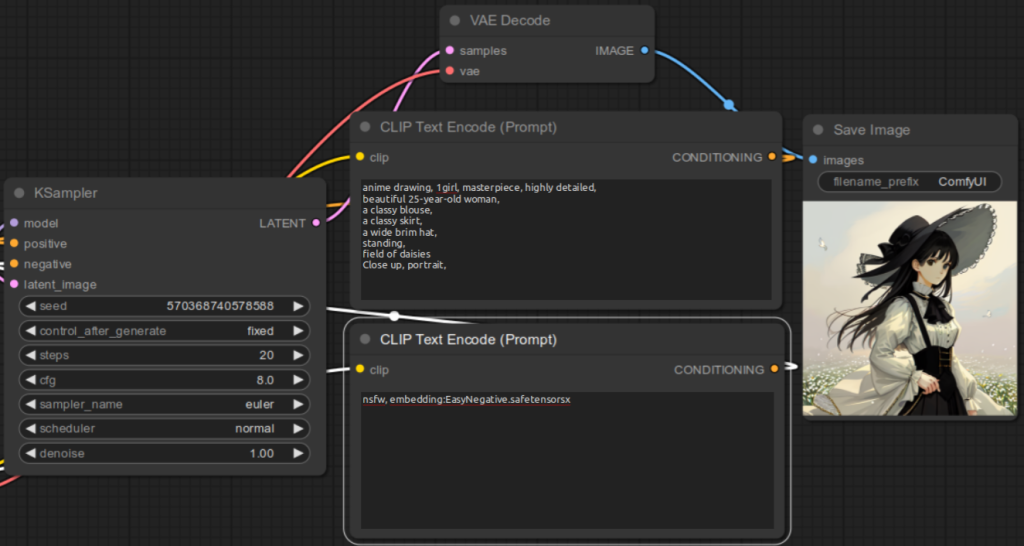
embedding:EasyNegativeembedding:EasyNegative.safetensorsBelow are the examples:
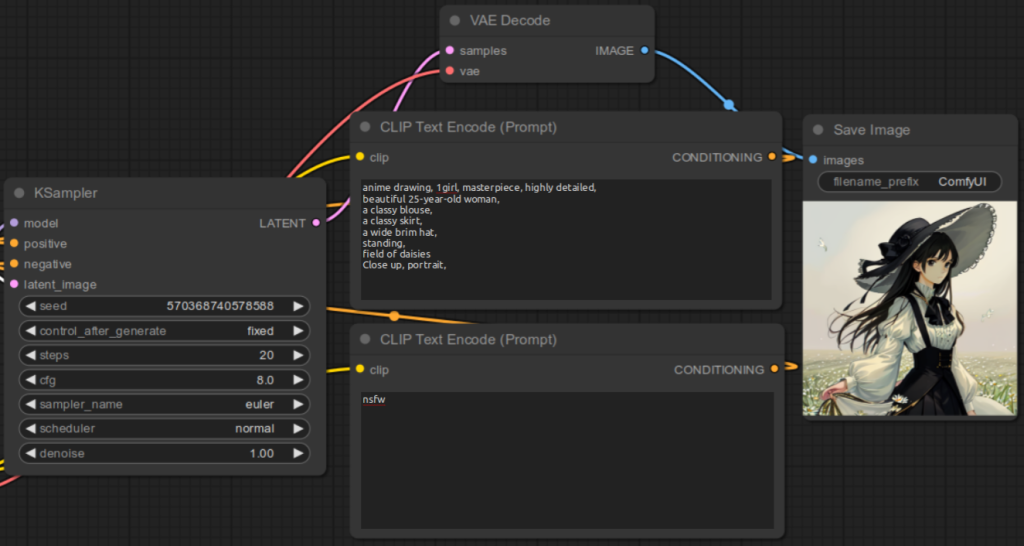


Here are some examples to illustrate the result for not specifying the embedding file correctly:
References
[1] Rinon Gal et al. An Image is Worth One Word: Personalizing Text-to-Image Generation using Textual Inversion. Retrieved from https://arxiv.org/abs/2208.01618.
[2] Rinon Gal. textual_inversion. https://github.com/rinongal/textual_inversion.
[3] comfyanonymous. Textual Inversion Embeddings Examples. Retrieved from https://comfyanonymous.github.io/ComfyUI_examples/textual_inversion_embeddings/.