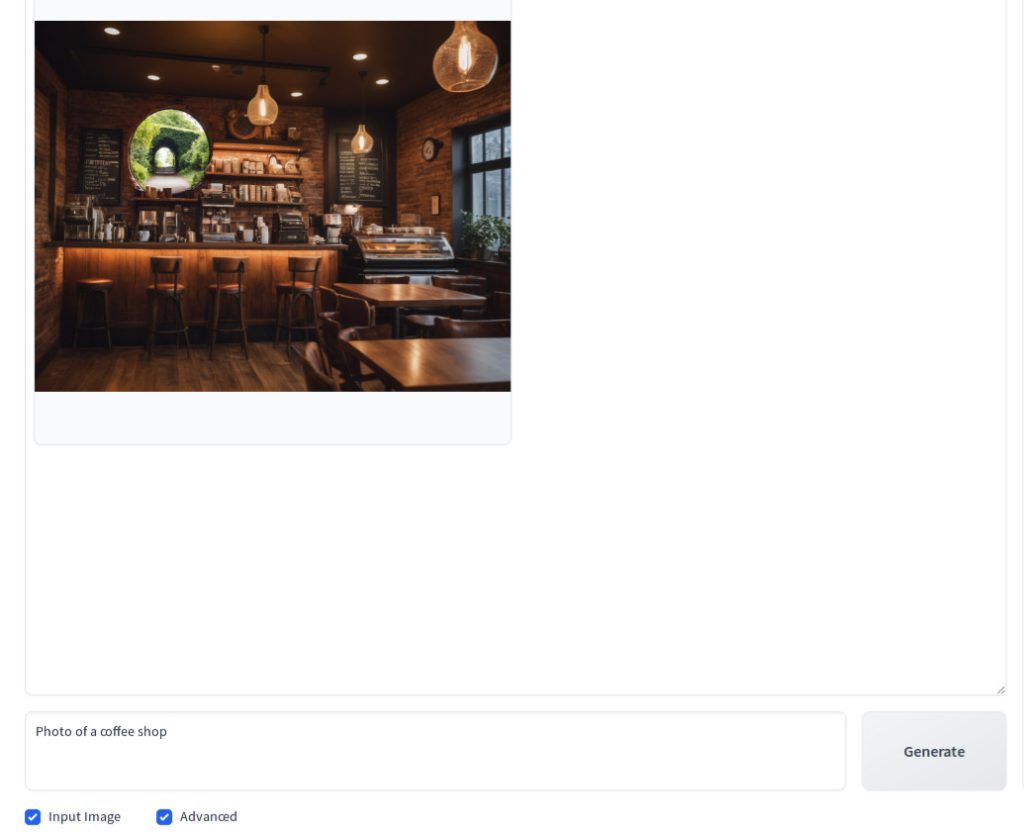
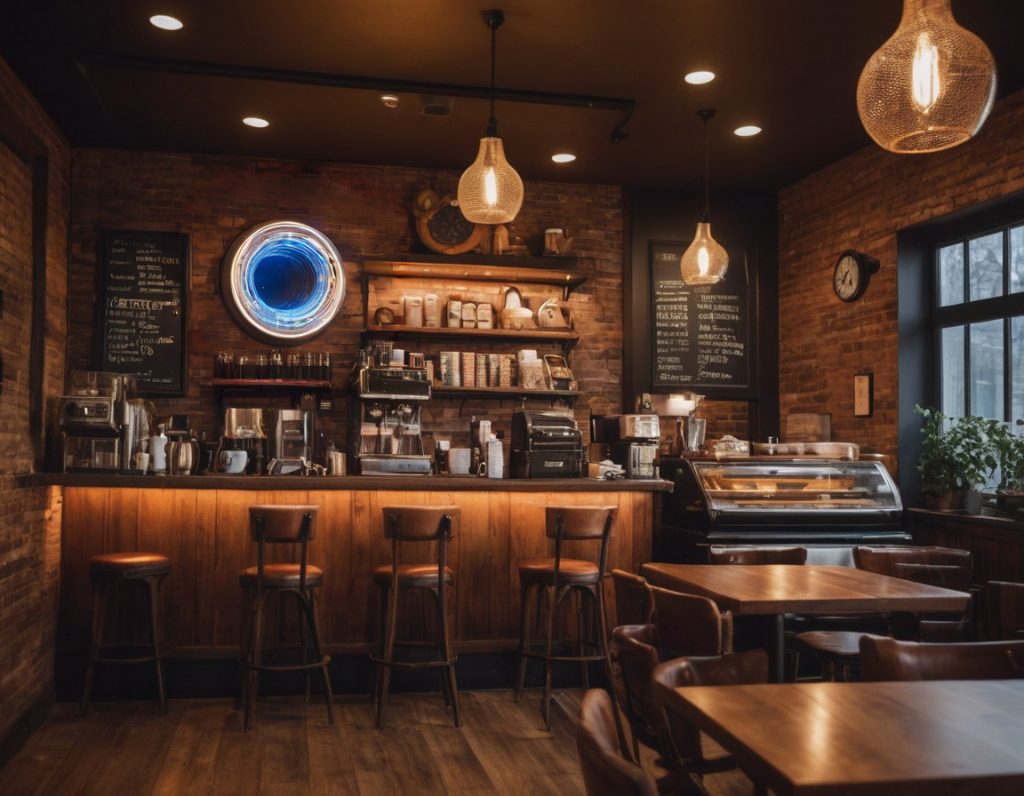
Welcome to the part 2 of our Foocus Inpainting tutorial. In our previous tutorial How to Inpaint in Fooocus, we covered a case where Fooocus inpaints the object according to your prompt. In this tutorial, we will cover a more difficult case where Fooocus does not inpaint per your prompt using those options. Let’s take a look at an example. In the below image of a coffee shop, imagine that you want to to inpaint a time tunnel on the wall.
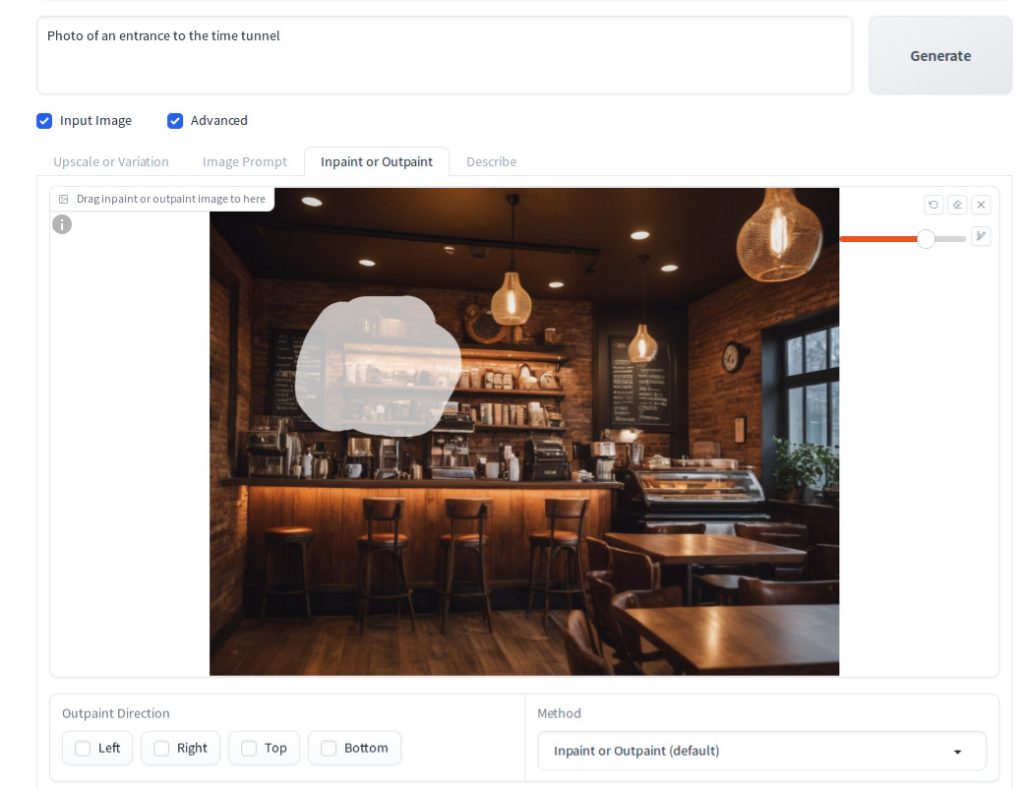
If you just try to inpaint, most likely you would get this instead:
Where is the time tunnel? Fooocus inpainted a regular wall instead. Let’s discuss how to solve this problem.
Steps
For those of you who want to use the image of the coffee shop as the source image, here are the generation parameters:
{
"Prompt": "Photo of a coffee shop",
"Negative Prompt": "",
"Fooocus V2 Expansion": "Photo of a coffee shop, very detailed, cinematic, sharp focus, vibrant colors, elaborate, highly coherent, symmetry, full perfect, beautiful, epic, artistic, innocent, scenic, thought, ambient light, cute, magical, enchanted, magic, fashionable, peaceful, open, lovely, iconic, fine, awesome, intricate, atmosphere, creative, positive, imagined, imposing",
"Styles": "['Fooocus V2', 'Fooocus Enhance', 'Fooocus Sharp']",
"Performance": "Speed",
"Resolution": "(1152, 896)",
"Sharpness": 2,
"Guidance Scale": 4,
"ADM Guidance": "(1.5, 0.8, 0.3)",
"Base Model": "juggernautXL_version6Rundiffusion.safetensors",
"Refiner Model": "None",
"Refiner Switch": 0.5,
"Sampler": "dpmpp_2m_sde_gpu",
"Scheduler": "karras",
"Seed": 5083224851019732450,
"LoRA 1": "sd_xl_offset_example-lora_1.0.safetensors : 0.1",
"Version": "v2.1.862"
}
Once you have the source image, do the following:
- Keep the prompt as the original:
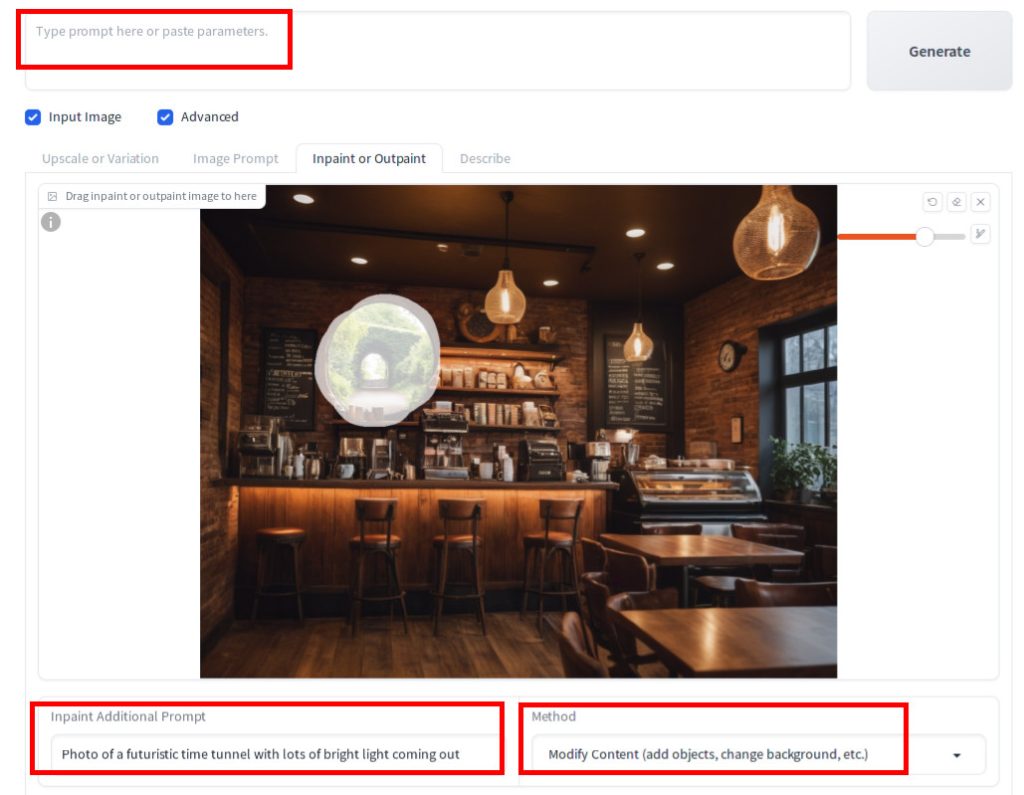
Photo of a coffee shop - Check the
Input Imagecheckbox - Check the
Advancedcheckbox below the text prompt - Click the
Inpaint or Outpainttab - Drag the source image to the canvas from your file viewer application (e.g. Windows Explorer or Mac Finder)
- In
Inpaint Additional Prompt, putPhoto of an entrance to the time tunnel - In
Methoddrop down list, selectModify Content (add objects, change background, etc.) - Paint the area on wall using the brush
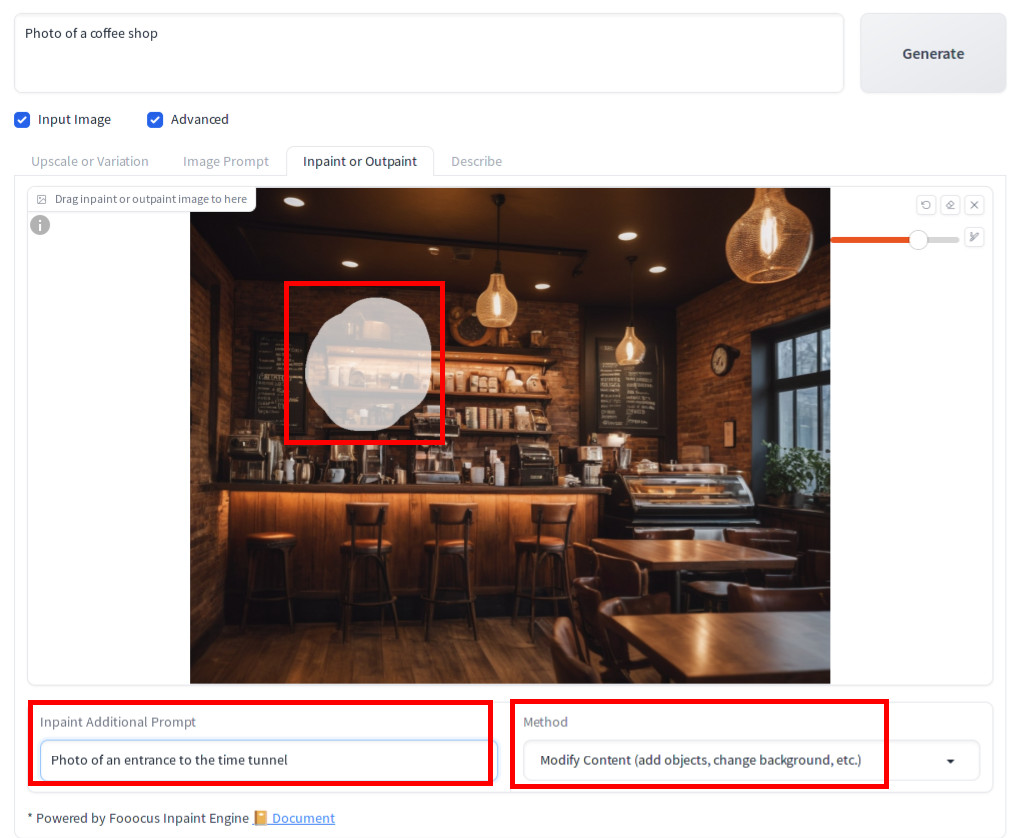
Press Generate, you should now see the tunnel generated on the wall.
However, the tunnel does not look like a time tunnel, but rather looks like a regular tunnel. Therefore, a few more steps are needed to fix this. First, let’s fix the tunnel itself.
- Remove the prompt
- Drag the updated image with the green tunnel to the canvas from your file viewer application (e.g. Windows Explorer or Mac Finder)
- In
Inpaint Additional Prompt, putPhoto of a futuristic time tunnel with lots of bright light coming out - In
Methoddrop down list, keepModify Content (add objects, change background, etc.) - Keep the mask on the tunnel
Press Generate again.
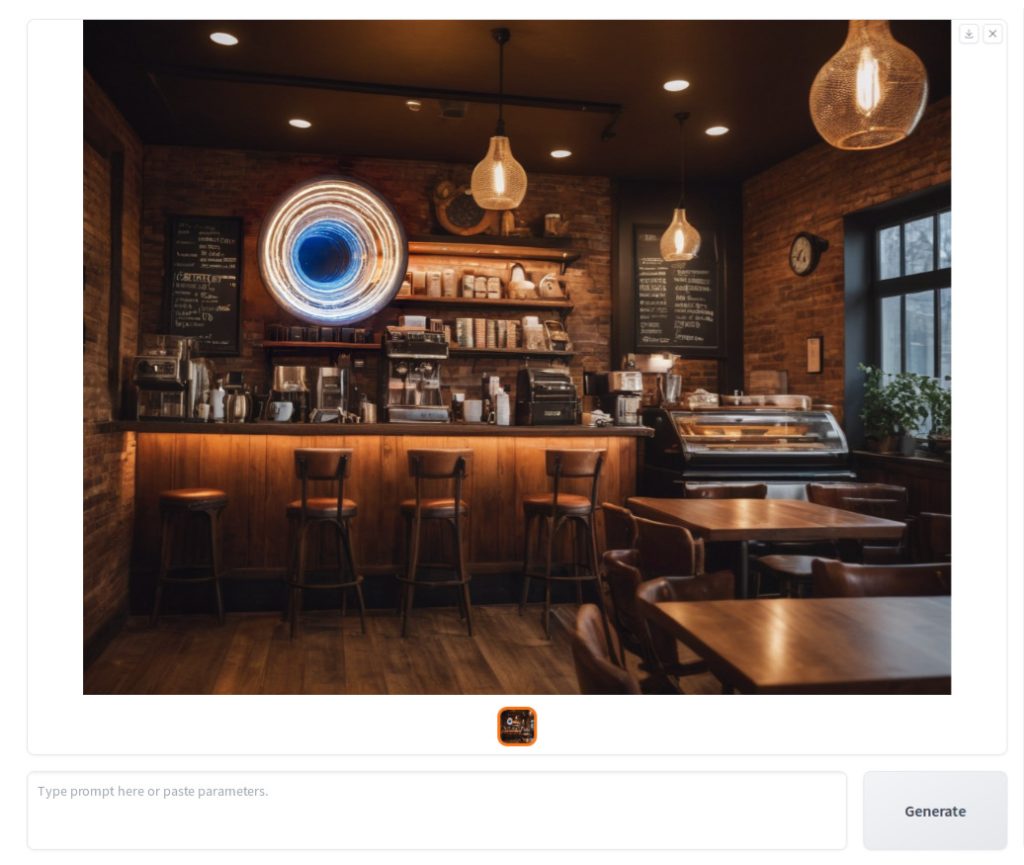
Now the tunnel looks more futuristic. Our final step is to blend the inpainted area with the rest of the image. For example, the right edge of the tunnel is overlapping the shelf which looks weird. To fix this, do the following:
- Drag the updated image to the canvas from your file viewer application (e.g. Windows Explorer or Mac Finder)
- Update the prompt:
Photo of an entrance to the time tunnel on the wall of a coffee shop - In the
Methoddrop down list, selectInpaint or Outpaint (default) - Paint only the edge of the inpainted area. Do not paint inside.
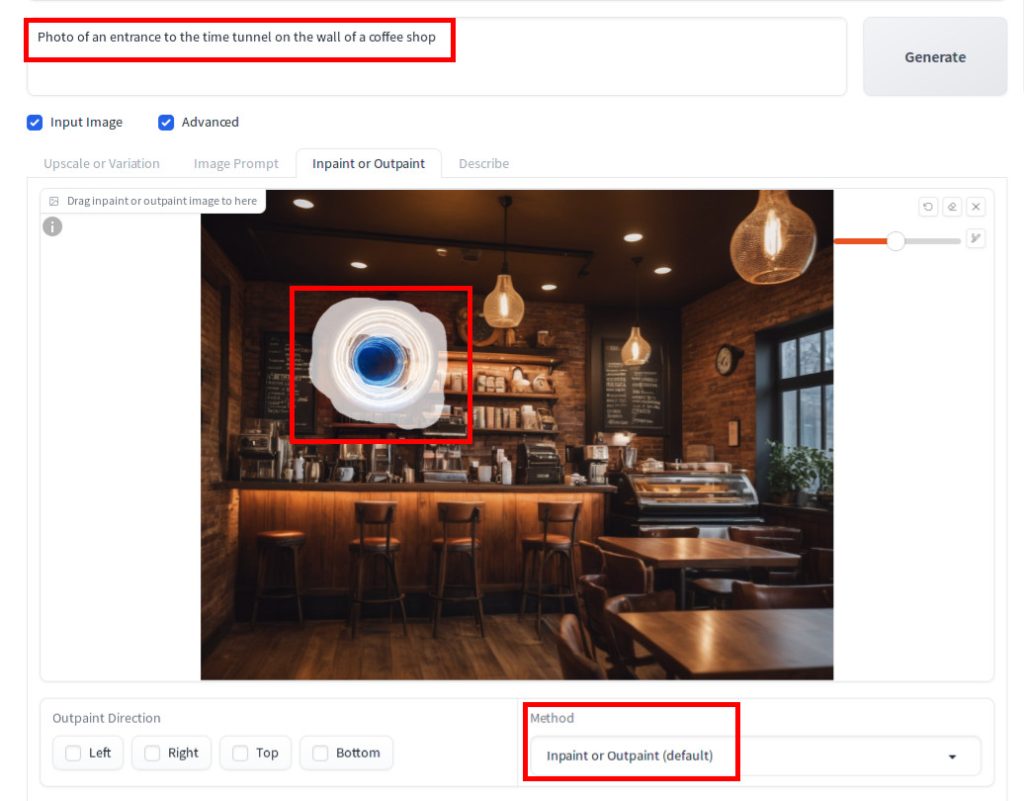
Now if you hit Generate, you can see that the tunnel is better blended.
Congratulations on mastering a new technique for inpainting challenging objects! This accomplishment is sure to expand your creative horizons and help you realize your artistic vision. Keep exploring and pushing the boundaries of your artistry!