Overview
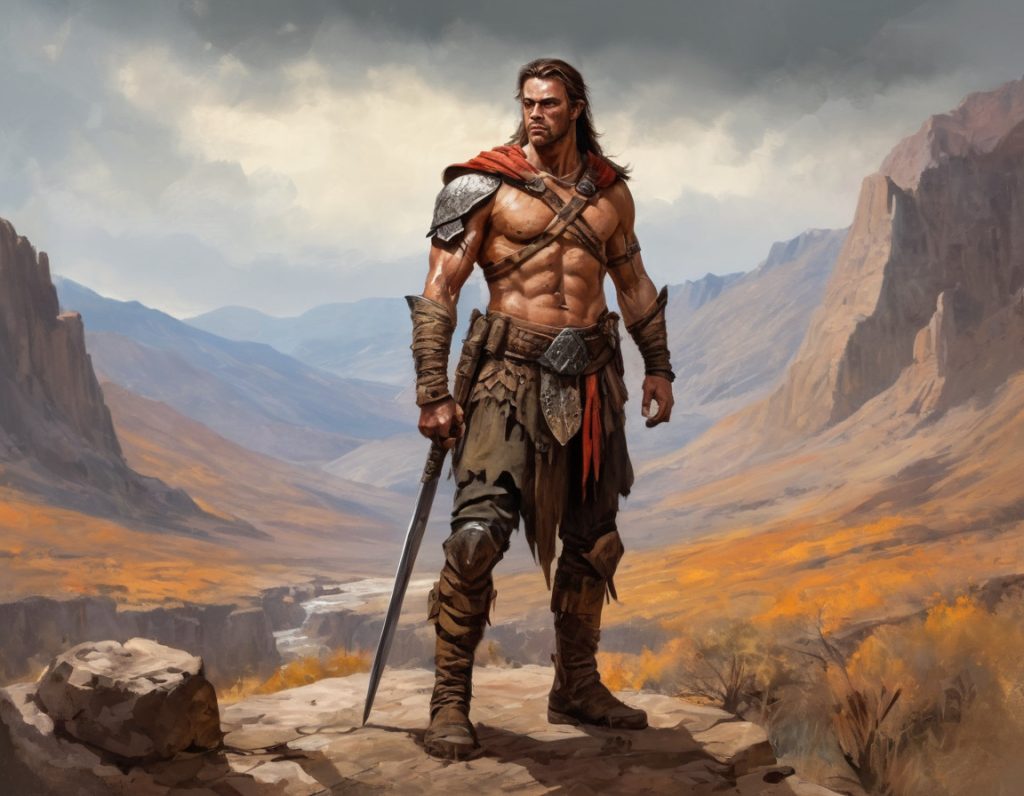
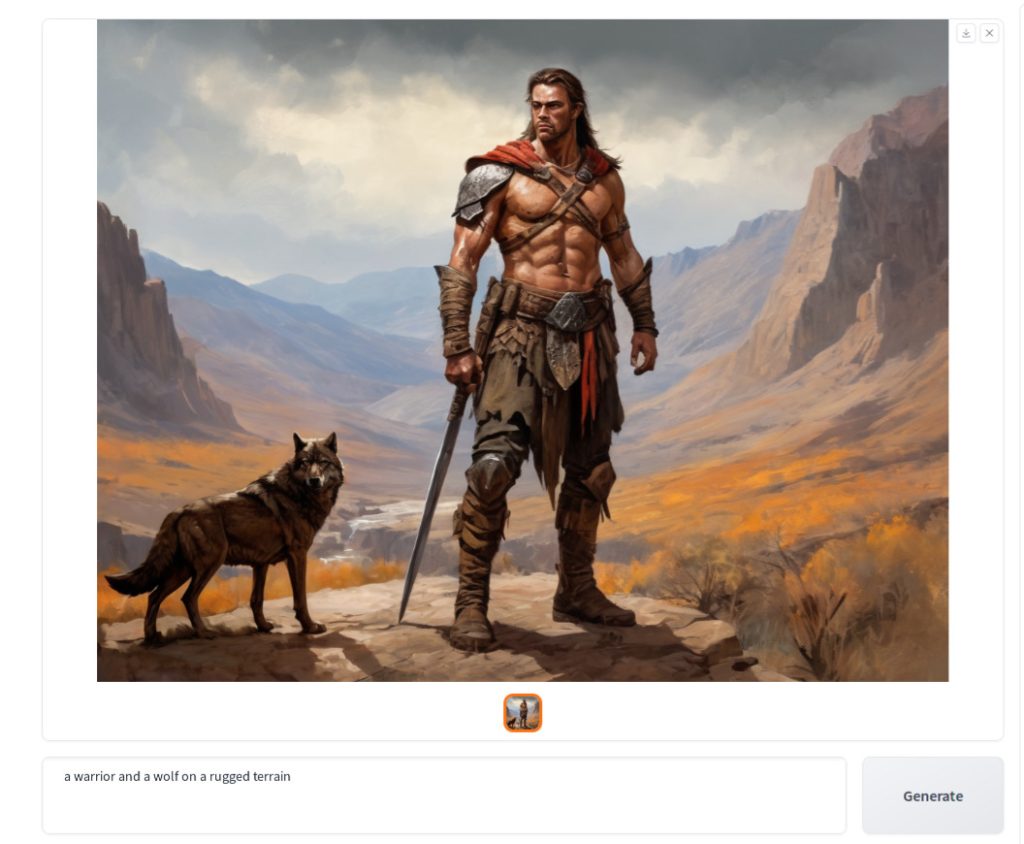
In this tutorial, we will be discussing how to do Inpainting in Fooocus. Inpainting is a feature that allows the user to replace a part of the image with another image in a way that looks natural. In this tutorial, we will be using the below image. The goal is to put a wolf on the left of the warrior and enhance the face of the warrior. Let’s dive in.
Generation parameters
{
"Prompt": "\ta warrior standing on a rugged terrain",
"Negative Prompt": "",
"Fooocus V2 Expansion": "",
"Styles": "['MRE Dark Dream', 'Artstyle Watercolor', 'Mk Color Sketchnote']",
"Performance": "Speed",
"Resolution": "(1152, 896)",
"Sharpness": 2,
"Guidance Scale": 4,
"ADM Guidance": "(1.5, 0.8, 0.3)",
"Base Model": "juggernautXL_version6Rundiffusion.safetensors",
"Refiner Model": "None",
"Refiner Switch": 0.5,
"Sampler": "dpmpp_2m_sde_gpu",
"Scheduler": "karras",
"Seed": 6095063063420913378,
"LoRA 1": "sd_xl_offset_example-lora_1.0.safetensors : 0.1",
"Version": "v2.1.862"
}
Steps
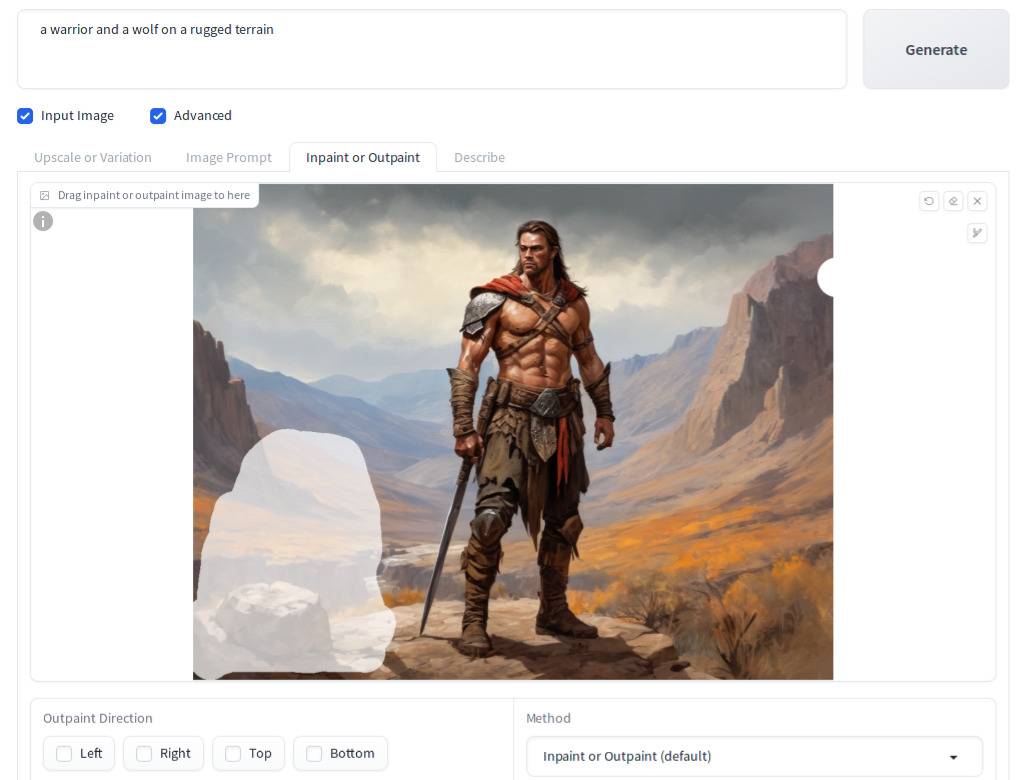
Before we go over the Inpainting steps, we need a source image. If you haven’t, generate the source image using the generation parameters above, or you can use the above image. Once you get an image similar to the one shownabove, do the following:
- Change the prompt to add a wolf:
a warrior and a wolf on a rugged terrain - Check the
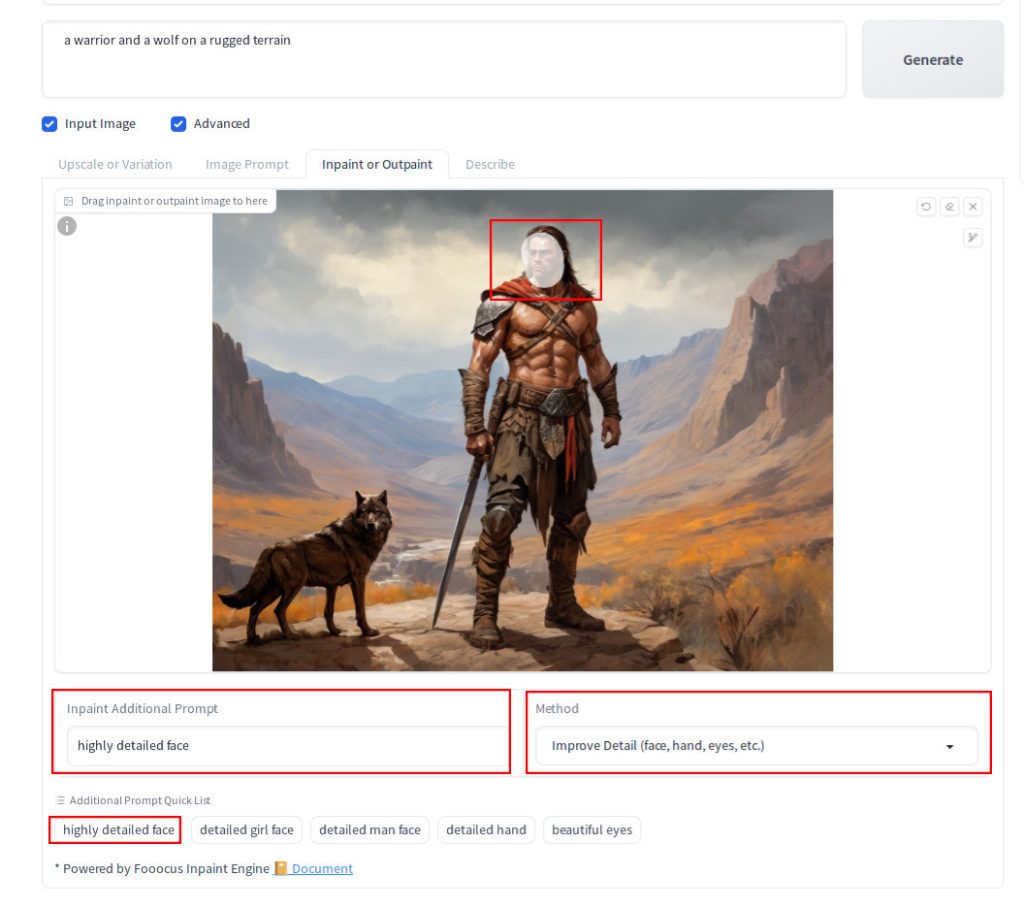
Input Imagecheckbox - Check the
Advancedcheckbox below the text prompt - Click the
Inpaint or Outpainttab - Drag the source image to the canvas from your file viewer application (e.g. Windows Explorer or Mac Finder)
- In
Methoddrop down list, selectInpaint or Outpaint (default) - Paint the area on the left side of the warrior using the brush
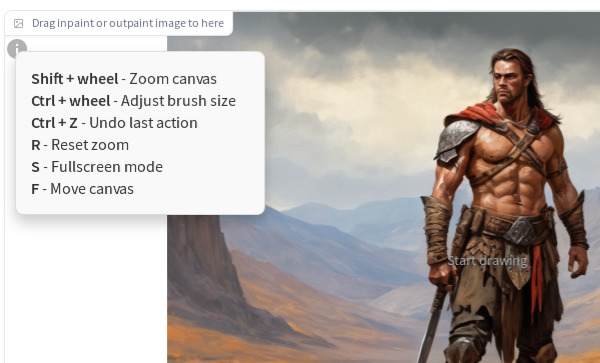
There are some keys and fields to control mask editing that are not obvious. If you hover you mouse over the round i icon on top left of the canvas. Info tip is displayed. You can press S to make the drawing canvas bigger and R to restore the original canvas size.
There also controls on the top right of the canvas:

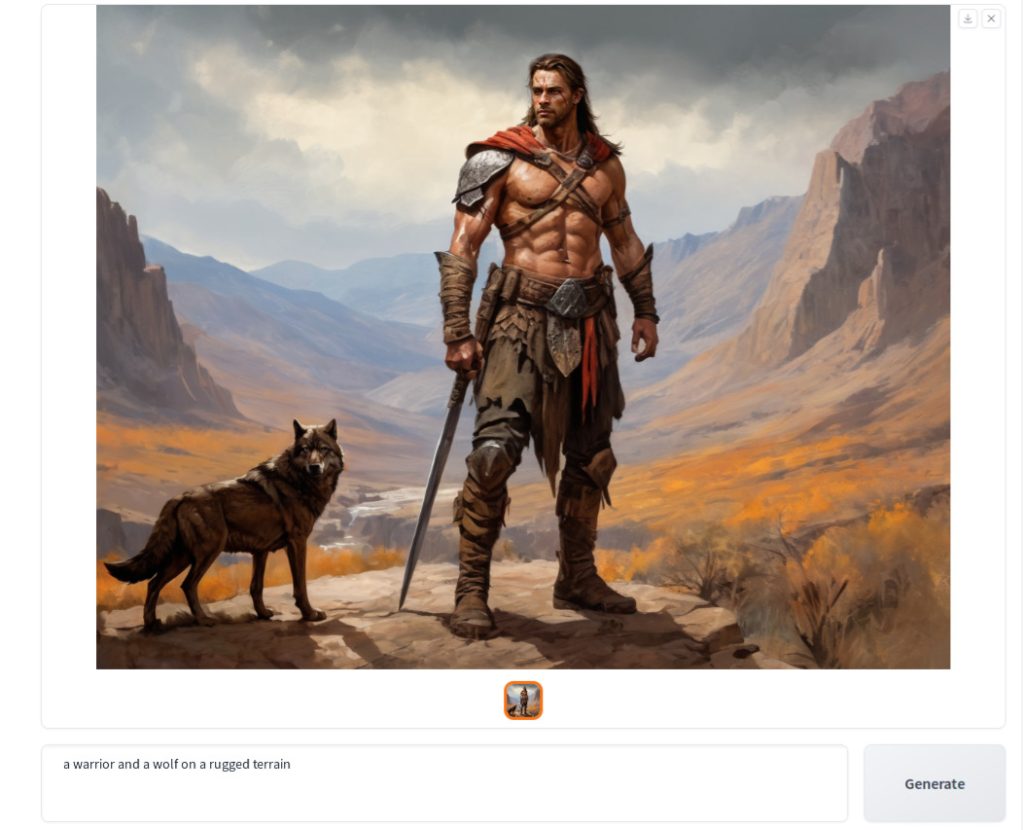
Now Press Generate, and you should see a wolf appear.
Let’s move on to Inpainting his face. Especially, we want to fix his right eye that looks squinting. To do so:
- Drag the updated image with the wolf into the canvas from your file viewer application.
- In the
Inpaint Additional Promptfield, typehighly detailed face. Alternatively, you can just clickhighly detailed faceinAdditional Quick Prompt Listto copy the prompt. - In
Methoddrop down list, selectImprove Detail (face, hand, eyes, etc.) - Paint his face using the brush
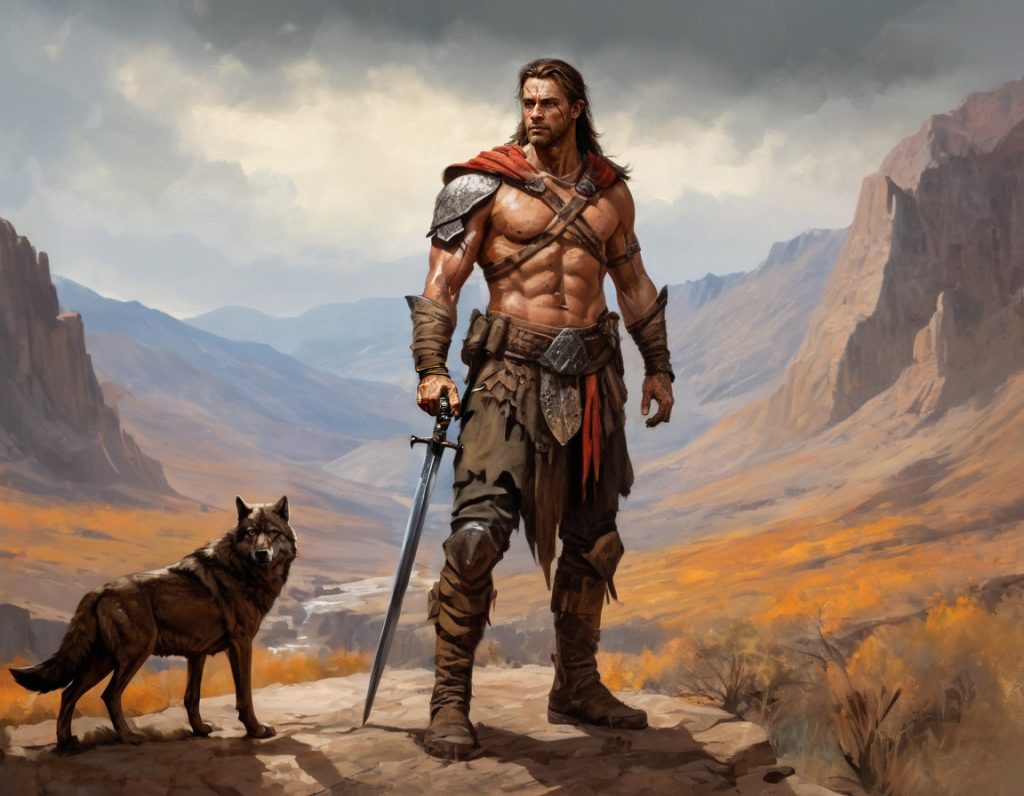
Now Press Generate, and you should see his face looking more natural and the problem with his right eye gone.
You may notice that there are still some issues with his hands. You can try the same approach as the face for the hand, but unfortunately it does not always work. Generating and inpainting a realistic hand is still difficult even with Fooocus. Here is the result of after multiple iterations with Inpainting. Though not perfect, it looks better than the original.
The truth is that when you see a problem with a hand, if Inpainting does not fix the problem, you may need to consider using other software package to fix the hand or changing the pose.
References
[1] lllyasviel. [Fooocus 2.1.822] Fooocus Inpaint or Outpaint (Midjourney Left/Right/Top/Bottom)#414. Retrieved from https://github.com/lllyasviel/Fooocus/discussions/414.
Thanks for the guide! I had no idea about the hotkeys on the “i” button until I read this. Great!!
You are welcome. Thank you for your comment!