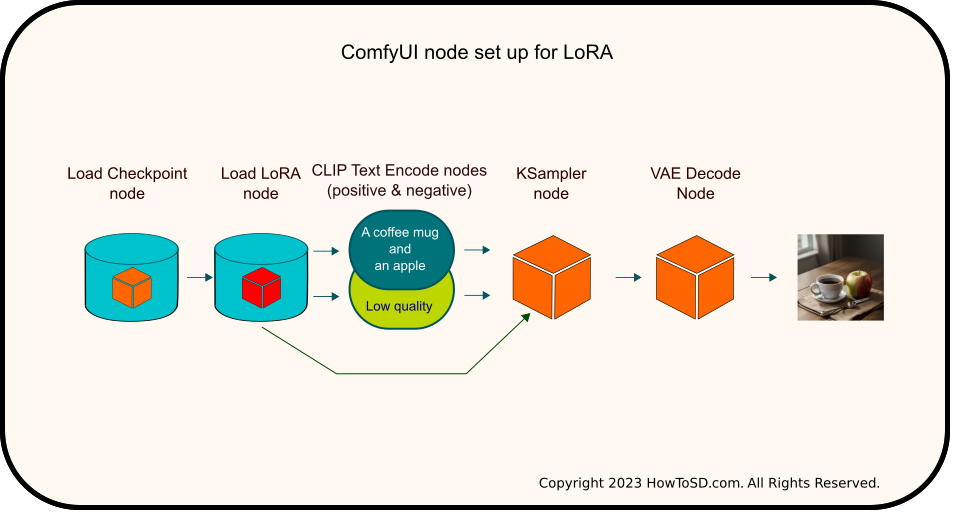
Overview of steps
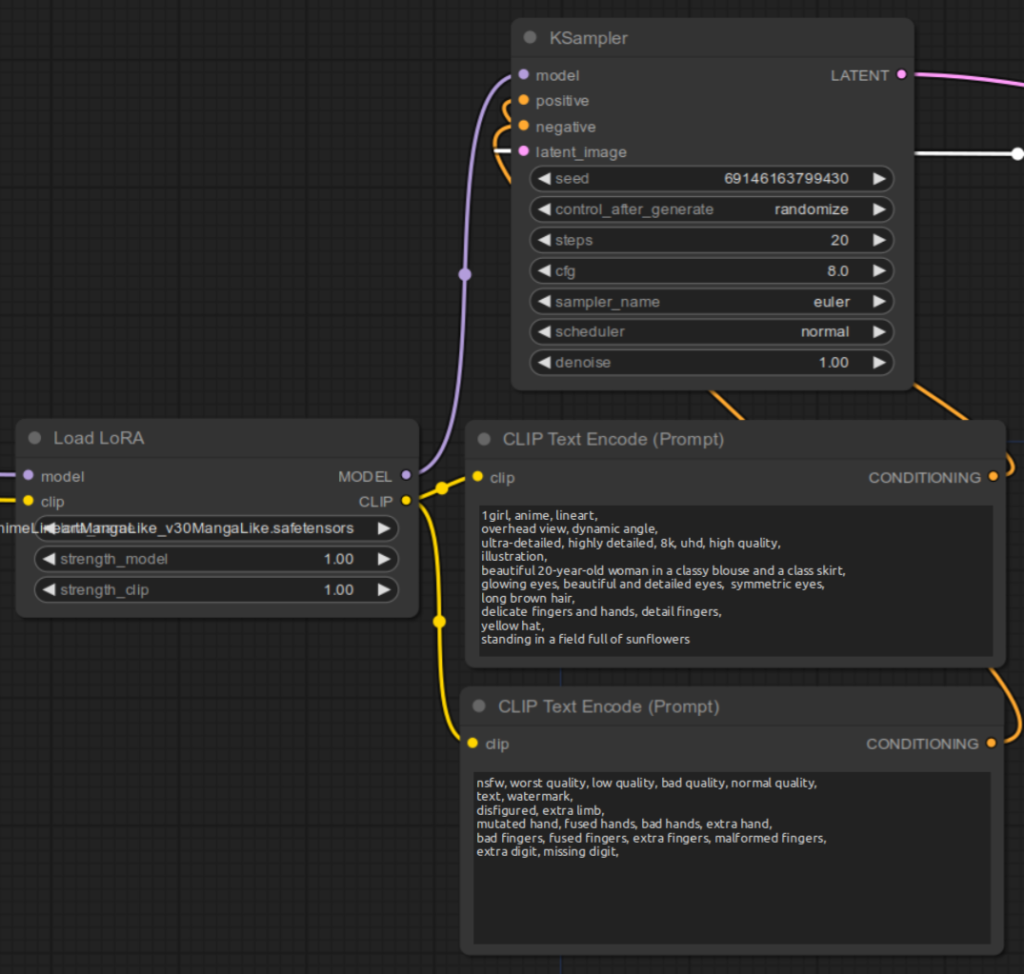
In ComfyUI, integrating LoRA into your workflow involves placing a Load LoRA node within your existing setup. Specifically, this node should be positioned between the Load Checkpoint and CLIP Text Encode nodes, as well as between the Load Checkpoint and KSampler nodes, as illustrated in the figure below. For those already using a text-to-image generation flow, the addition of the Load LoRA node and wiring are the only required changes. The following sections will provide a detailed walk-through of the necessary wiring and setup steps.
1. Adding a Load LoRA node
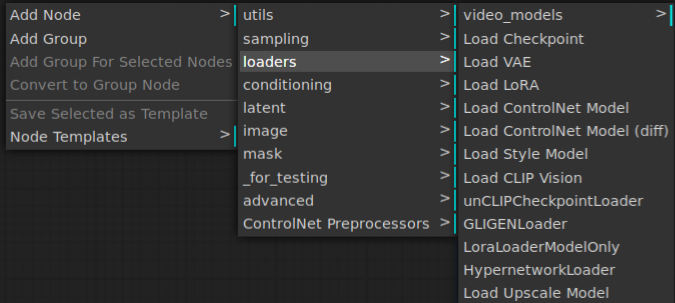
Right-click an open area of ComfyUI and select Add Node | loaders | Load LORA.
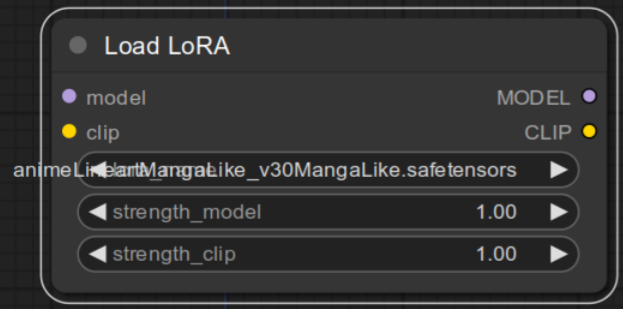
Once the node is created, click the top dropdown list and select the LoRA model that you want to use. In this tutorial, animeLineartMangaLike_v30MangaLike.safetensors is used.
2. Wiring the Load LoRA node
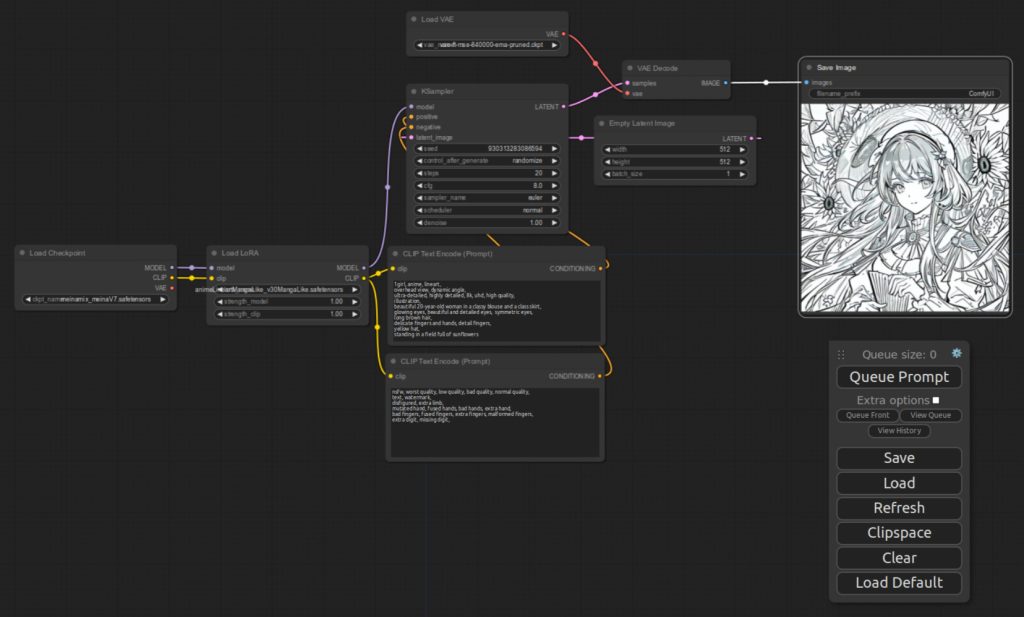
In the default text to image flow, MODEL output of Load Checkpoint is connected to KSampler. Remove that connection. Then link MODEL output of the Load Checkpoint to model output of Load LoRA. Note VAE output of Load Checkpoint is not connected because I have a Load VAE node separately defined to use a standalone VAE. If you want to use VAE included in the main model, make sure that you connect this output to VAE Decode node.
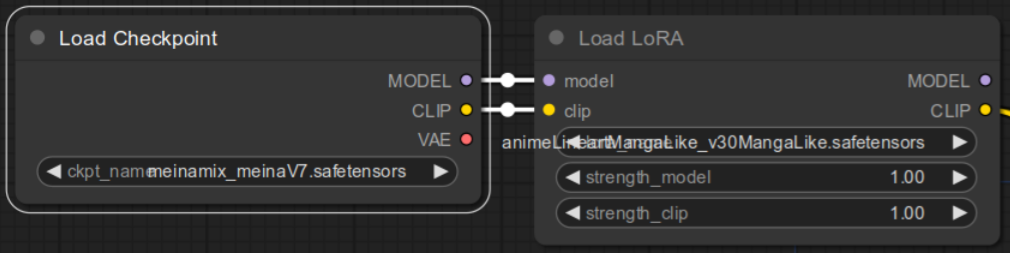
Similarly, remove the connection between Load Checkpoint and two CLIP Text Encode nodes.
Connect MODEL output of Load LoRA to model input of KSampler.
Connect CLIP output of Load LoRA to clip input of CLIP Text Encode for positive prompt. Repeat this for the negative prompt.
Congratulations! You are done. If you press Queue Prompt on the main menu, you should see your image generated with LoRA being used in process.
Using multiple LoRAs with ComfyUI
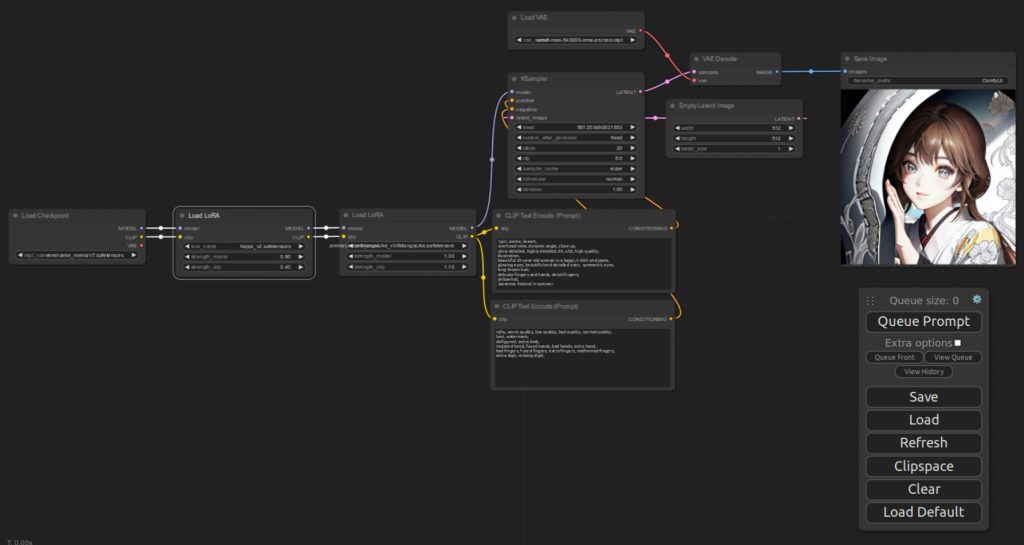
If you want to use more than one LoRA, you can just insert a new Load LoRA node between the Load Checkpoint and the first Load LoRA node as shown below. Be sure to adjust strength_model and strength_clip fields of both Load LoRA nodes if you are not getting the image that you want.

Here is the overview of the workflow. Please note that the fonts in the below diagram are quite small, making it impossible to read the node names and input/output field names. For clarity on these details, refer back to the figures provided earlier.
References
[1] comfyanonymous. Lora Examples. Retrieved from https://comfyanonymous.github.io/ComfyUI_examples/lora/.