What Can You Achieve with Image-to-Image Conversion?
The image-to-image feature in Automatic1111 offers the capability to alter the style of an existing image. This powerful tool can significantly broaden your creative horizons. Beyond style transformation, it’s also useful for rectifying facial renderings that may not have been accurately produced in the txt2img process. To better understand these applications, let’s explore a few illustrative examples.
Style Transfer Examples
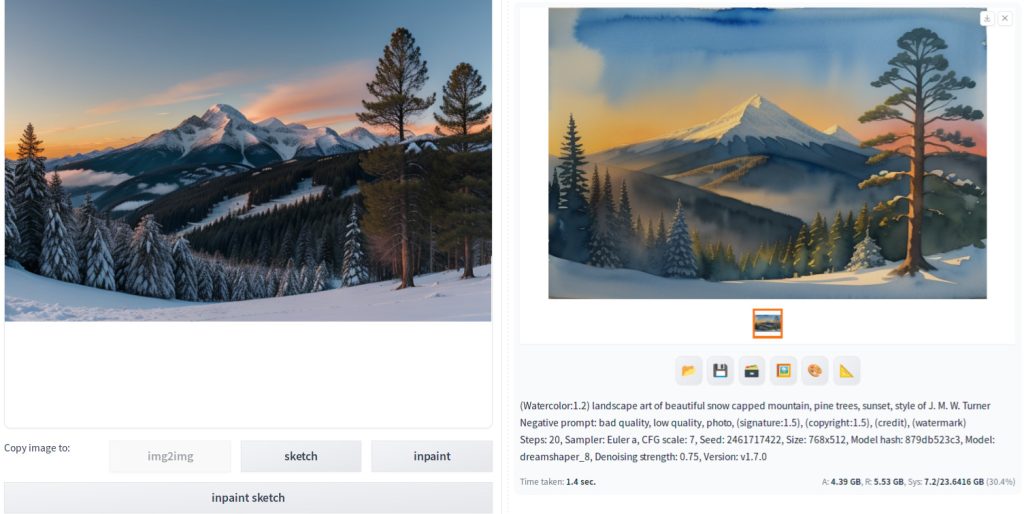
In the following example, we demonstrate a style transfer application. A watercolor effect is applied to an initially photo-realistic image, showcasing the transformative power of this feature.
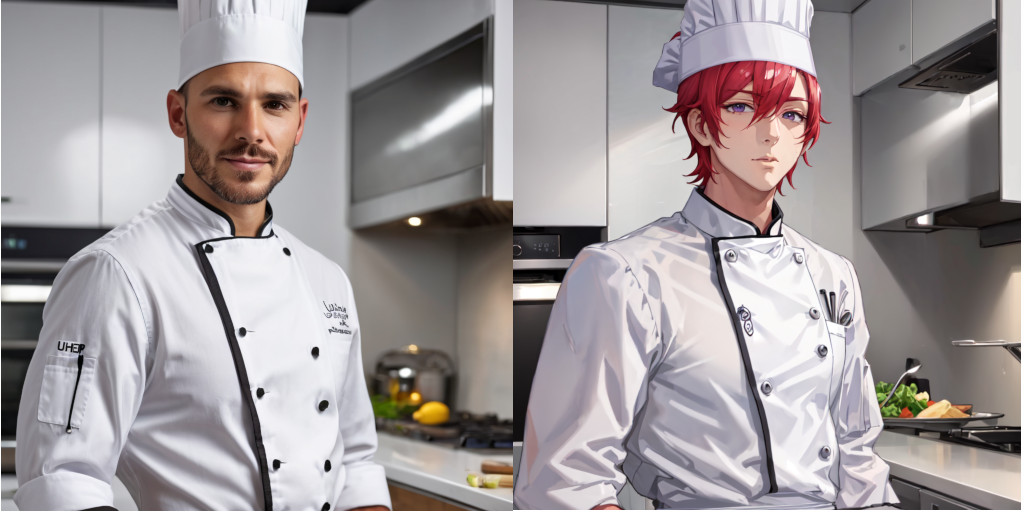
Below, we present another example of style transfer, where a photo-realistic image is transformed into an anime-style depiction, illustrating the versatility of this feature.

Face Reconstruction Example
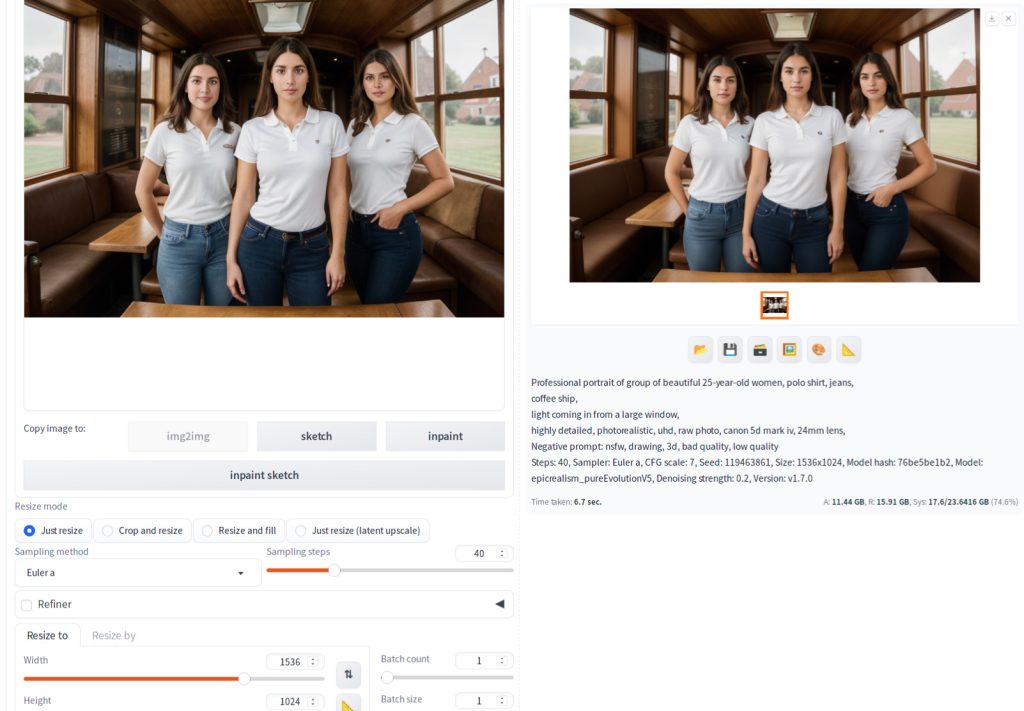
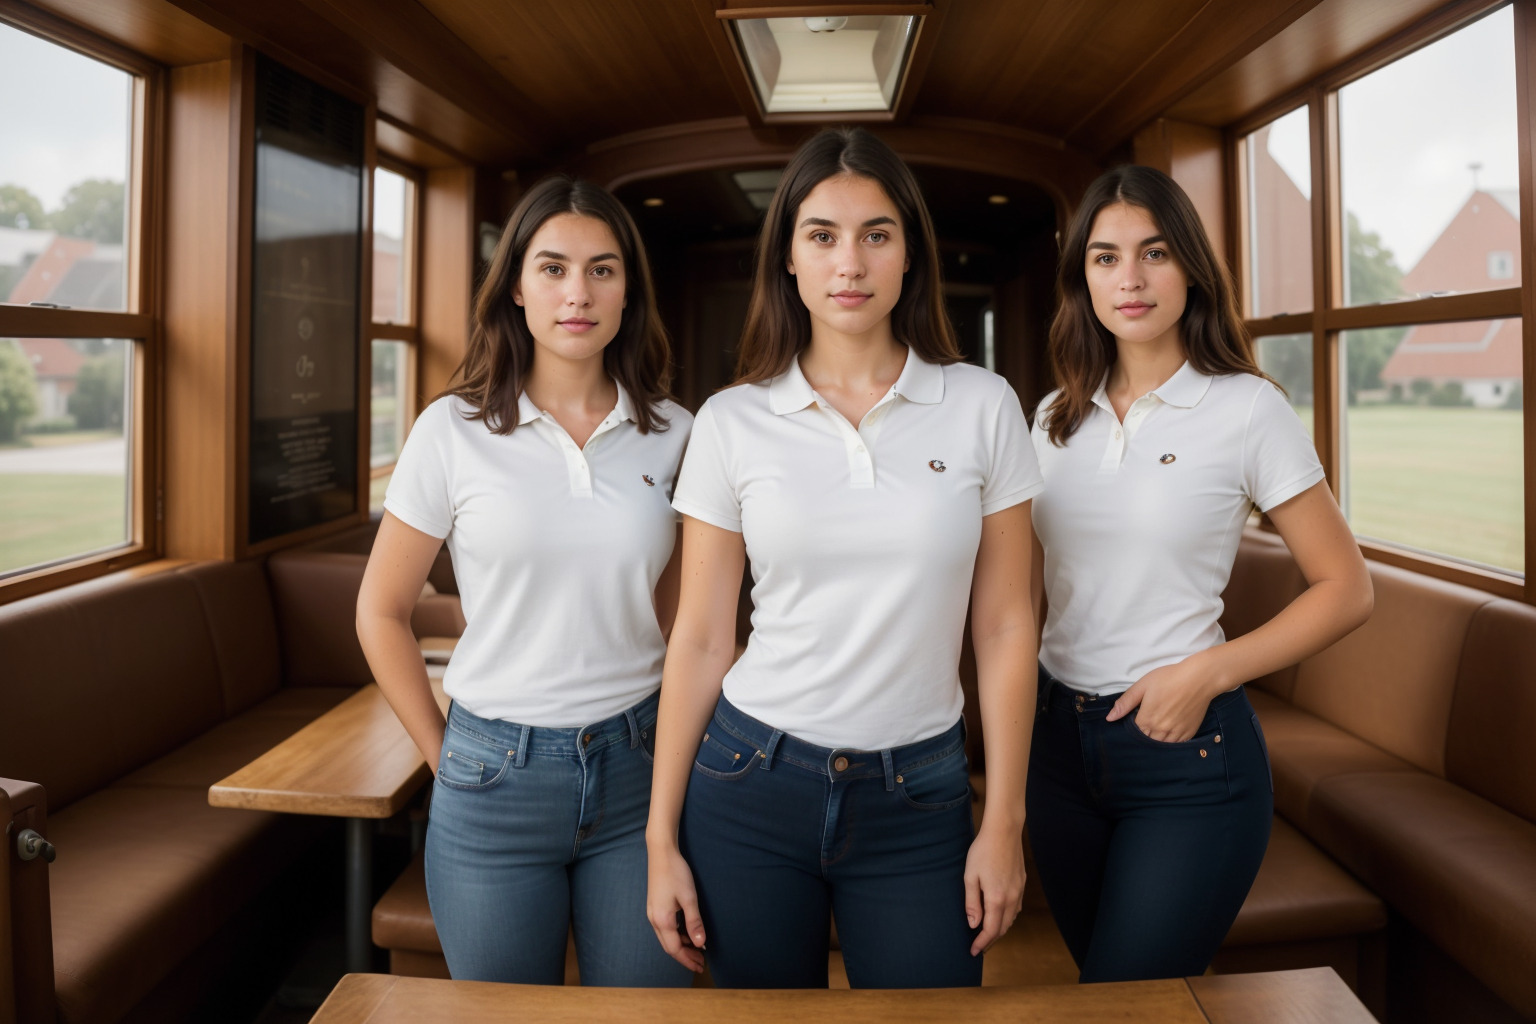
Image-to-image functionality can also be effectively used to rectify facial imperfections in generated images. The image displayed below was initially created using the txt2img tab. As you can observe, the faces of the two women, positioned on the left and right, exhibit deformities, particularly around their eyes, due to the generation process. This is a common scenario where image-to-image can be instrumental in correcting such imperfections.
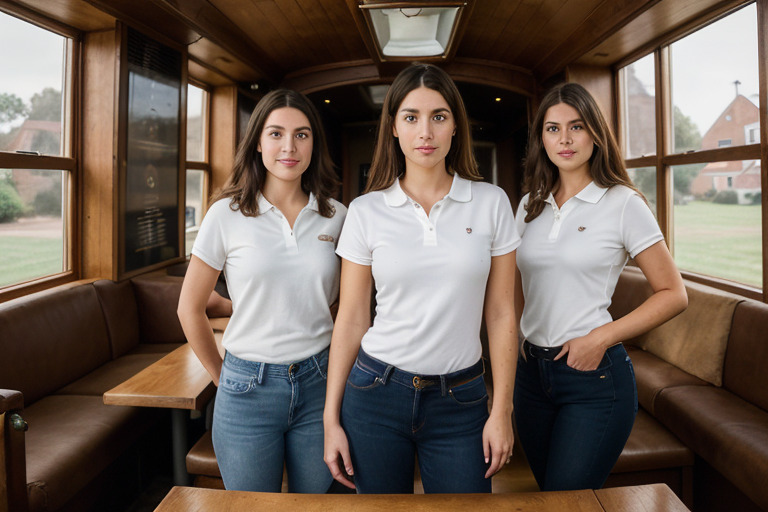
Here is the larger version of the original file to illustrate the problem.
Here’s the result obtained through the image-to-image process. As you can see, the issues with the eyes of both women have been successfully rectified, demonstrating the effectiveness of this feature in enhancing image quality.
Steps to use image to image
Follow these steps to effectively utilize the image-to-image functionality:
- Select a Style and Load the Appropriate Model: First, determine the desired style for your image. Then, load a model that matches this style by entering its name in the
Stable Diffusion Checkpointfield. - Set Positive and Negative Prompts: Tailor your prompts to the chosen style. For instance, if you’re converting a realistic source image to a watercolor style, include ‘watercolor’ in your positive prompt.
- Load the Source Image: Import the image you want to convert.
- Adjust the Denoising Parameter: This setting is crucial in determining the influence of the source image on the final output.
- Configure Resize Mode: Set how the image will be resized during the transformation process.
- Fine-Tune Other Parameters (Optional): For additional customization, adjust other parameters as needed. Refer to our text-to-image generation tutorial for detailed explanations of each UI field.
In the following sections, we’ll dive into more detailed instructions for steps 3, 4, and 5.
Loading the Source image to img2img tab
If Automatic1111 is showing txt2img tab, click img2img tab to switch. You should see a screen like below.
To load the source image, drag your image from your file manager (e.g. Windows Explorer, Mac Finder), to the blank area under the tab name that says Drag Image Here, or click Click to Upload which opens up a file chooser. You should see your image on the tab once you chose the file.

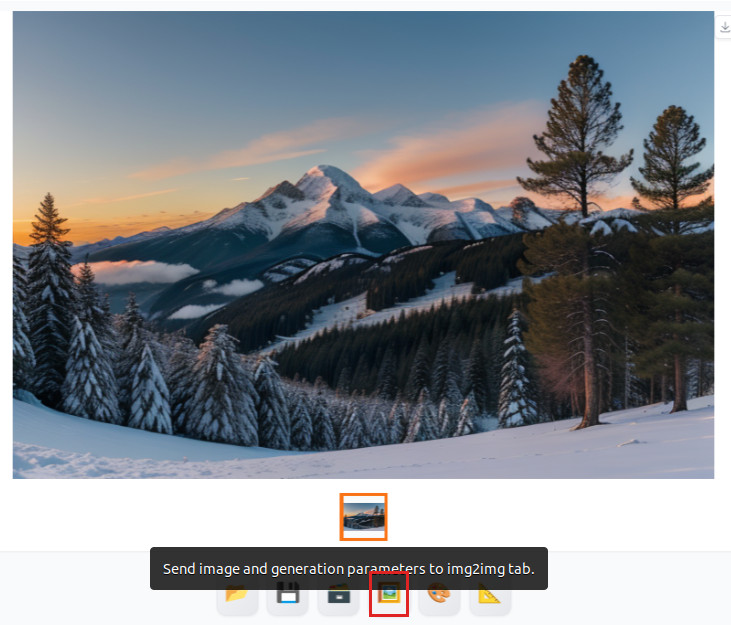
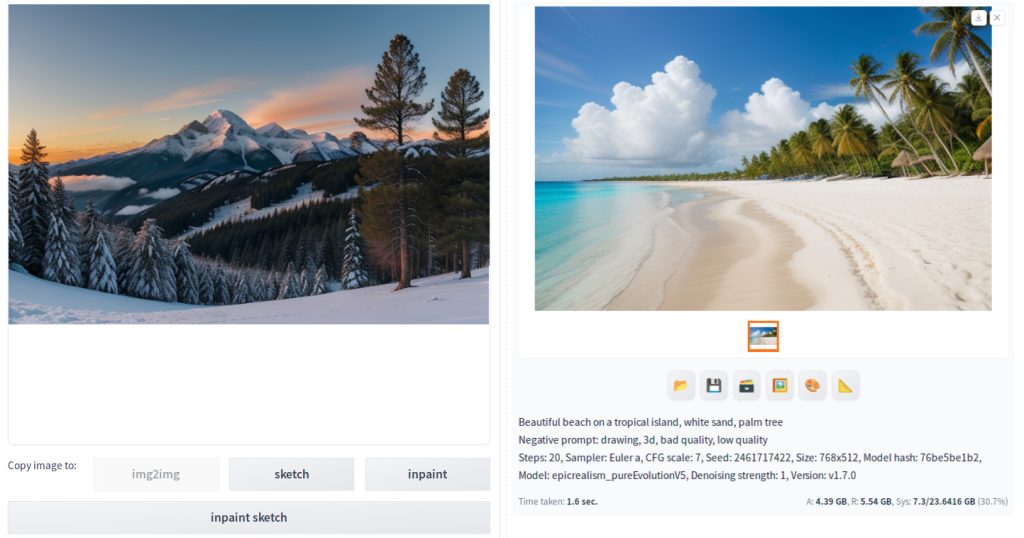
If you want to use an image that you have generated using the txt2img tab, there is an easy way. Press Send to img2img button right after you generate an image on txt2img tab. This button is located on the txt2img tab just below the generated picture (marked with red square in the below figure). Clicking this button will send the image as well as other generation information to img2img tab.
Denoising
The ‘Denoising’ setting is crucial in the img2img tab and plays a pivotal role in determining the effectiveness of the image-to-image generation process.
- A setting of ‘0’ means the source image is fully retained in the generated image.
- A setting of ‘1’ implies that the source image has no influence on the image generation.
Think of the ‘Denoising’ parameter as a mixing ratio between the source image and the text prompt.
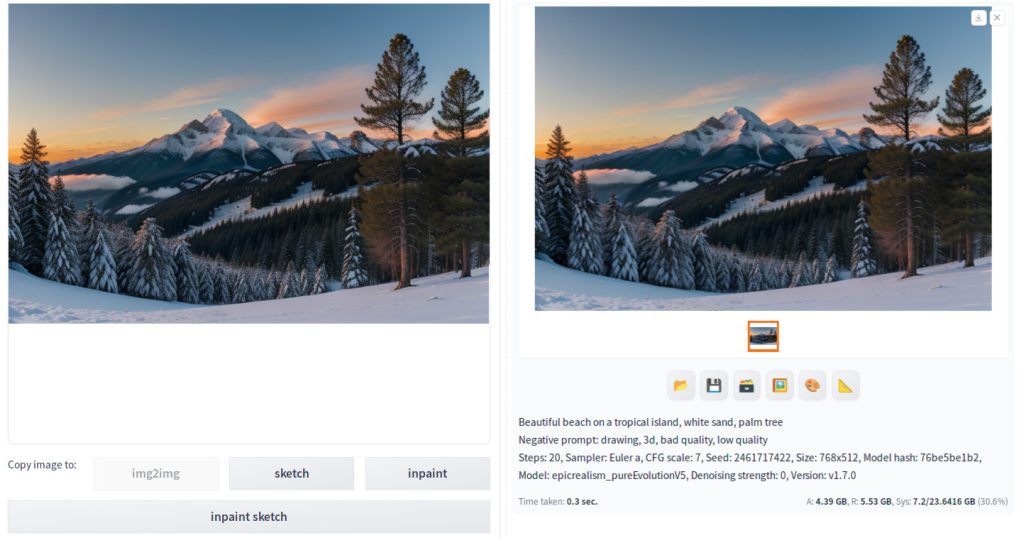
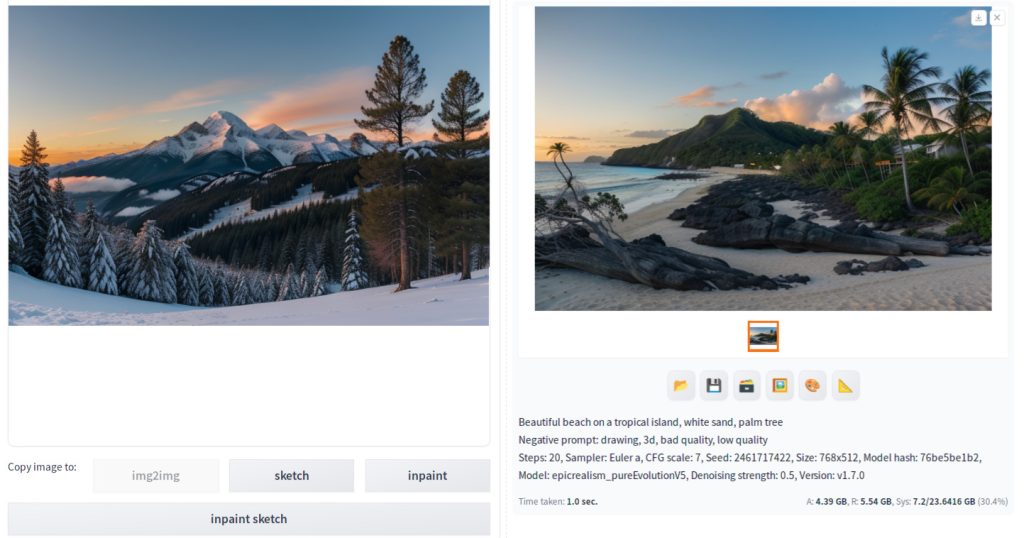
To illustrate this, consider the three images below with ‘Denoising’ set to 0, 1, and 0.5, respectively. The source image is shown on the left. With ‘Denoising’ at 0, the generated image looks identical to the source image. At a ‘Denoising’ level of 1, the output aligns with the prompt ‘Beautiful beach on a tropical island, white sand, palm tree’, showing no trace of the source image. For ‘Denoising’ at 0.5, the result is a blend of both the source image and the text prompt.
Here are the recommended steps:
1. Set denoise to 1 and generate the image. Verify that the style of the image is what you want as the target. This is to verify the prompt and the model.
To optimize your use of the denoise parameter in image generation, consider the following recommended steps:
- Initial Test with High Denoise: Begin by setting the denoise value to 1 and generate the image. This should not show any attribute of the source image. This step is crucial for ensuring that the target style and output align with your expectations, verifying both the prompt’s effectiveness and the suitability of the model.
- Gradual Adjustment of Denoise: Start with a very low denoise value, such as 0.1. The output should be very similar to the source image. Then, incrementally increase it by 0.1, observing the changes with each step, until you achieve the desired balance.
Particularly for face reconstruction, it’s essential to start with a low denoise value. This approach helps maintain a closer resemblance to the original facial features, preventing excessive deviation from the source image that is what you desire.
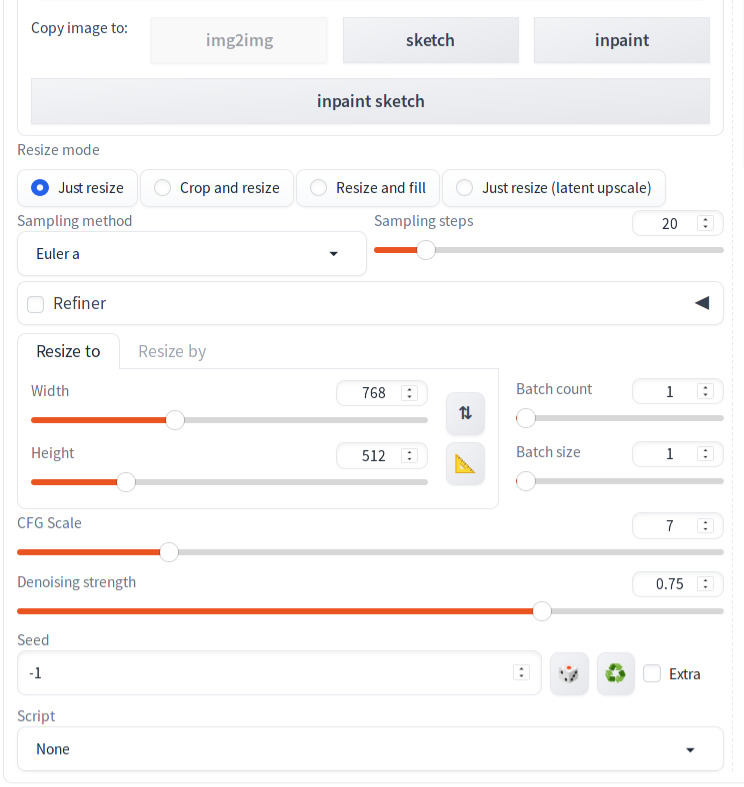
Specifying the resize mode
In Automatic1111, you have four resize options to choose from:
- Just Resize
- Crop and Resize
- Resize and Fill
- Just Resize (Latent Upscale)
To use these options, input the desired width and height for your target image in the respective Width and Height fields. The choice of resize option largely depends on the aspect ratio (the width-to-height ratio) of your target image compared to the source image:
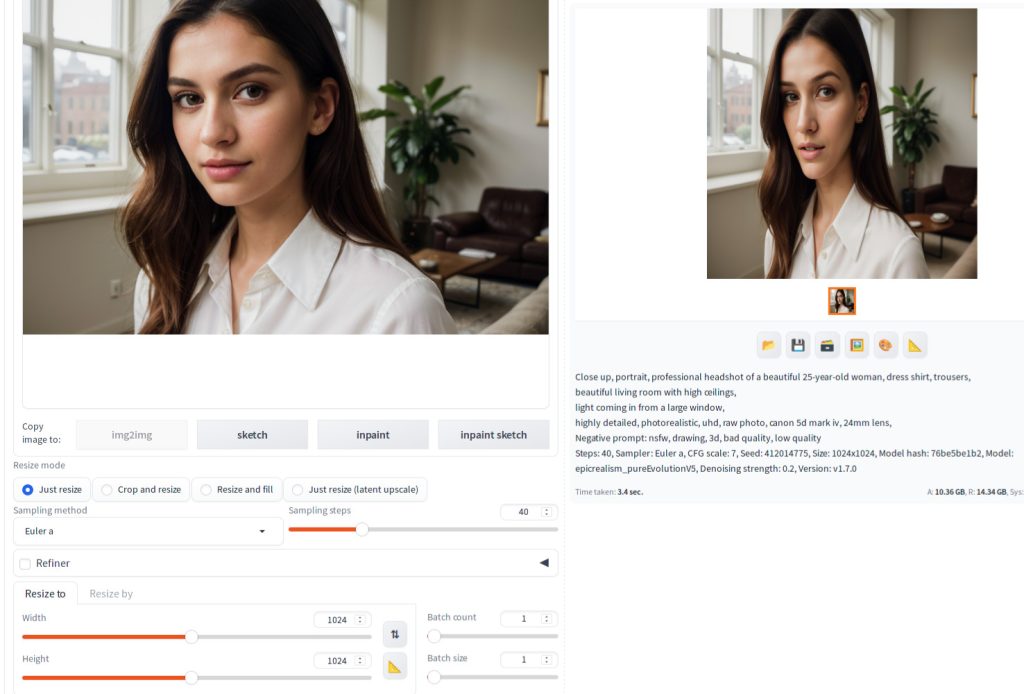
- Just Resize: Opt for this when the aspect ratios of the source and target images are the same. It resizes the image before converting it to the latent image [1].
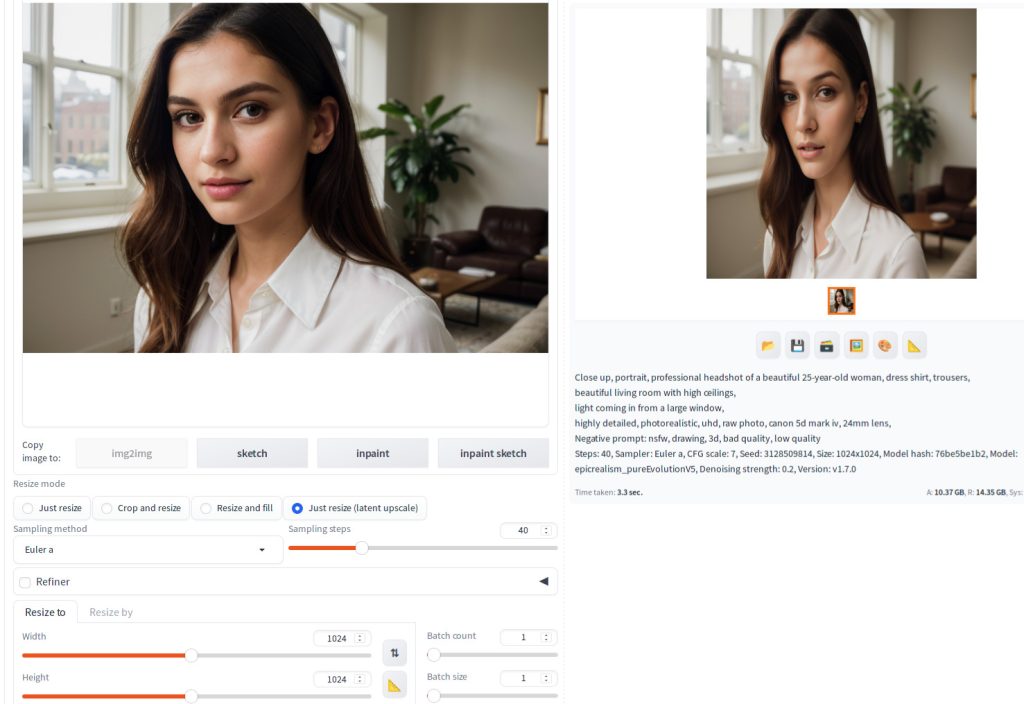
- Just Resize (Latent Upscale): Similar to ‘Just Resize’, but it resizes the image after it has been converted to a latent image [2].
If the aspect ratios differ, using Just Resize or Just Resize (Latent Upscale) will lead to stretched images, as illustrated in the examples below. In such cases, consider these alternatives:
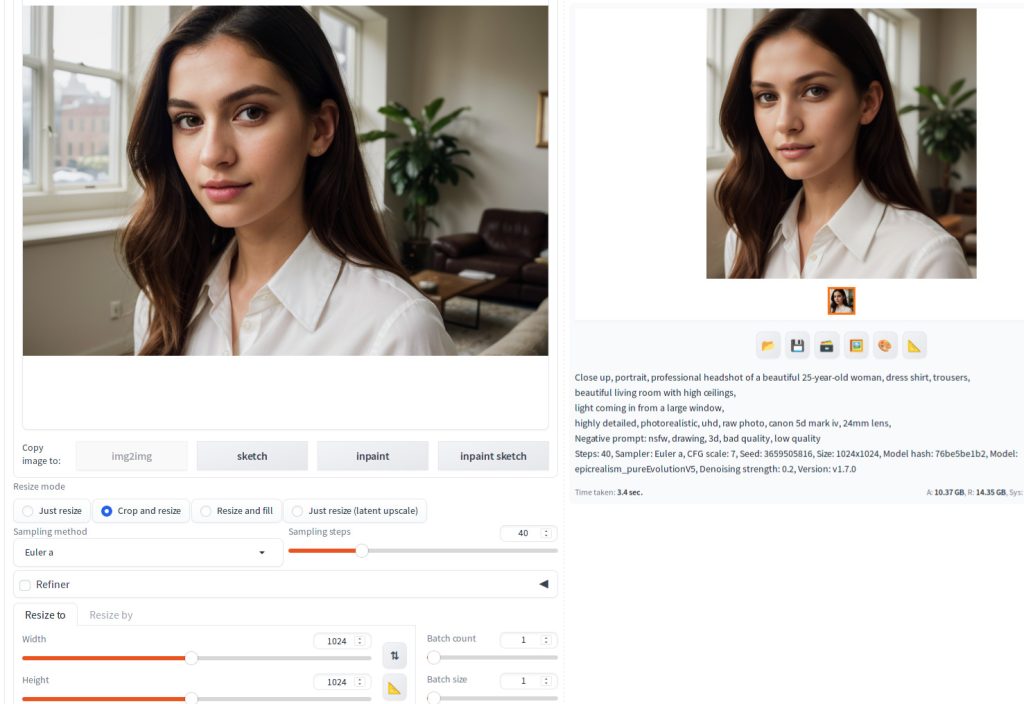
- Crop and Resize: This option crops a portion of the input image to match the target aspect ratio.
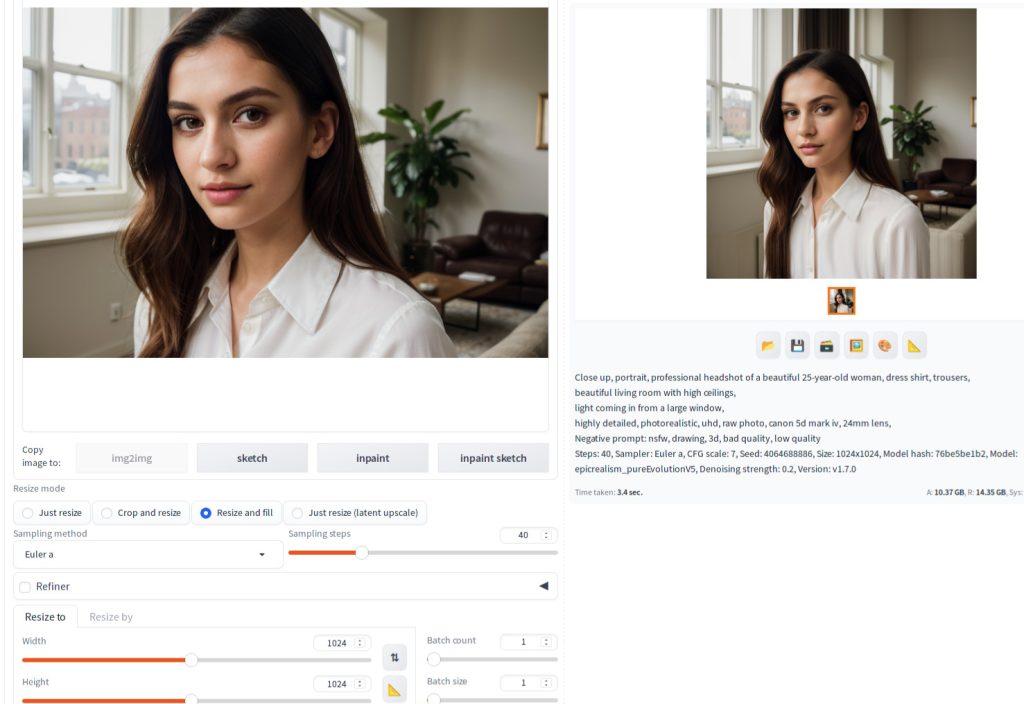
- Resize and Fill: It adjusts the image by filling the missing area in the target image, which might result in an unnatural appearance and could make it necessary to use Inpainting to address the look of the image.
To effectively reconstruct a face, it is recommended to double the dimensions of the source image if the dimension of source image is 512×512, 512×768 or 768×512.
Just resize option example when aspect ratios are the same

Just resize option example when aspect ratios are different
Just resize (Latent upscale) option example when aspect ratios are the same
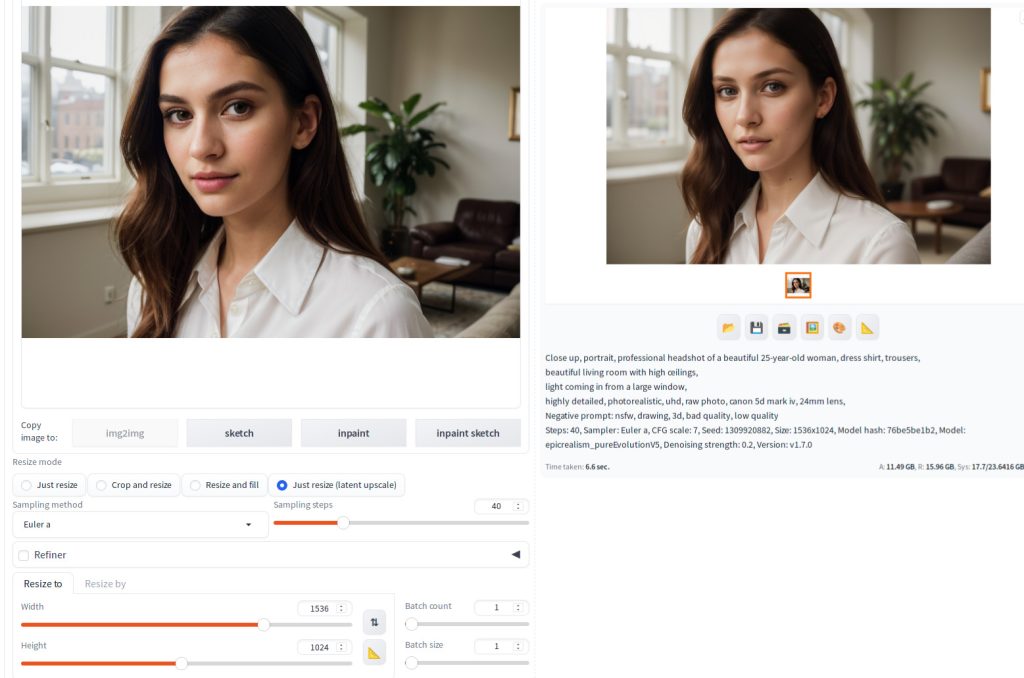
Just resize (Latent upscale) option example when aspect ratios are different
Crop and resize option example
Resize and fill example
References
AUTOMATIC1111. stable-diffusion-webui. Retrieved from https://github.com/AUTOMATIC1111/stable-diffusion-webui/blob/master/modules/processing.py#L1450.
AUTOMATIC1111. stable-diffusion-webui. Retrieved from https://github.com/AUTOMATIC1111/stable-diffusion-webui/blob/master/modules/processing.py#L1499.