Overview
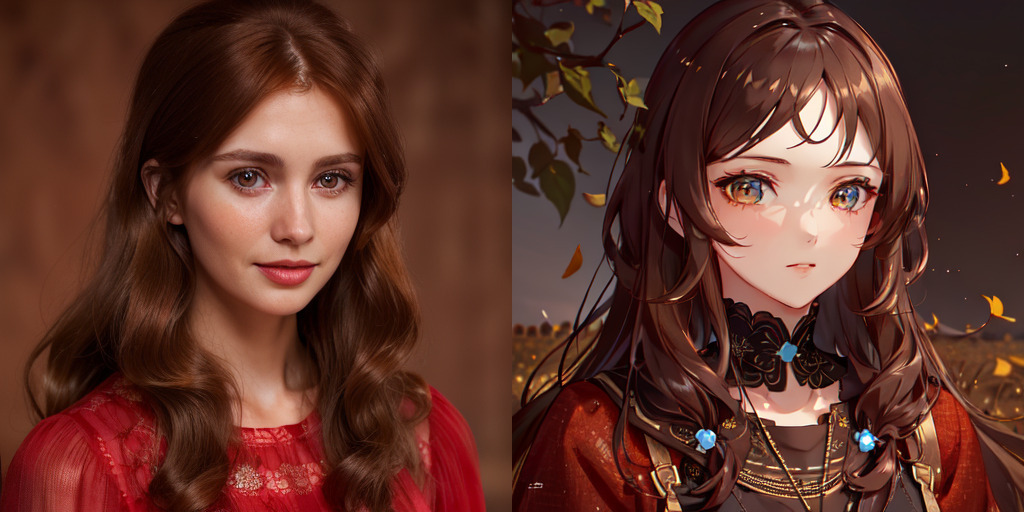
The image-to-image feature is an invaluable tool for generating one image from another. This functionality is particularly useful for style transformations. In this tutorial, we will explore how to utilize the image-to-image feature in ComfyUI, specifically focusing on converting a photo-realistic image into an anime-style picture.
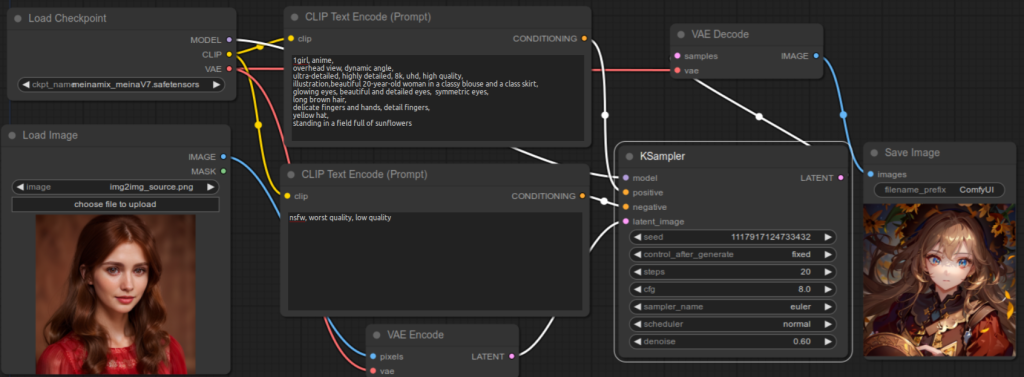
Conceptually, the image-to-image UI in ComfyUI is configured by inputting a source image into the KSampler node. However, it’s important to note that KSampler processes images in latent space (compressed form). Therefore, your initial step involves converting the input image into this latent format. This conversion is achieved using the encoder component of the Variational AutoEncoder (VAE).
To summarize, starting from the default text-to-image workflow in ComfyUI, the following steps are required:
- Add a ‘Load Image’ Node: This node is responsible for loading your input image.
- Add a ‘VAE Encode’ Node: Use this node to transform your input image into a latent image.
- Adjust the Workflow Wiring: Ensure the nodes are correctly interconnected.
- Modify the denoise parameter value: Alter this setting to control the proportion of the source image that is retained in the final generated image.
The process is relatively straightforward. Let’s get started!
Adding a Load Image Node
If you haven’t done so, press Load Default button on the main menu to load the default UI. You should see the following flow for text to image.
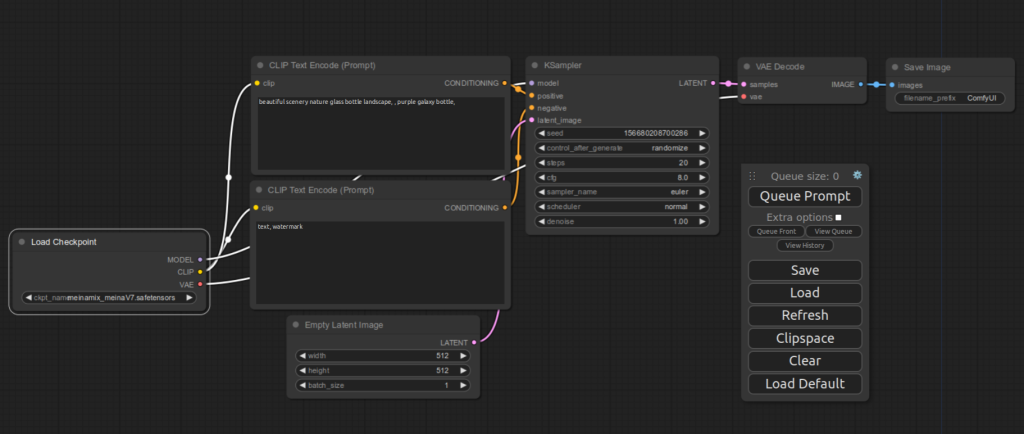
First, delete Empty Latent Image node at the bottom that we don’t need. Select the node then press the DELETE key.
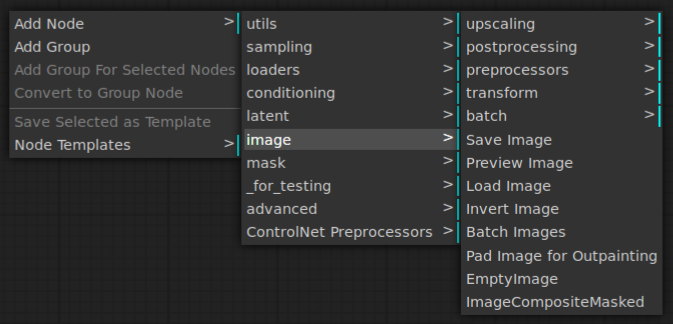
Then, right-click an empty space on the UI and select Add Node | image | Load Image menu item.
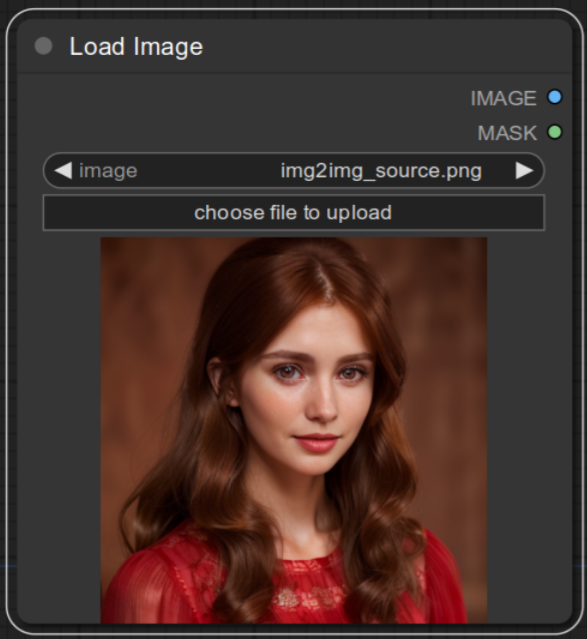
Once you see the Load Image node, load the source image by clicking choose file to upload.
2. Add a VAE Encode Node
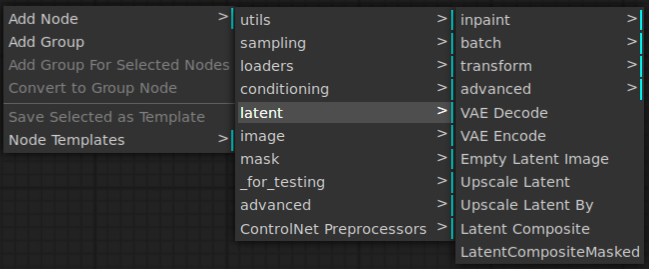
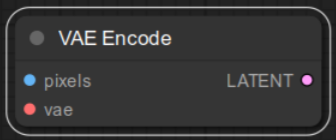
Right-click an empty space on the UI and select Add Node | latent | VAE Encode menu item.
You should see the below node created.
3. Adjust the Workflow Wiring
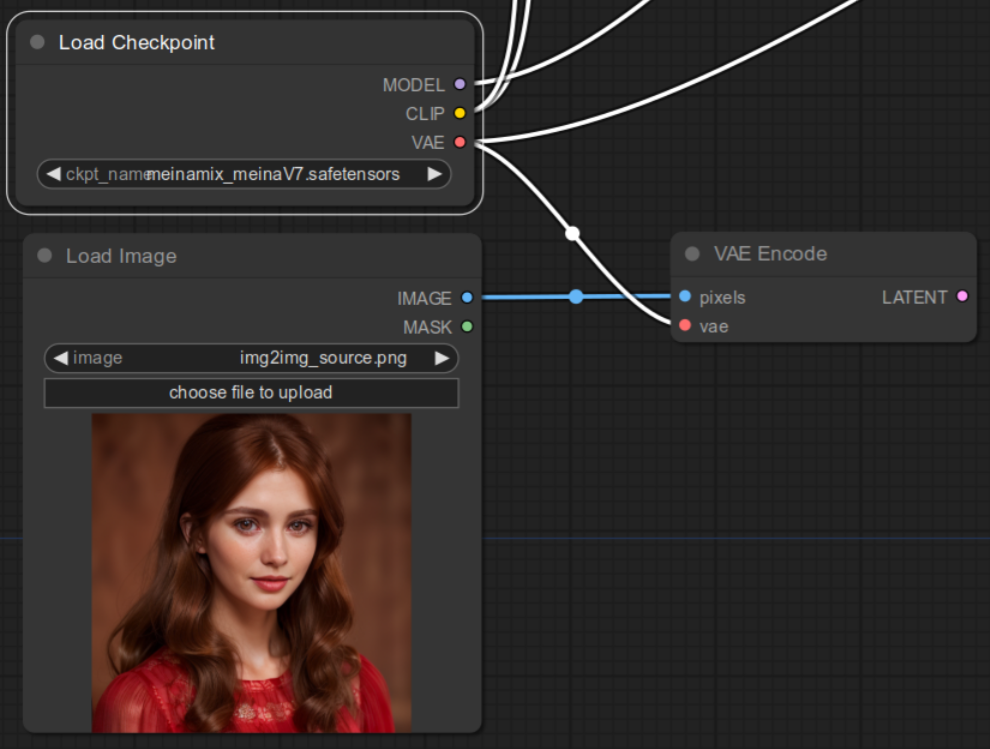
Connect IMAGE outout of Load Image to pixels input of VAE Encode.
Then connect VAE output of Load Checkpoint to vae input of VAE Encode.
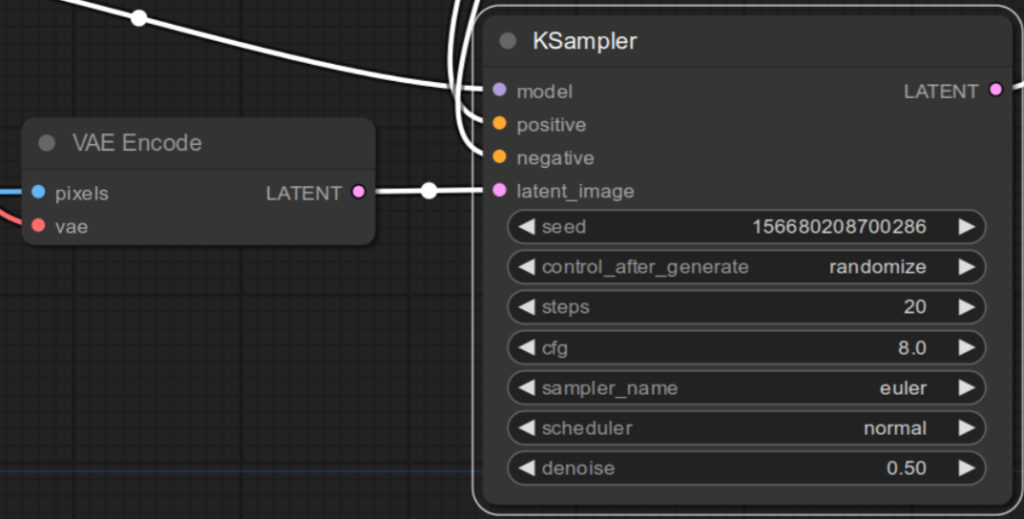
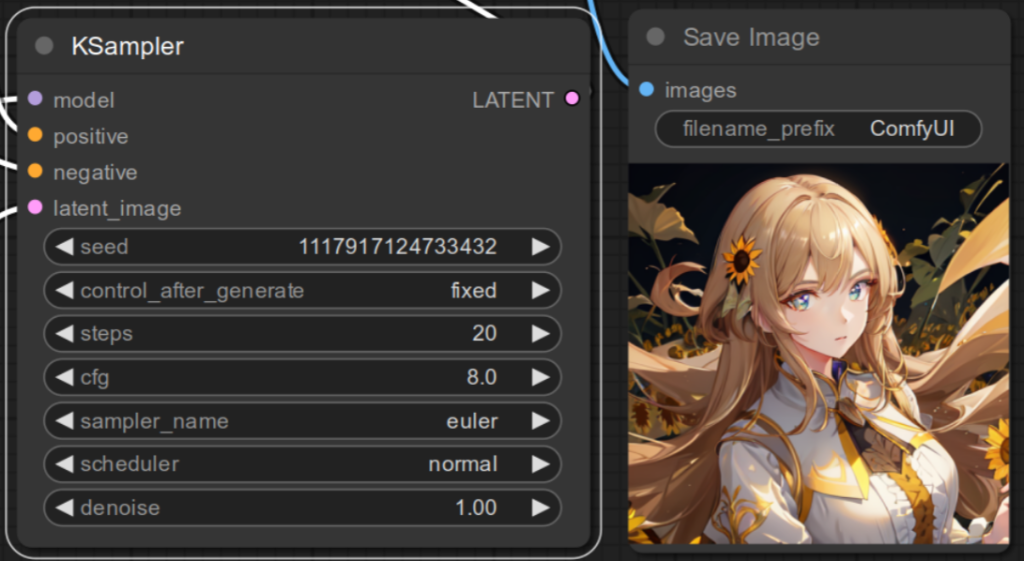
Now connect LATENT output of VAE Encode to latent_image input of KSampler. If denoise value does not show 0.6 (e.g. 0.5 below), set denoise of KSampler to 0.60. This is an arbitrary value and you can adjust in the next section.
Now enter positive and negative prompts that you want to use. In this tutorial, following are used, but feel free to use your own:
Positive prompt1girl, anime,
overhead view, dynamic angle,
ultra-detailed, highly detailed, 8k, uhd, high quality,
illustration,beautiful 20-year-old woman in a classy blouse and a class skirt,
glowing eyes, beautiful and detailed eyes, symmetric eyes,
long brown hair,
delicate fingers and hands, detail fingers,
yellow hat,
standing in a field full of sunflowers
Negative promptnsfw, worst quality, low quality
(Note: The positive prompt includes the phrase “class skirt”. This was intended to be “classy skirt”, but since the prompt was used as is, the original wording has been retained for consistency.)
Now if you press Queue Prompt, you should see an image generated.
4. Modify the denoise parameter value
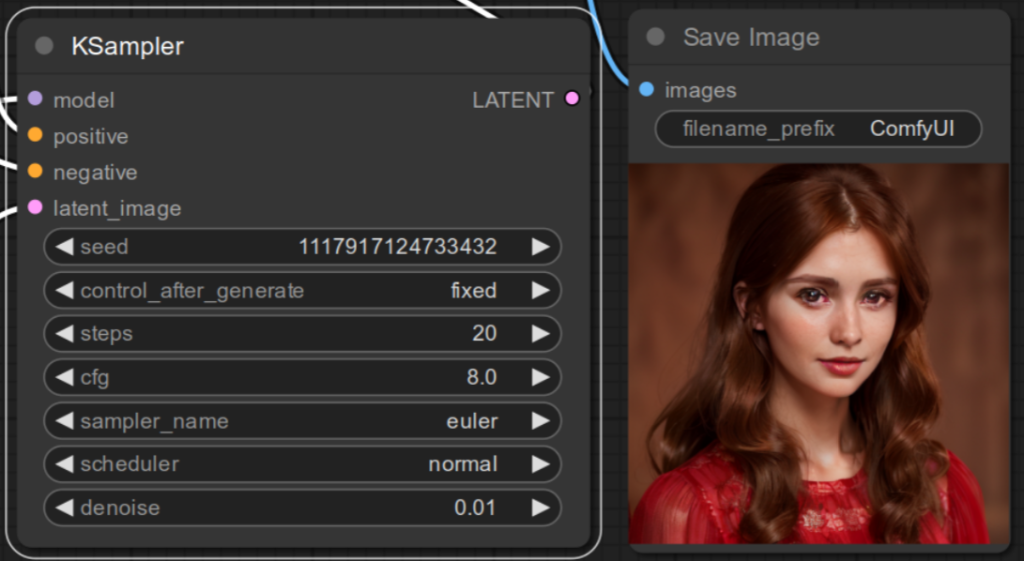
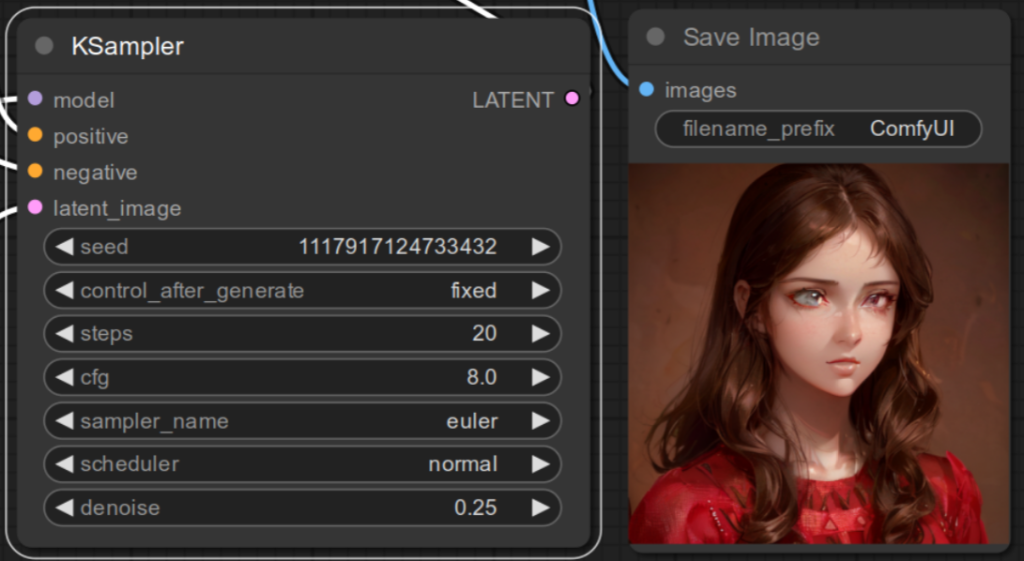
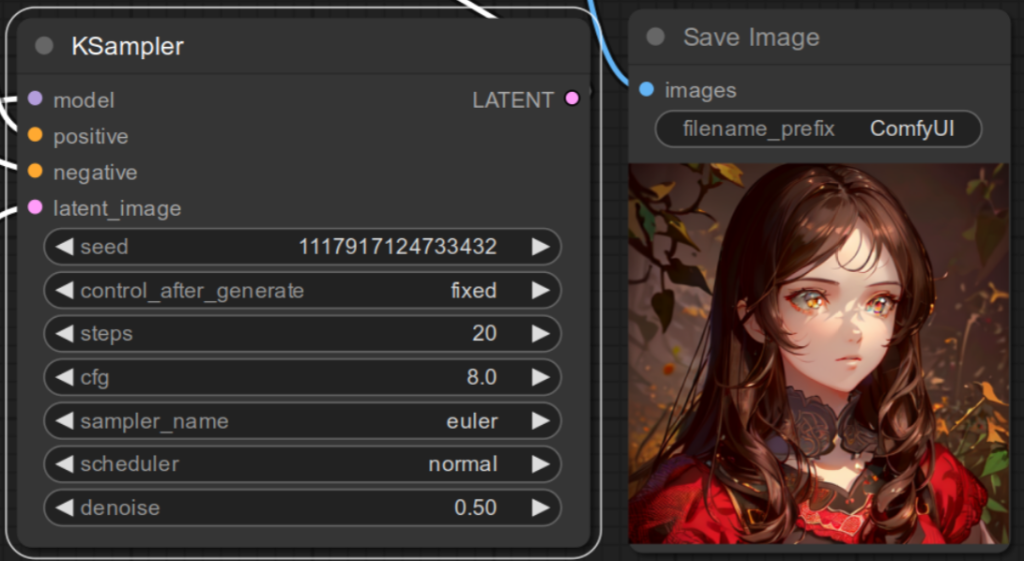
The denoise parameter in KSampler is pivotal for the image-to-image process. It allows you to adjust the extent to which the source image influences the final output. This parameter can be set anywhere from 0 to 1. Currently, setting it to exactly 0 is not possible due to a known error, but you can use a value close to 0. A setting of 0 would ideally keep the original image intact, while a setting of 1 completely disregards the input image, effectively emulating a text-to-image generation process.
Below are examples illustrating the varying effects of different denoise values: 0.01, 0.25, 0.5, 0.75, and 1. I recommend experimenting with this parameter to find the perfect balance for your needs.

References
[1] comfyanonymous. Img2Img Examples. Retrieved from https://comfyanonymous.github.io/ComfyUI_examples/img2img/.