Understanding ControlNet Integration with ComfyUI
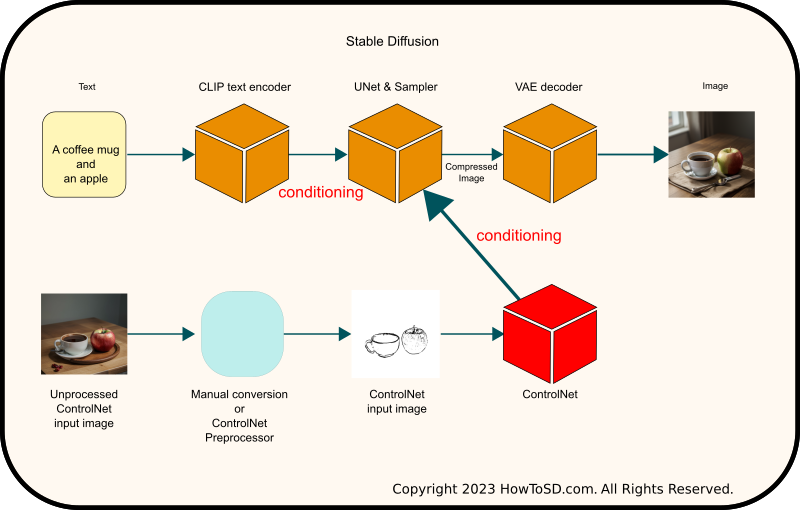
Before diving into the steps for using ControlNet with ComfyUI, let’s first revisit what ControlNet accomplishes. In the Stable Diffusion system, the UNet or Latent Diffusion Model leverages the encoded text output from the CLIP text encoder as a guide for image generation. ControlNet enhances this process by providing additional guidance, known as conditioning, to the UNet. The figure below illustrates the overall architecture of how ControlNet integrates with the Stable Diffusion framework.
ControlNet comes in various models, each tailored to the type of clue you wish to provide during the image generation process. For instance, the Canny model utilizes edge images produced by the Canny edge detection method, while the Depth model employs depth map images. It’s important for newcomers to understand that ControlNet involves two distinct stages:
- Preprocessing: Generating an image that serves as input to ControlNet.
- Image Generation with ControlNet: Using the specific image created in the preprocessing stage as a clue (or conditioning) to guide image generation.
Upon default installation, ComfyUI does not support the preprocessing step, necessitating manual steps or the installation of additional modules. This tutorial will guide you through the manual process of preprocessing and focus primarily on the second stage of image generation with ControlNet. Detailed instructions for this second stage will be provided shortly.
Prerequisite
This tutorial assumes that you have already installed ComfyUI and has successfully generated an image from a text prompt. If you haven’t done that, please follow the tutorial Getting started with ComfyUI.
Installing models
If you already have ControlNet models on your PC
If you have been using Automatic1111, the path to ControlNet weights should be located under stable-diffusion-webui/models/ControlNet or stable-diffusion-webui/extensions/sd-webui-controlnet/models
The directory should contain files like below. Make sure that you have at least scribble as you need this model to follow this tutorial.
...
control_v11p_sd15_canny.pth
control_v11p_sd15_mlsd.pth
control_v11p_sd15_openpose.pth
control_v11p_sd15_scribble.pth
...
The easiest way to make ControlNet models available to ComfyUI is to let it know that path to the existing model directory. To do so, find the file extra_model_paths.yaml.example at the root of the ComfyUI package installation.
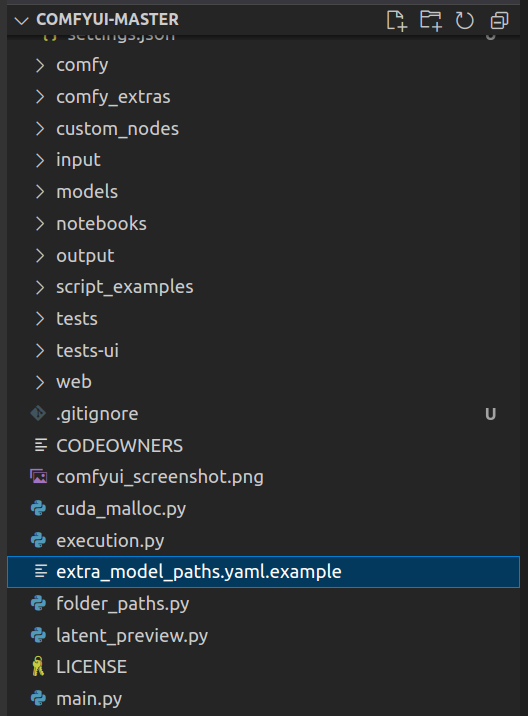
Rename extra_model_paths.yaml.example to extra_model_paths.yaml and edit the file as shown below:
a111:
    base_path: <Put your automatic1111 installation path ending stable-diffusion-webui/>
...
    hypernetworks: models/hypernetworks
    # controlnet: models/ControlNet  # Check if your ControlNet weights are in in this directory. If so, uncomment
    controlnet: extensions/sd-webui-controlnet/models  # If weights are in models/ControlNet, delete this line
You have to restart ComfyUI after editing this file. Now ComfyUI can access your existing ControlNet models.
If you don’t have ControlNet models on your PC
Access HuggingFace and download ControlNet models. In ComfyUI the directory for ControlNet weight is ComfyUI-master/models/controlnet. Copy the downloaded models to this directory and start ComfyUI.
Overview of the steps
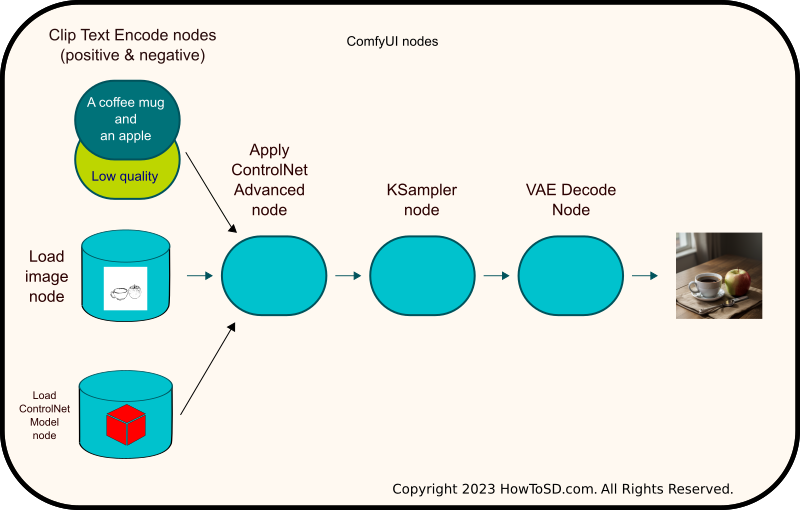
The figure below illustrates the setup of the ControlNet architecture using ComfyUI nodes. In this configuration, the ‘ApplyControlNet Advanced’ node acts as an intermediary, positioned between the ‘KSampler’ and ‘CLIP Text Encode’ nodes, as well as the ‘Load Image’ node and the ‘Load ControlNet Model’ node. This crucial node is tasked with supplying both the encoded text conditioning and the scribble control conditioning to the KSampler. Detailed instructions on how to add and connect these nodes in ComfyUI are outlined in the sections that follow.
Prepare a scribble image
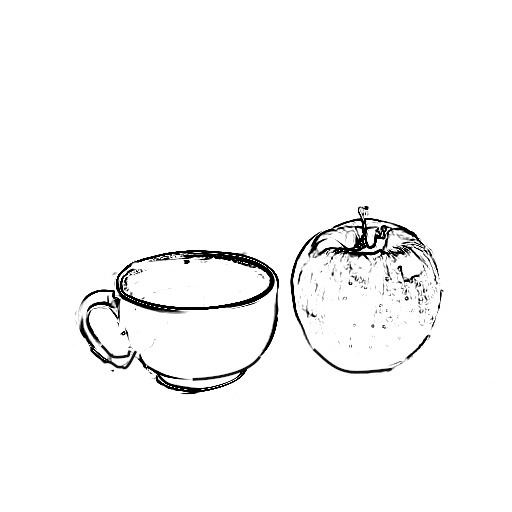
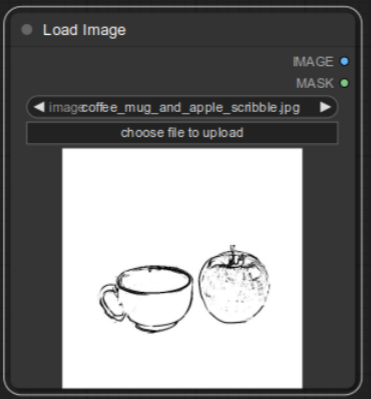
The first step in utilizing ControlNet is to prepare an input image. You have several options for sourcing this image: you can download a suitable scribble image from the internet, or create one using an image editor like GIMP. Alternatively, for the purposes of this tutorial, you may use the scribble image I’ve provided below. Ensure that the image size is standardized at 512px by 512px for optimal results.
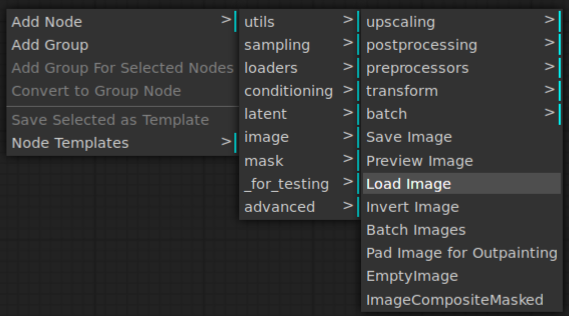
Now go to ComfyUI and right-click on the area where you want to add a node to load the scribble. When you see the menu, select Add Node | image | Load Image.
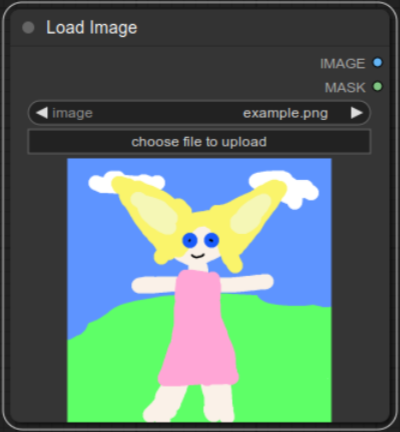
You should see the Load Image node below.
Once you select the menu item, you should see a new node created.
Click choose file to upload and pick the scribble file. After the file is uploaded, you should see the scribble file in the node.
Add a node to load a ControlNet model
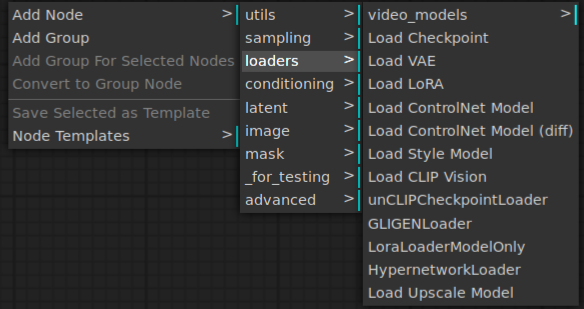
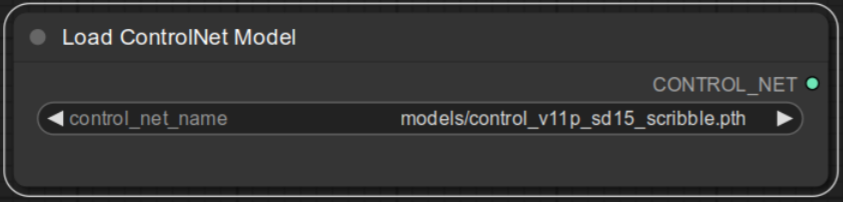
Right-click on the UI to display the menu. From the menu, select Add Node | loaders | Load ControlNet Model
Once the node is created, select control_v11p_sd15_scribble.pth.
Add a node to apply ControlNet model
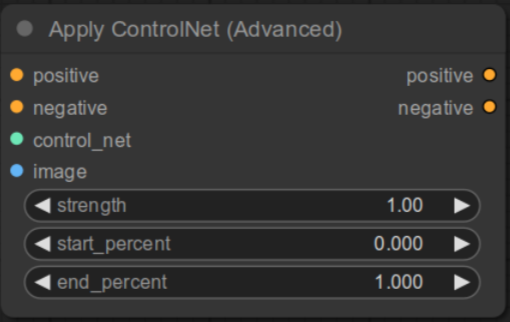
Right-click on the UI to display the menu. From the menu, select Add Node | conditioning | Apply ControlNet (Advanced). Make sure that you select Advanced instead of without Advanced.
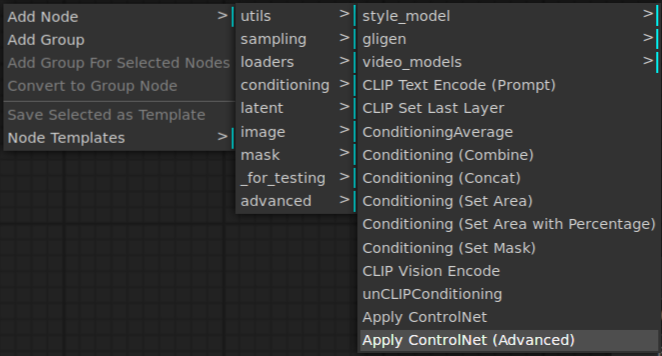
Apply ControlNet (Advanced) node should be added and you should see below.
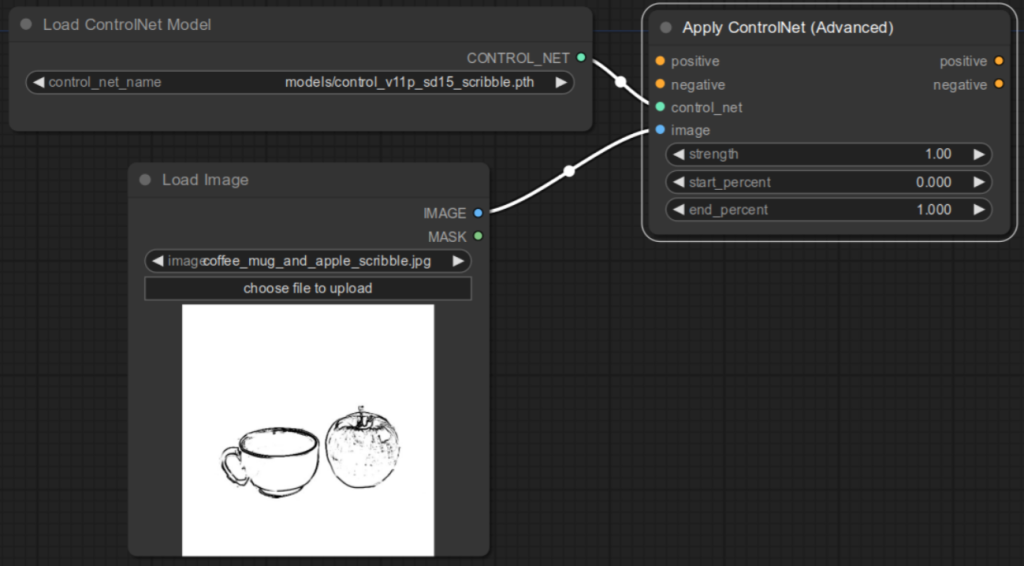
Now connect CONTROL_NET output of Load Controlnet Model node to control_net input of Apply ControlNet (Advanced).
Then connect IMAGE output of Load Image node to image input of Apply ControlNet (Advanced).
Move onto CLIP TextEncode (Prompt) node. CONDITIONING output should be connected to positive input of KSampler. Disconnect the connection and connect to positive input of Apply ControlNet (Advanced) instead. Do the same for negative prompt.
For this tutorial, you can enter the following prompts into CLIP Text Encode nodes:
Positive node:An apple and a cup of coffee, a table,
high quality, highly detailed, 4k, raw photo, photorealistic, uhd
Negative node:
Low quality, drawing, painting
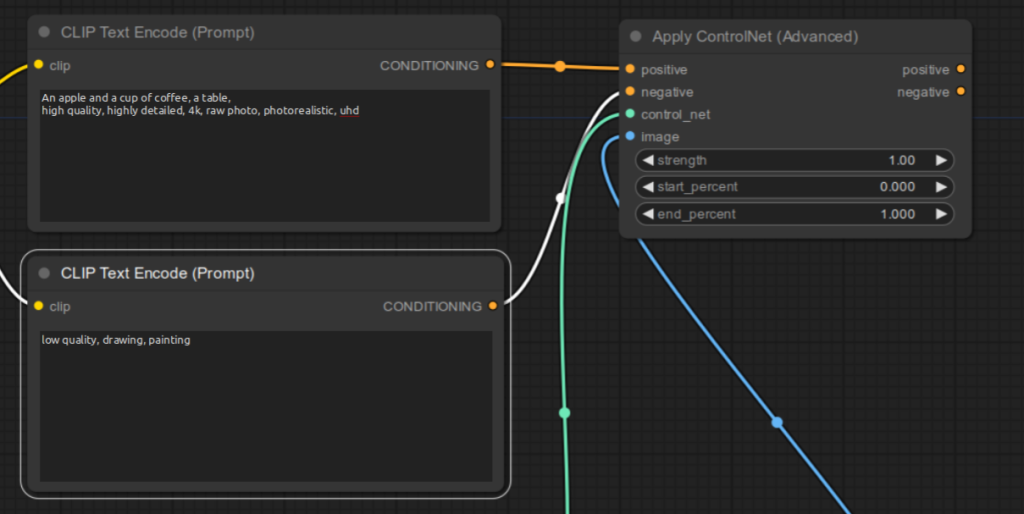
Now connect the positive output of ApplyControlNet (Advanced) to positive input of KSampler. Do the same for negative.
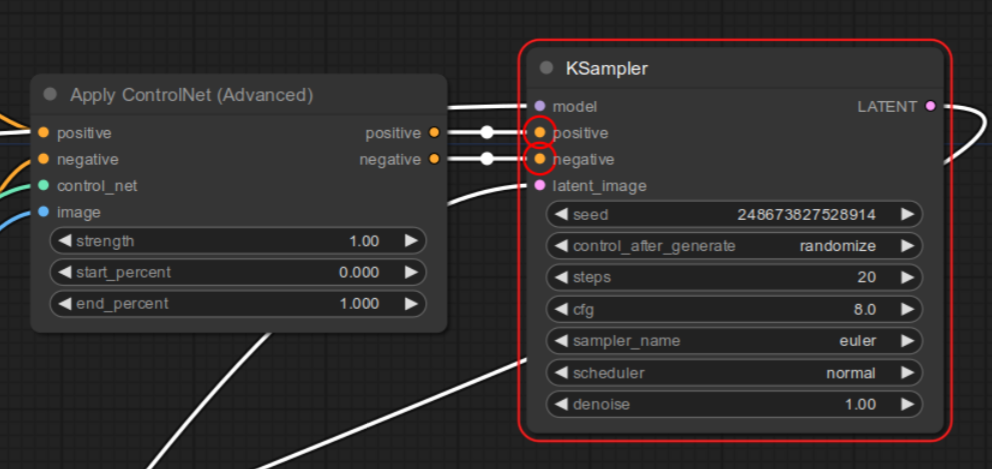
Congratulations. You are done with wiring nodes. If you hit Queue Prompt, you should see the image generated.
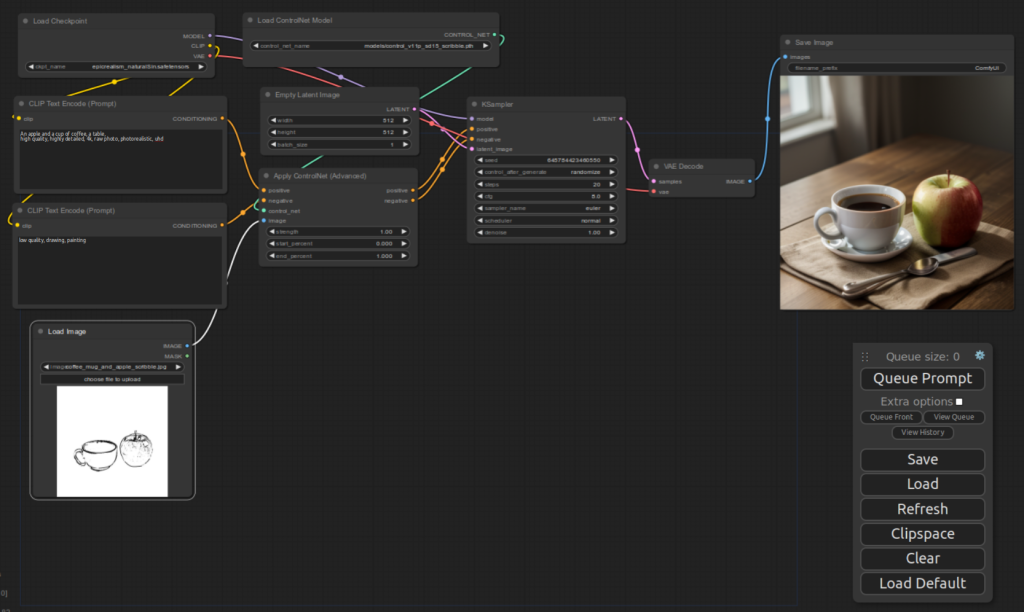
Here is the final image.
