Welcome to the third installment of our series on using ControlNet in Automatic1111. This tutorial builds upon the concepts introduced in How to use ControlNet in Automatic1111 Part 1: Overview and How to use ControlNet in Automatic1111 Part 2: Installation. If you haven’t read them yet, we recommend doing so. In this segment, we’ll cover using lineart and OpenPose images as ControlNet input.
Using Lineart as ControlNet Input
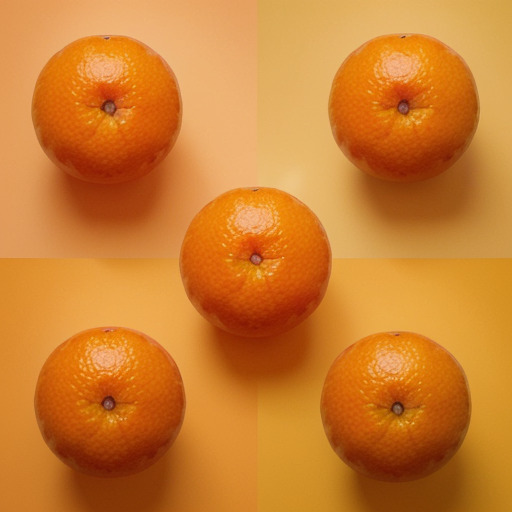
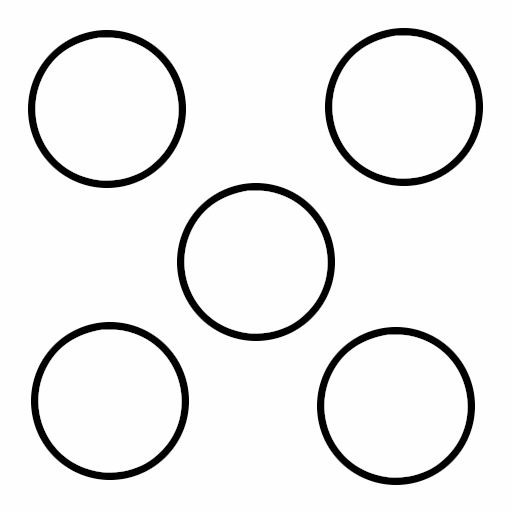
Our objective in this section is to create an image featuring five oranges arranged as depicted in the cover photo of this page. The first step is to prepare an image with five circles, like the one shown below, using photo editing software. Ensure that the image dimensions are 512×512 pixels to align with this tutorial’s steps. You are welcome to use the provided image, but please check that its resolution remains 512×512 after downloading it to your computer.
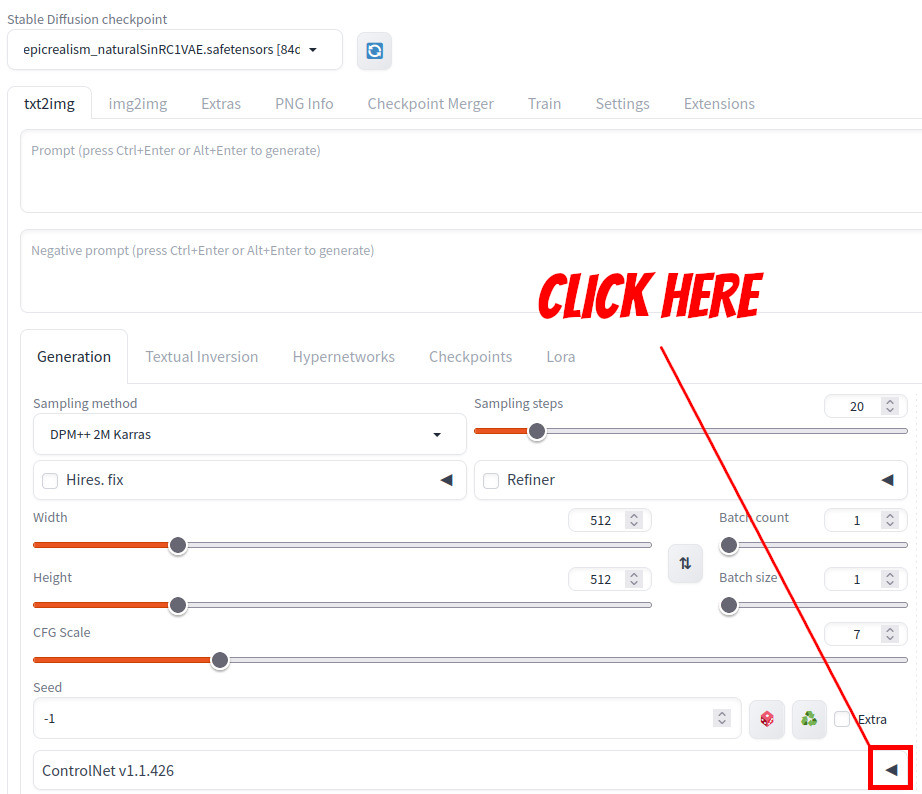
Now on the txt2img tab, click the triangular button in the ControlNet section as shown below.
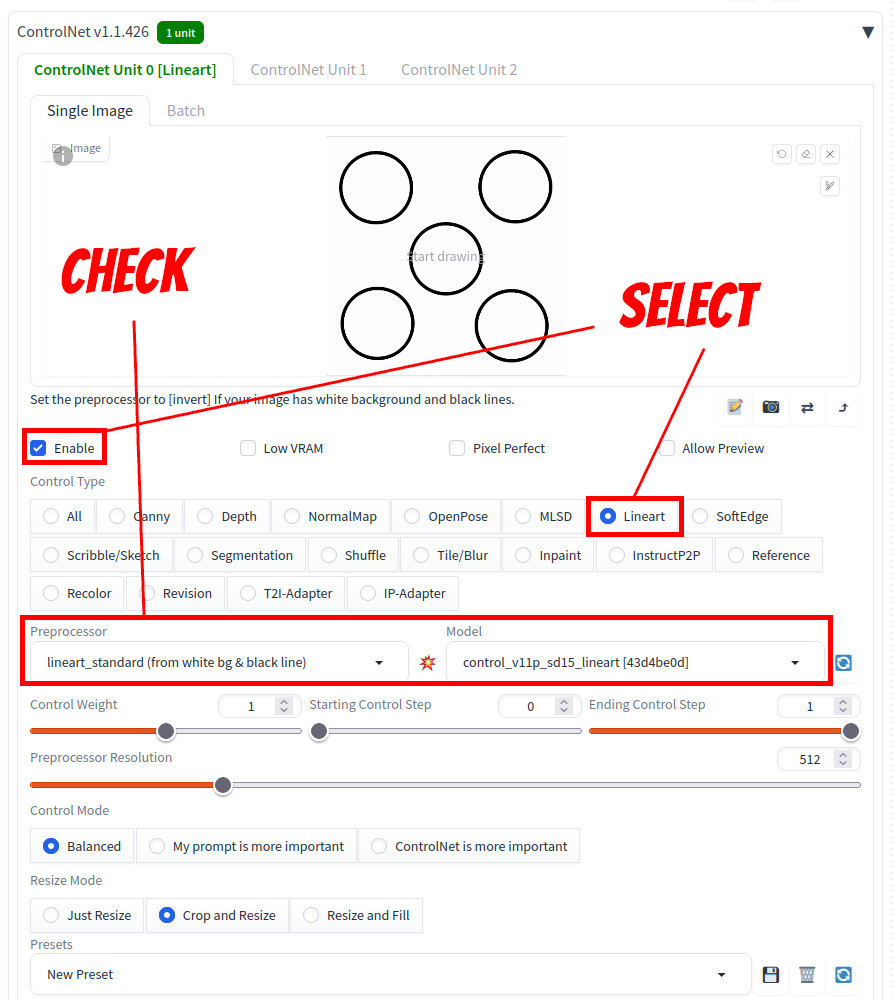
ControlNet section should open up. There are many options but don’t be overwhelmed. You only need to adjust a few for this tutorial to get the result.
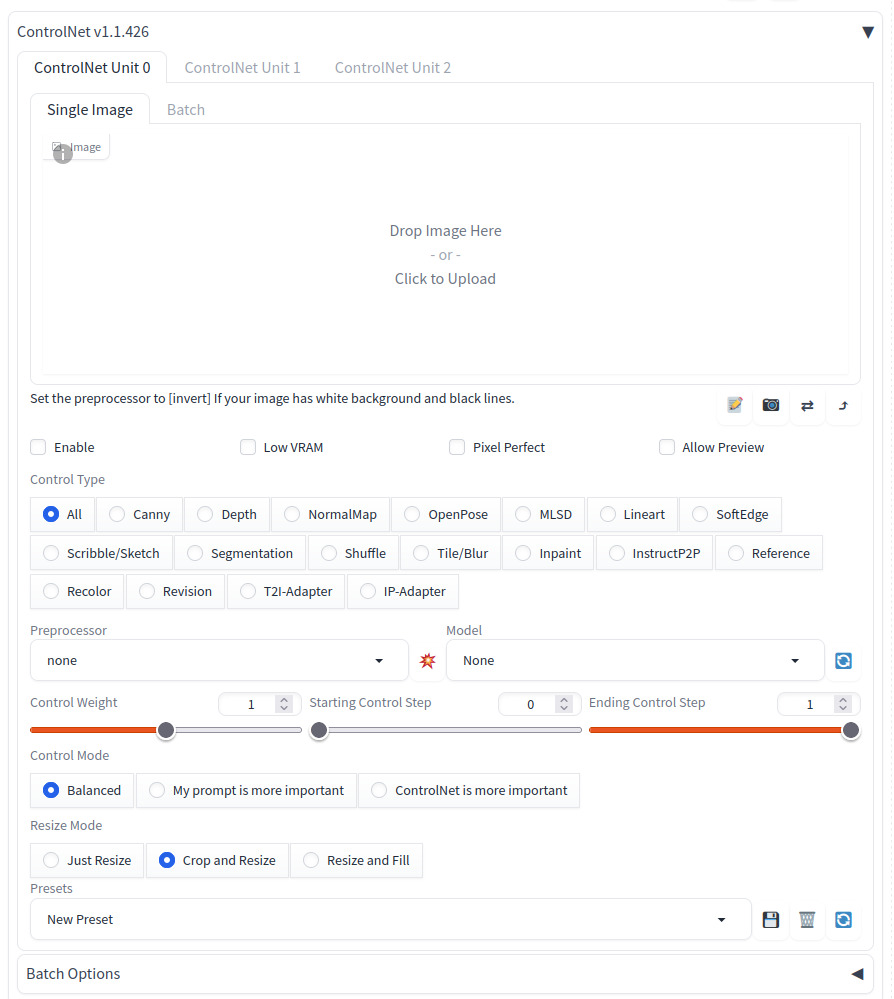
First, either drag and drop your five-circle image to the top of the section or click the area to select the image you’ve created or downloaded. Next, activate the feature by clicking ‘Enable‘ and select ‘Lineart‘ as the Control Type, as depicted below. Ensure that the Preprocessor is set to ‘lineart_standard (from white bg & blackline)‘ and the Model to ‘control_v11p_sd15_lineart'. If you haven’t downloaded the lineart model as outlined in our previous tutorial, it won’t appear in the list. To download the model, refer back to the previous tutorial for detailed steps.
Enter prompts:
Positive:A photo of five oranges,Negative:
highly detailed, photorealistic, 4k, uhdlow quality
This step is optional, but in order to get the same result as this tutorial, load epicrealism_naturalSinRC1VAE model. Refer to the generation parameters listed below. If you click Generate, oranges are generated at the desired positions.
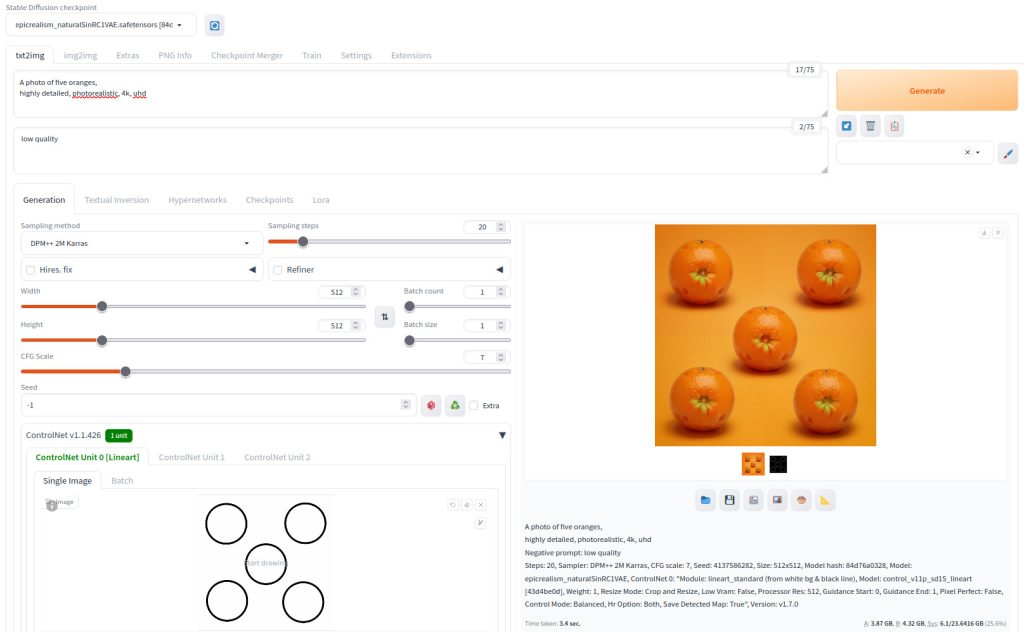
You may need to try a few times until you see ones with less flaws. Here is the final result. If you want to enhance quality, you can send the image to Inpainting tab and touch up.
Here are the generation parameters of this image
A photo of five oranges,
highly detailed, photorealistic, 4k, uhd
Negative prompt: low quality
Steps: 20, Sampler: DPM++ 2M Karras, CFG scale: 7, Seed: 3849377827, Size: 512x512, Model hash: 84d76a0328, Model: epicrealism_naturalSinRC1VAE, ControlNet 0: "Module: lineart_standard (from white bg & black line), Model: control_v11p_sd15_lineart [43d4be0d], Weight: 1, Resize Mode: Crop and Resize, Low Vram: False, Processor Res: 512, Guidance Start: 0, Guidance End: 1, Pixel Perfect: False, Control Mode: Balanced, Hr Option: Both, Save Detected Map: True"Using OpenPose as ControlNet Input
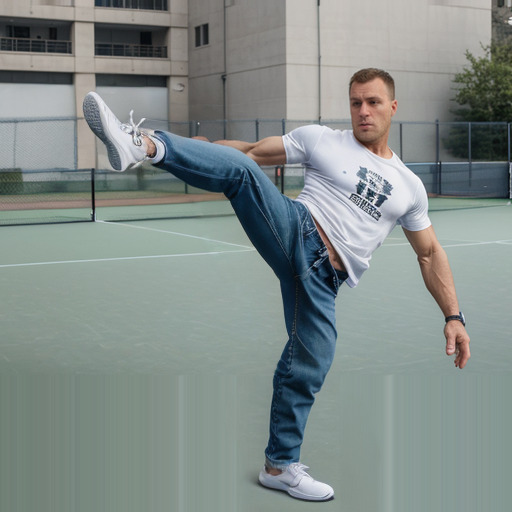
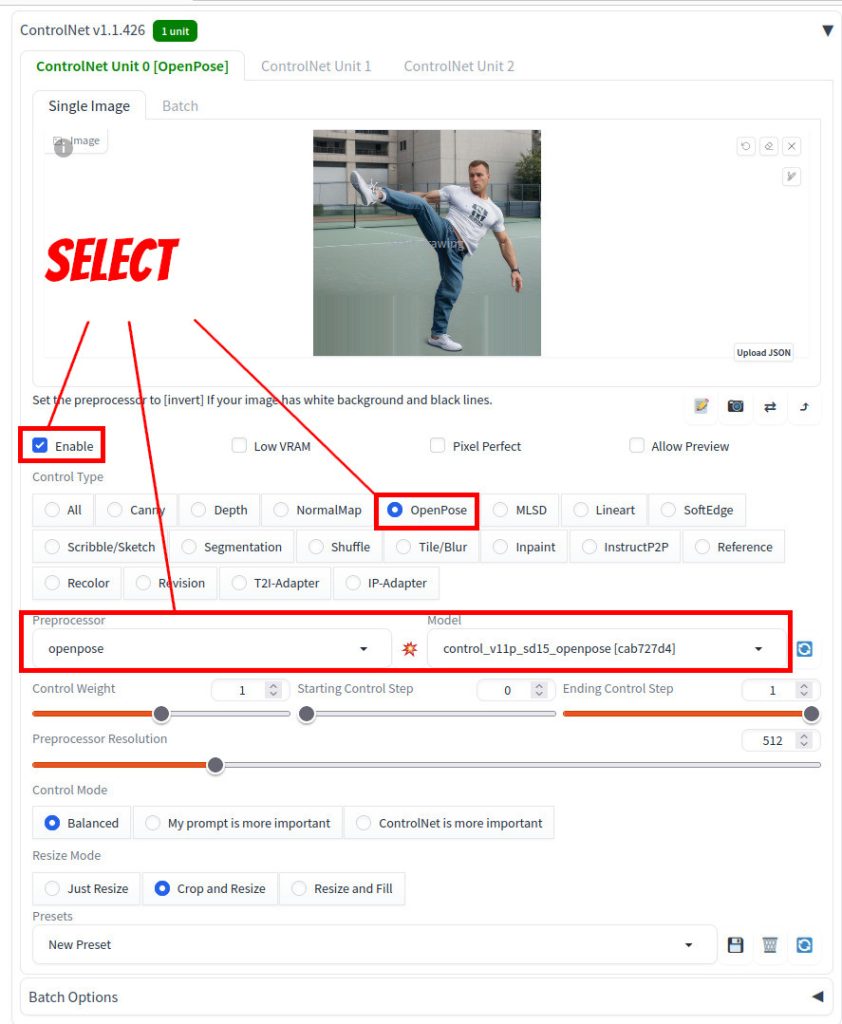
Now let’s move onto extracting a pose from an image and use the pose as the input to ControlNet. Here is the image we will be using.
After loading the source image, select OpenPose in ControlType. Also, select openpose in Preprocessor. Verify that control_v11p_sd15_openpose is selected in Model.
Enter prompts:
Positive prompt:photo-realistic, 4k, uhd, masterpiece, highly detailed, a male humanoid robot doing a high kick in space, body armor, face cover, stars and space ships in the background
Negative prompt: nsfw, low quality, bad quality, mutated limbs, extra limbs, disfigured, ugly
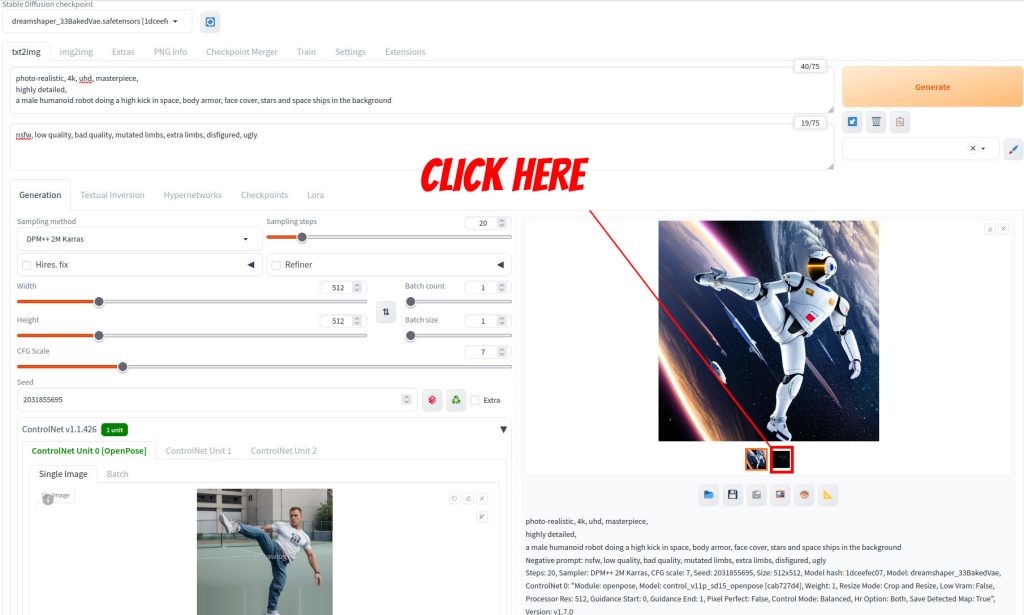
I used dreamshaper_33BakedVae model for this example. Now click Generate. You should see an image like below.

Here are the generation parameters
photo-realistic, 4k, uhd, masterpiece,
highly detailed,
a male humanoid robot doing a high kick in space, body armor, face cover, stars and space ships in the background
Negative prompt: nsfw, low quality, bad quality, mutated limbs, extra limbs, disfigured, ugly
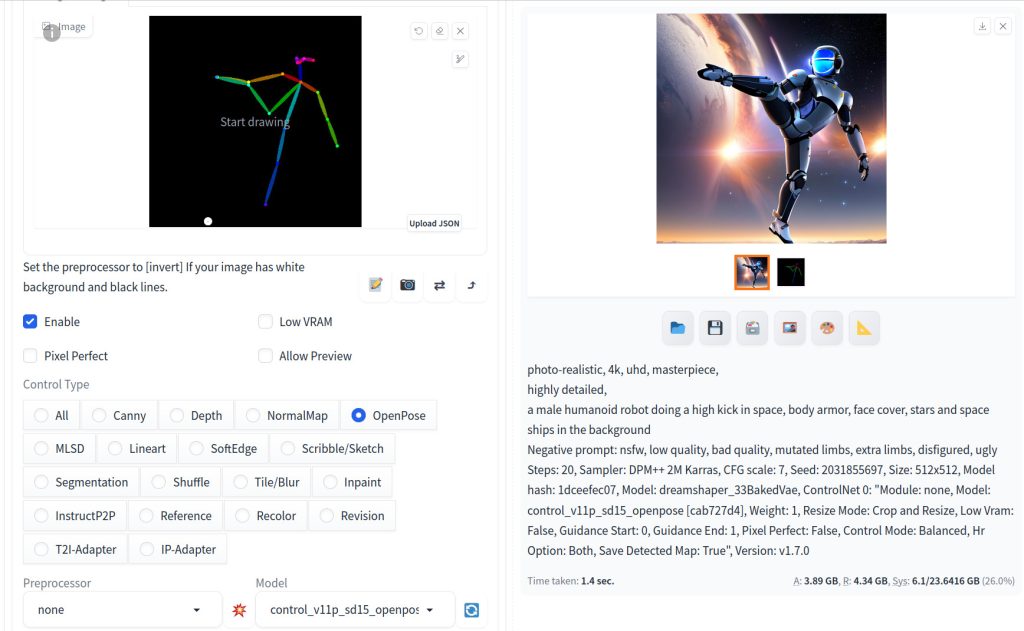
Steps: 20, Sampler: DPM++ 2M Karras, CFG scale: 7, Seed: 2031855695, Size: 512x512, Model hash: 1dceefec07, Model: dreamshaper_33BakedVae, ControlNet 0: "Module: openpose, Model: control_v11p_sd15_openpose [cab727d4], Weight: 1, Resize Mode: Crop and Resize, Low Vram: False, Processor Res: 512, Guidance Start: 0, Guidance End: 1, Pixel Perfect: False, Control Mode: Balanced, Hr Option: Both, Save Detected Map: True"As we mentioned, image generation using ControlNet is a two-step process. First step in this example is to extract a pose from the given image, and the second step is to feed the pose image to ControlNet which works with Stable Diffusion to generate the desired image. Can we see the intermediate pose image? Yes we can. Let’s click the black square just below the generated image as shown below.
You will see the OpenPose image is now loaded. You can click the down arrow button to download the image to your browser’s save directory on your computer.
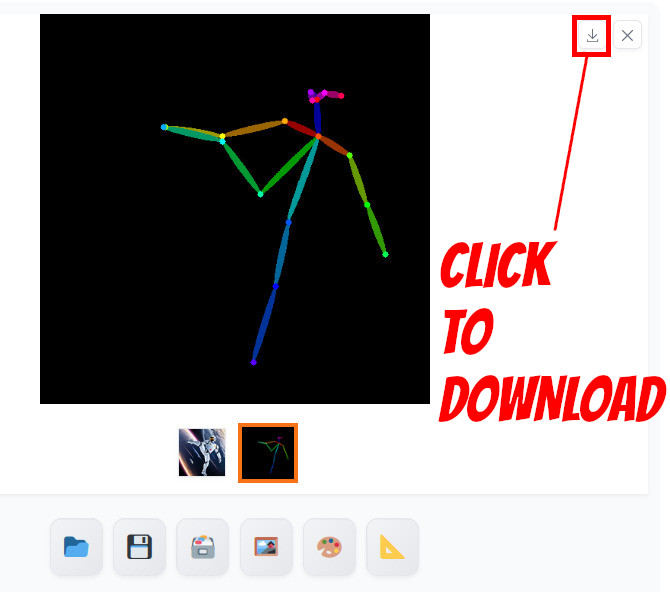
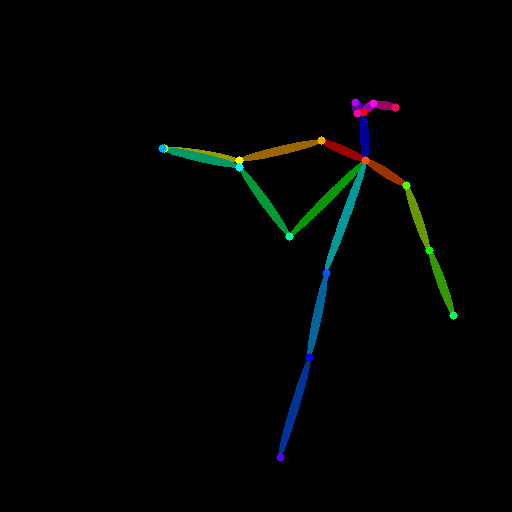
Here is the actual pose image.
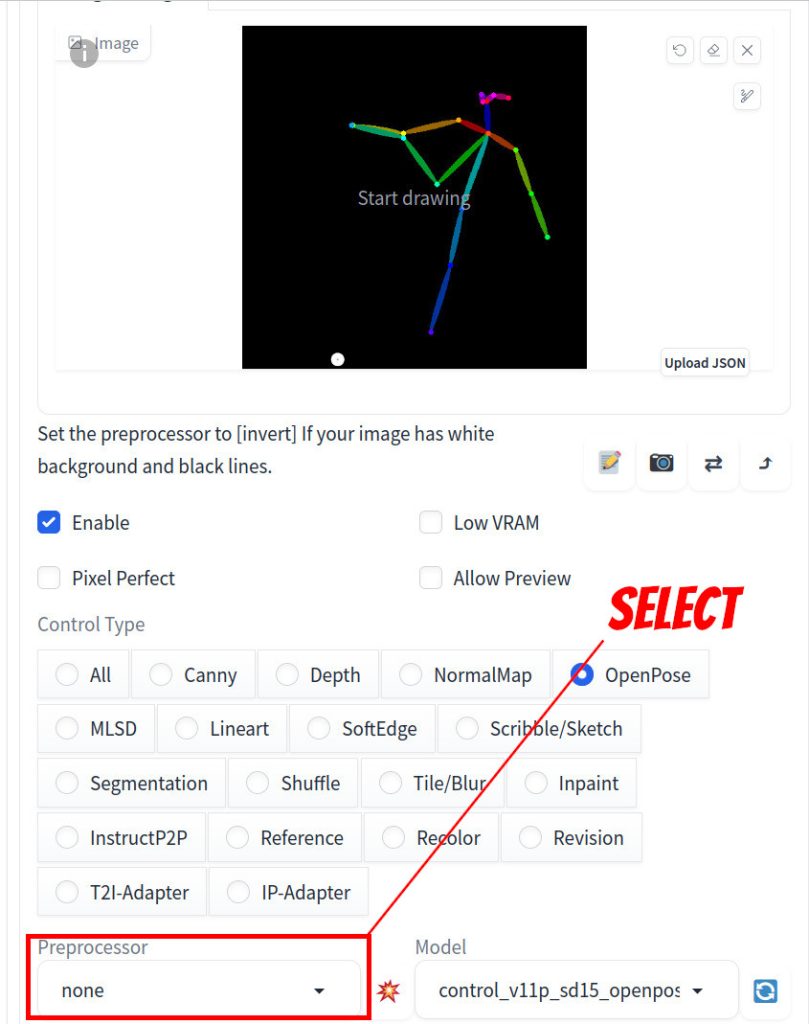
Using pre-generated preprocessed image as ControlNet input
Now let’s try using this OpenPose image as the input for ControlNet. Load the image to the ControlNet section (you are more than welcome to use the image above).
Make sure that you select none in Preprocessor. I updated the seed for this example, but that is optional. These are the only changes that you need to make.
Now hit generate, you should see an image of a robot following the OpenPose input.
Congratulations! You have now gained the essential knowledge needed to effectively use ControlNet. With a variety of ControlNet models available, each offering its unique characteristics, there’s much to explore. For more detailed information, please refer to the references section below.
References
[1] Mikubill. sd-webui-controlnet. Retrieved from https://github.com/Mikubill/sd-webui-controlnet.
[2] Lvmin Zhang. ControlNet. https://github.com/lllyasviel/ControlNet.