An AI model requires a large amount of data to train. However, there are cases that the pretrained model does not support the generation of specific art style or an object as the model was not trained with data containing the style or object. LoRA was invented as a way to customize the model with the small amount of data. It is not a full-fledged model so it works in conjunction with the main model. Though Fooocus does not support training a LoRA yet, you can use a LoRA that is trained by someone else and there are many LoRAs available on model sharing websites. In this tutorial, we will be covering how to use a LoRA in Fooocus.
What type of LoRAs to use
When you look for a LoRA, look for the one for SDXL. SD 1.5 LoRAs are also supported in Fooocus to some extent but the steps to set up are more complicated and you may not get the ideal result, so it’s better to stick to the LoRAs for SDXL for now.
When you download a LoRA, pay attention to the LoRA creator’s note about the trigger word. In this example, we will be using Glass Sculptures LoRA (sdxl_glass.safetensors) which I downloaded from a model share website. According to the author for this LoRA, trigger words are translucent and transparent, and the example prompt was a glass sculpture of [], transparent, translucent, reflections, [styles, etc], so I made a note of these when I downloaded the LoRA.
Installing LoRAs
Make sure that the LoRA has .safetensors extension. Copy the file to the Fooocus/models/loras folder where Fooocus is your installation directory. For example, in our case, the path should be Fooocus/models/loras/sdxl_glass.safetensors.
Using LoRAs
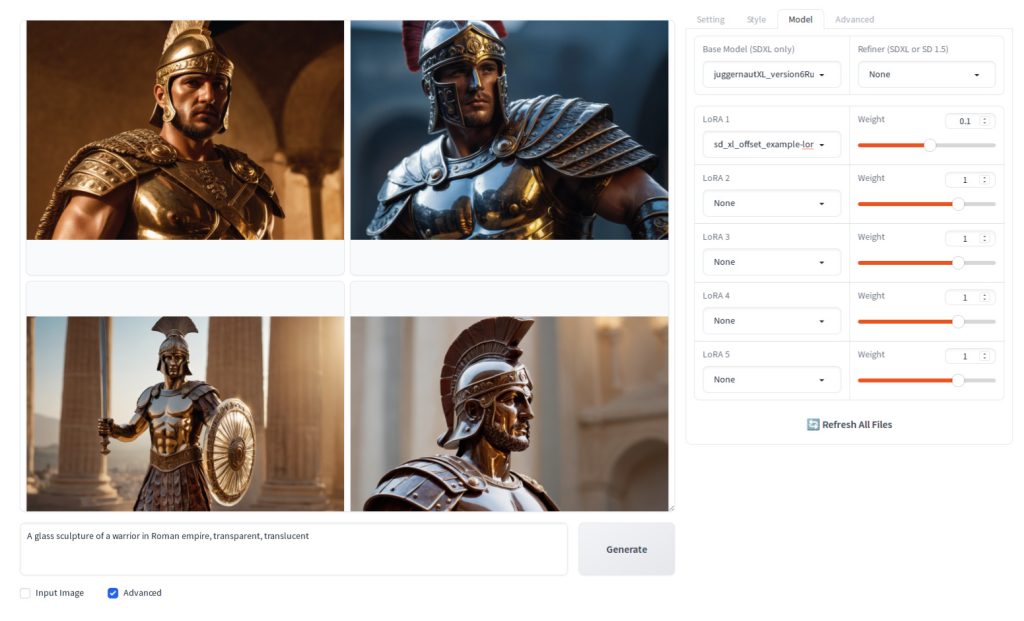
Before we use LoRA, let’s see if we can get an ideal result without LoRA. If you enter “A glass sculpture of a warrior in Roman empire, transparent, translucent” in the prompt and press Generate, you get two realistic looking warriors and two metal sculptures like below. Clearly this is not what we want.
Generation parameters (for the first image)
{
"Prompt": "A glass sculpture of a warrior in Roman empire, transparent, translucent",
"Negative Prompt": "",
"Fooocus V2 Expansion": "A glass sculpture of a warrior in Roman empire, transparent, translucent, chosen, full, detailed, intricate, elegant, intense, sparkling, highly vivid, dramatic, dynamic light, thought, sharp focus, bright, incredible fine detail, perfect composition, cinematic, beautiful, stunning, symmetry, illuminated, best, inspired, unique, creative, positive, attractive, confident, calm",
"Styles": "['Fooocus V2', 'Fooocus Enhance', 'Fooocus Sharp']",
"Performance": "Speed",
"Resolution": "(1152, 896)",
"Sharpness": 2,
"Guidance Scale": 4,
"ADM Guidance": "(1.5, 0.8, 0.3)",
"Base Model": "juggernautXL_version6Rundiffusion.safetensors",
"Refiner Model": "None",
"Refiner Switch": 0.5,
"Sampler": "dpmpp_2m_sde_gpu",
"Scheduler": "karras",
"Seed": 5931034287099445037,
"LoRA 1": "sd_xl_offset_example-lora_1.0.safetensors : 0.1",
"Version": "v2.1.864"
}
Now that we confirmed that we cannot get the image that we want with this setting, so let’s add LoRA. On the Model tab, click the LoRA2 dropdown list, and select the LoRA that you want to use. If you do not see the LoRA, then check to make sure that you have actually moved the file to the LoRA directory.
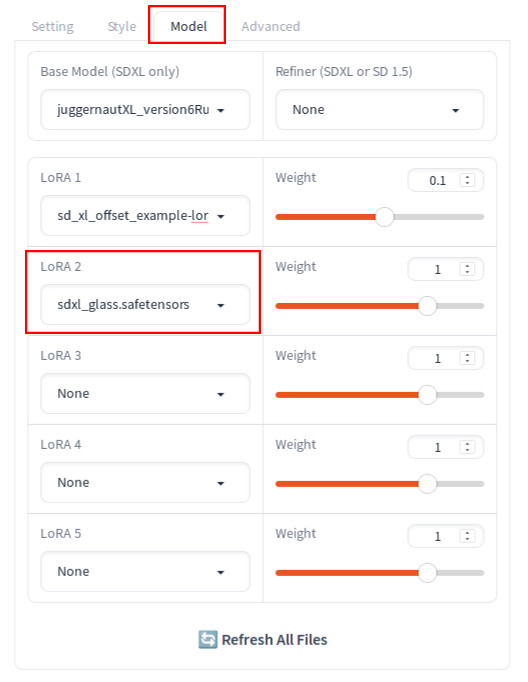
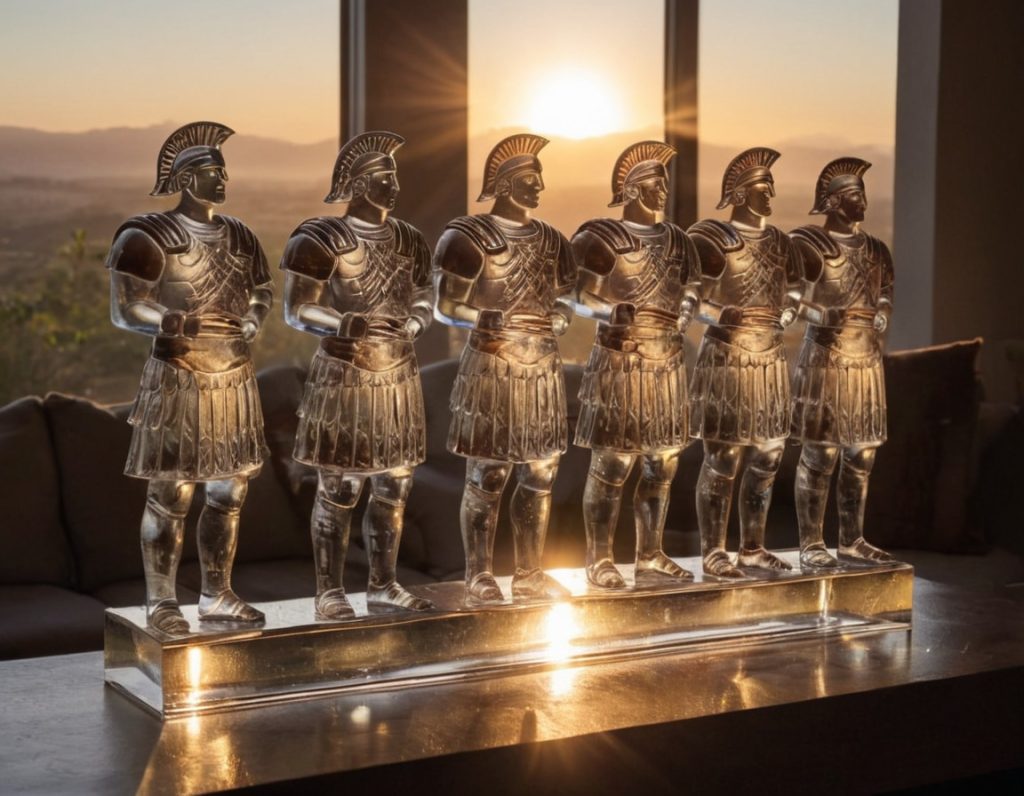
Press Generate, and you should see that glass sculptures of warriors generated this time.
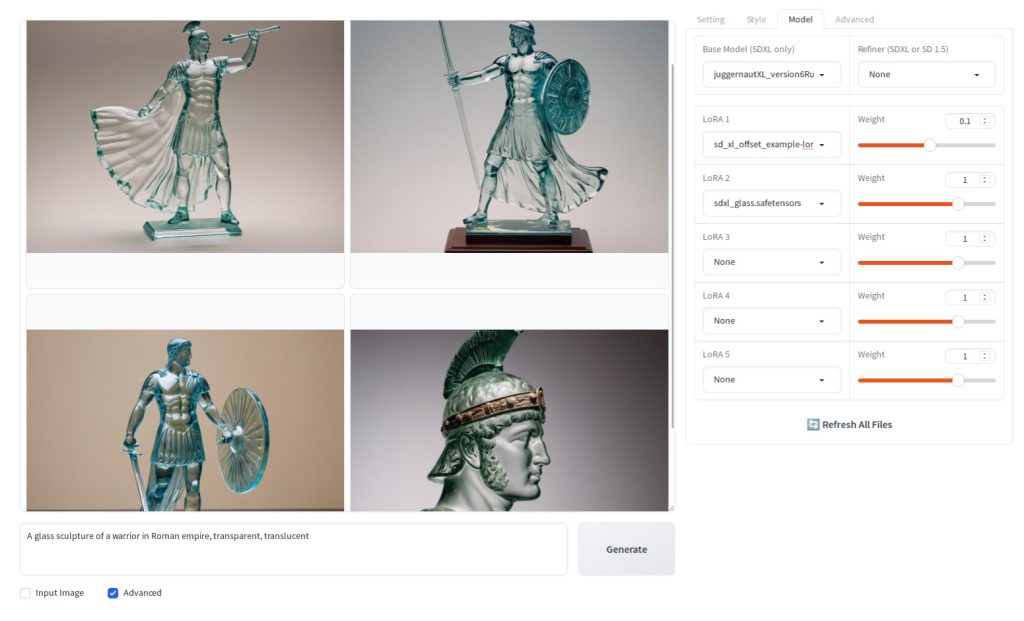
Note that sometimes you may see the effect of LoRA is too strong. If this happens, you may need to lower the Weight field value for the LoRA.
Using LoRA can significantly enhance your creative capabilities, underscoring one of Stable Diffusion’s key strengths as an open-source model: empowering anyone to develop their own LoRA with custom data. By mastering the creation of a LoRA, you can further make your creative aspirations come to life. Keep an eye out for our upcoming LoRA training tutorial!