In this tutorial, we will discuss how to upscale an image using Fooocus. We will be using the following prompt:
Portrait of a kitten with a beautiful 25-year-old woman wearing a red turtle-neck sweater and jeans. The image was taken on the beach by a professional photographer using Canon 5d mark iv.Base model is juggernautXL_version6Rundiffusion.safetensors.
Steps
If you do not have an image that you want to upscale, the first step is to generate a photo. If you enter the prompt and press Generate, you should get an image like below:
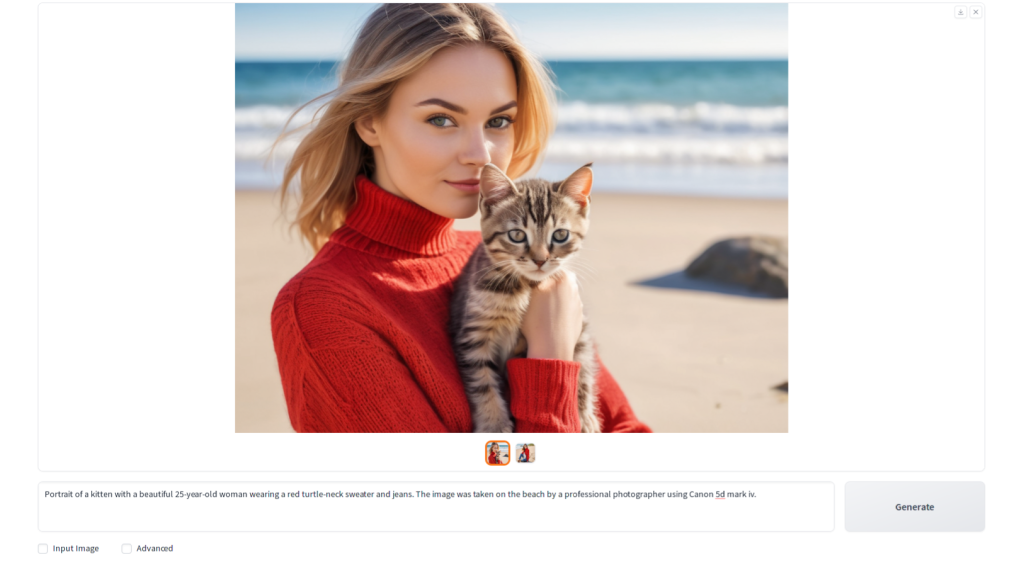
Now check Input Image and Advanced at the bottom of the screen.
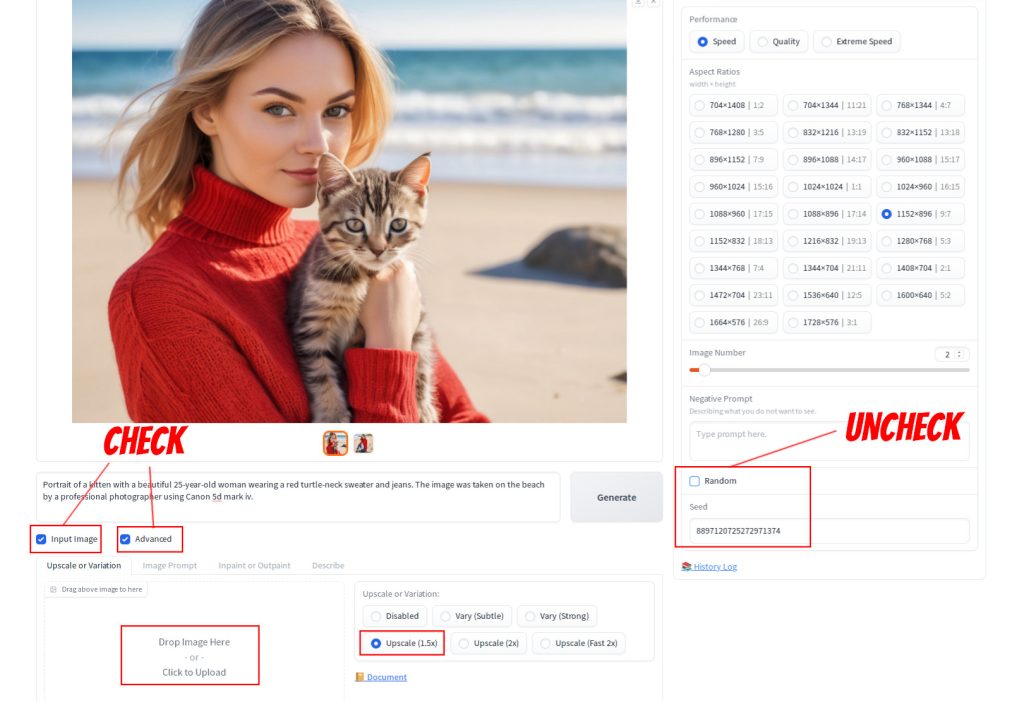
Now open your file explorer application (e.g. Windows Explorer, Mac Finder) , drag the image from the explorer into the area Drop Image Here, or you can click the area to select the file. You can also try dragging the image from the top of the screen into this area, but it may not work depending on the browser you are using.
Select Upscale (1.5x) or Upscale (2x). On the right side of the screen, uncheck Random to use the same seed. You can also adjust the number of images to generate by changing the Image Number field. Now press Generate, you should see two upscaled images generated. Since the original image size was 1152 w x 896 h, the size of the upscaled images is 1728 x 1344.
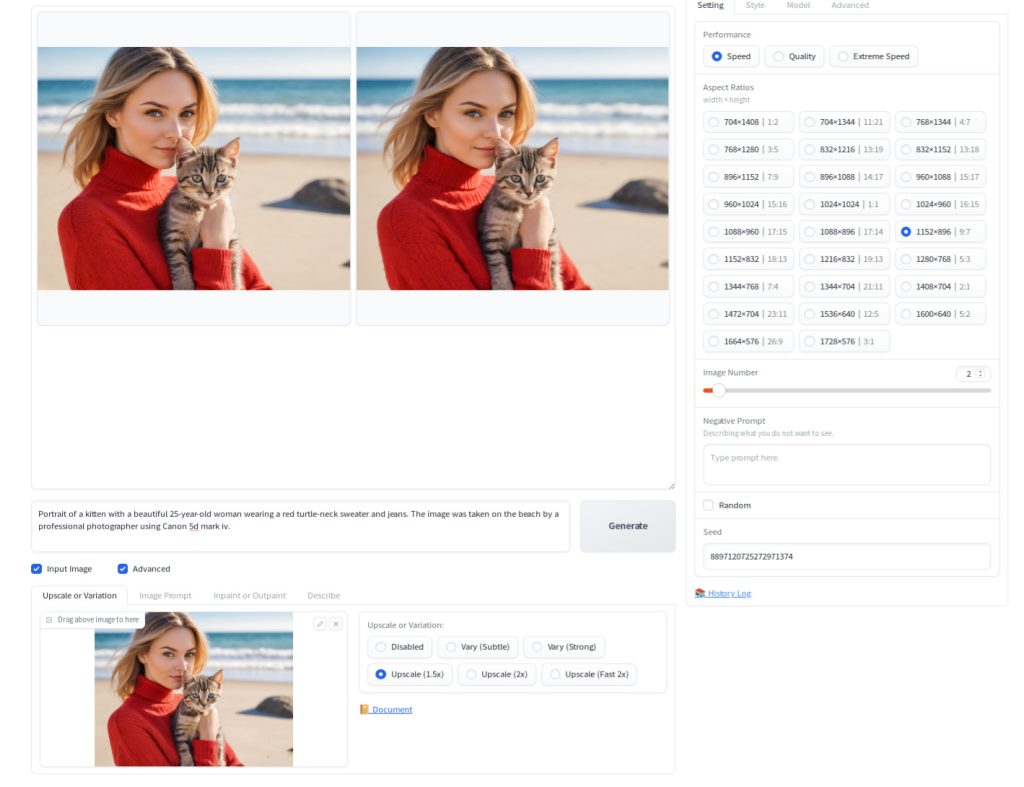
Below is the comparison of the original vs one of the upscaled images.
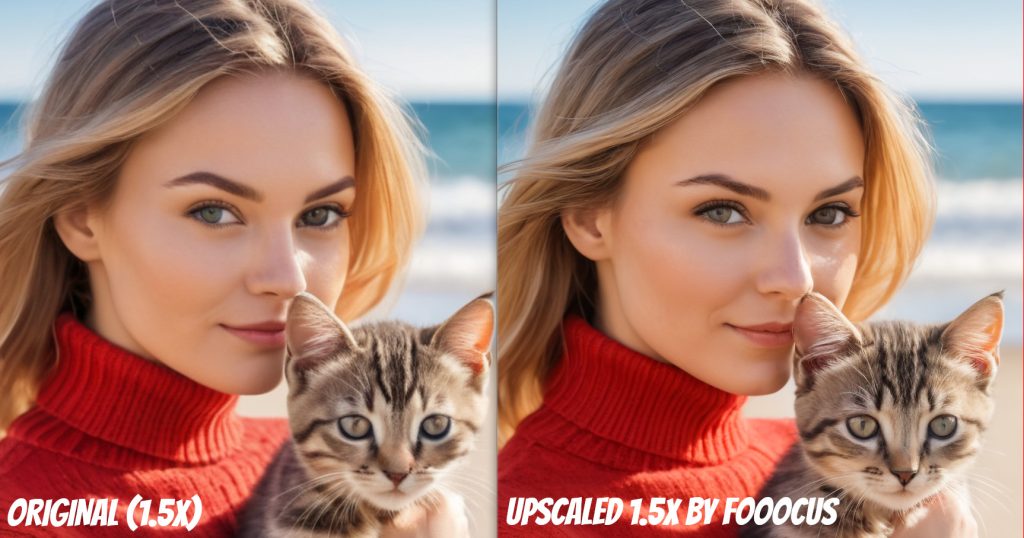
Original was enlarged by 150% using Ubuntu Image Viewer to display the image to the next of the Foocus-upscaled image on the right. As you can see Foocus-upscaling generated an image with more details especially around the face of the lady and the cat.
There are also Upscale (Fast 2x) and Upscale (2x) options. Here is the comparison of those upscaling methods.
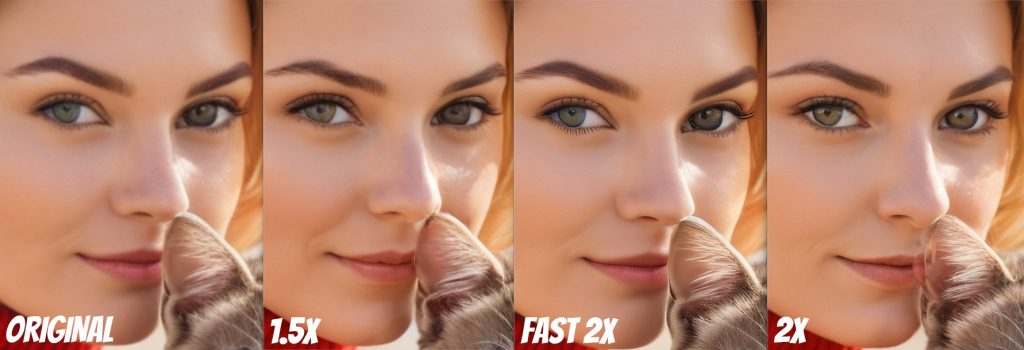
Upscale (Fast 2x) provides a sharp image, but the shape of the iris is deformed. So if you want to use this option, it is recommended that you pay attention to the details of the upscaled image to see if it meets your needs. The right-most image was enlarged using the Upscale (2x) option. This option provides beautiful details without having this issue in this case.
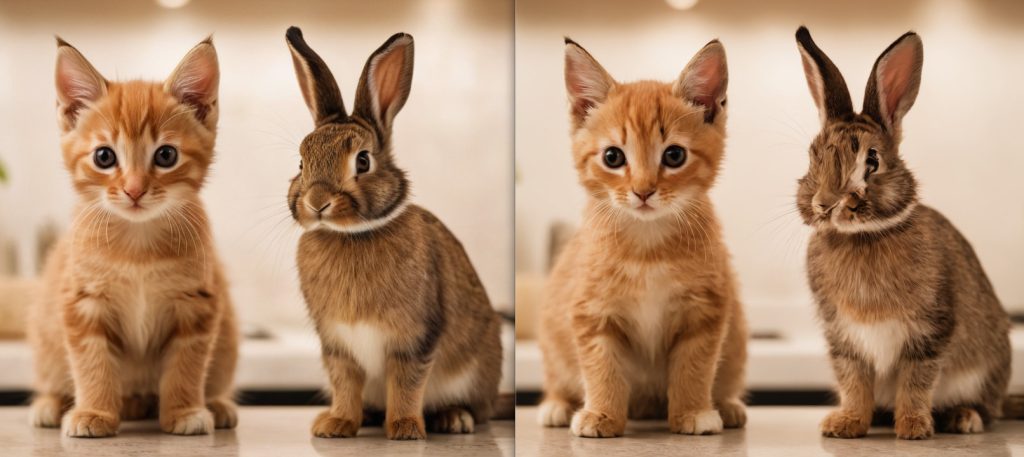
However, depending on the source image, Upscale 2x can also distort your image, so you also need to watch out. Below is an example to demonstrate this issue. Left is the original and the right is upscaled with Upscale (2x) & Performance set to Quality.You can see that the rabbit’s face is distorted, though the kitten does not have this problem.
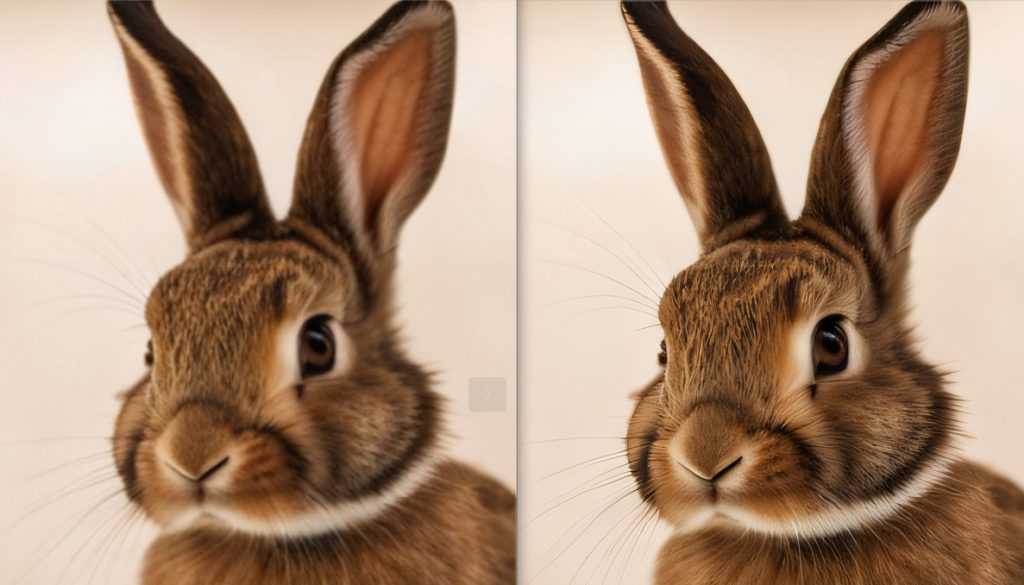
Below is a comparison between the original on the left and Upscale (Fast 2x) & Performance set to Quality on the right. As you can see the rabbit’s face is nicely upscaled without having distortion. Therefore, you might want to pick an appropriate upscaling method depending on whether you see any distortion in the generated image.
Performance settings
If Advanced checkbox is selected, on the ride side of the screen, you will see the Performance field with the following choices:
- Speed
- Quality
- Extreme speed
Here are the images with Upscale or Variation set to Upscale 2x, but the Performance field set to different values:
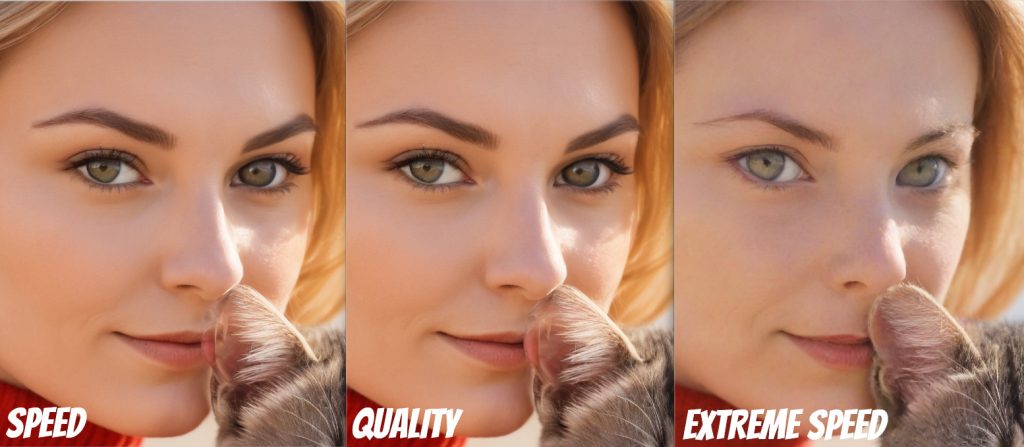
Using Extreme Speed for upscaling is not advisable, as it can significantly alter the original appearance of the face. Speed and Quality are a toss up, but the Quality option seems to have slightly more details. As you can see, Fooocus provides a wonderful easy-to-use way to upscale your image while enhancing details. This should help you upscale your image in a way that meets your creative vision.

