
Outpainting is an innovative feature that enables you to expand an image beyond its existing boundaries. For instance, if you have a tightly cropped photo of a house, outpainting can be utilized to naturally extend the image on both sides. This tutorial provides a step-by-step guide on how to effectively use outpainting in Fooocus, enhancing your images with seamless extensions.
Steps
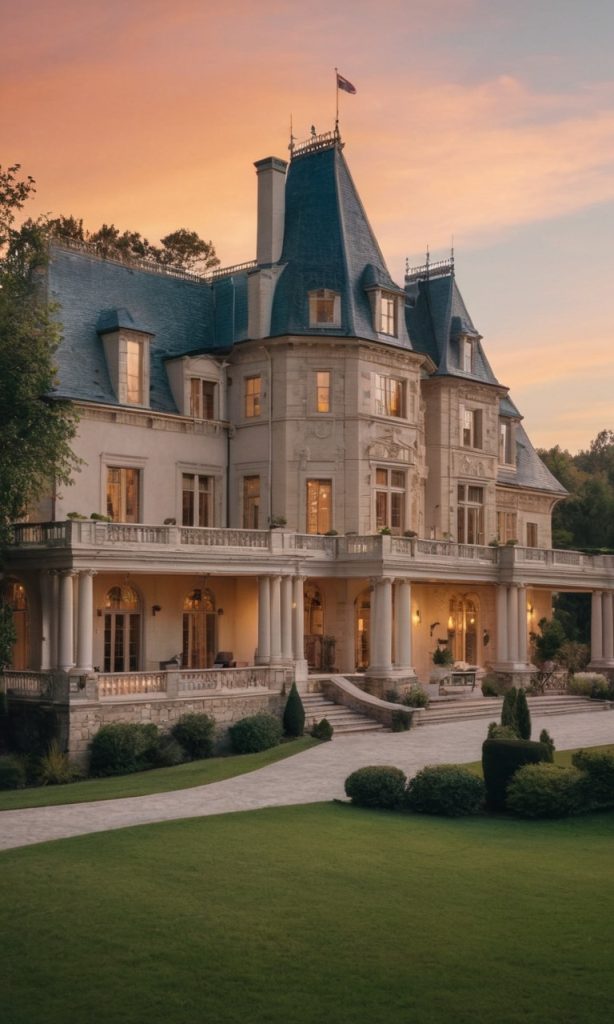
We will be using below image as the source image. You can generate this image using the generation parameters below or you are more than welcome to use this image.
Generation parameters
{
"Prompt": "Photo of a magnificent mansion on a hill",
"Negative Prompt": "",
"Fooocus V2 Expansion": "Photo of a magnificent mansion on a hill, cinematic, aesthetic, calm, beautiful, charming, classy, fancy, stunning, perfect, pretty, detailed, clear, artistic, loving, peaceful, color, cozy, lovely, nice, great, elegant, intricate, epic, focused, amazing, colorful, very coherent, ambient, rich vivid colors, highly detail, complex",
"Styles": "['Fooocus V2', 'Fooocus Enhance', 'Fooocus Sharp']",
"Performance": "Speed",
"Resolution": "(768, 1280)",
"Sharpness": 2,
"Guidance Scale": 4,
"ADM Guidance": "(1.5, 0.8, 0.3)",
"Base Model": "juggernautXL_version6Rundiffusion.safetensors",
"Refiner Model": "None",
"Refiner Switch": 0.5,
"Sampler": "dpmpp_2m_sde_gpu",
"Scheduler": "karras",
"Seed": 5398809861580284845,
"LoRA 1": "sd_xl_offset_example-lora_1.0.safetensors : 0.1",
"Version": "v2.1.862"
}
As you can see, the mansion is beautiful, but it is cropped too tight on both sides. Adding extra space would make the image look more appealing. Let’s try to add some space on both sides.
Once you have the source image, do the following:
- Keep the prompt as the original:
Photo of a magnificent mansion on a hill - Check the
Input Imagecheckbox - Check the
Advancedcheckbox below the text prompt - Click the
Inpaint or Outpainttab - Drag the source image to the canvas from your file viewer application (e.g. Windows Explorer or Mac Finder)
- In
Outpaint Direction, checkLeftandRight - In
Methoddrop down list, selectInpaint or Outpaint (default)
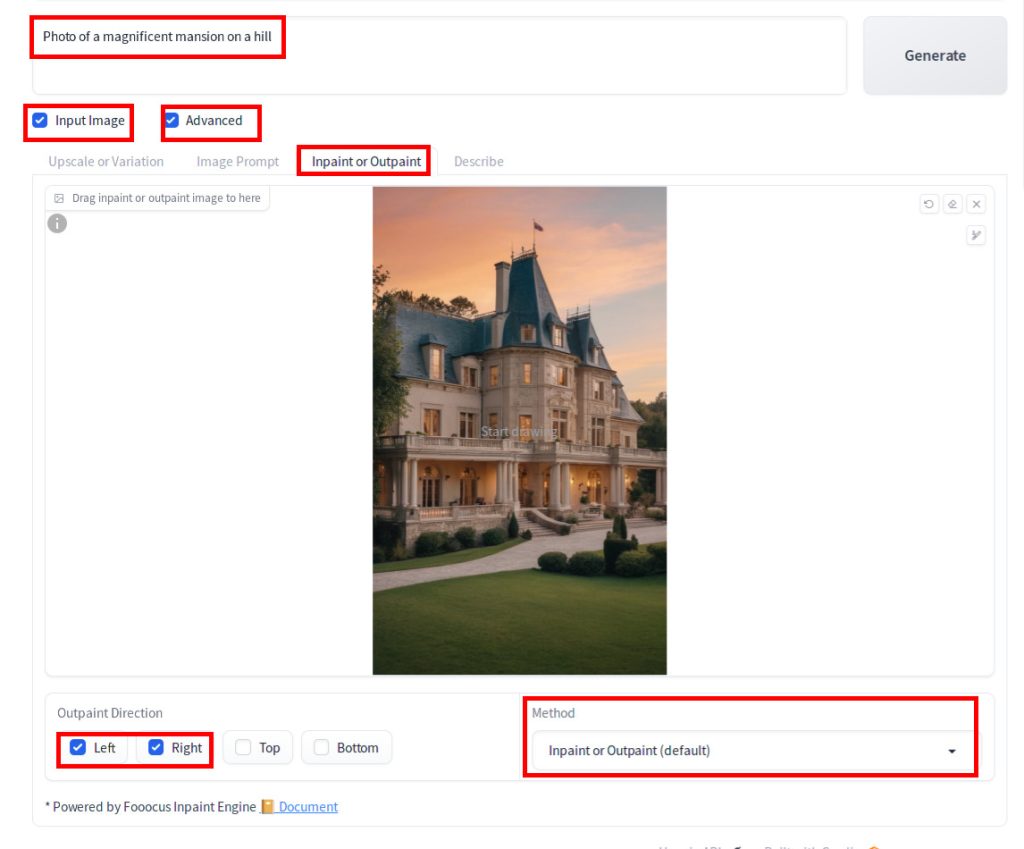
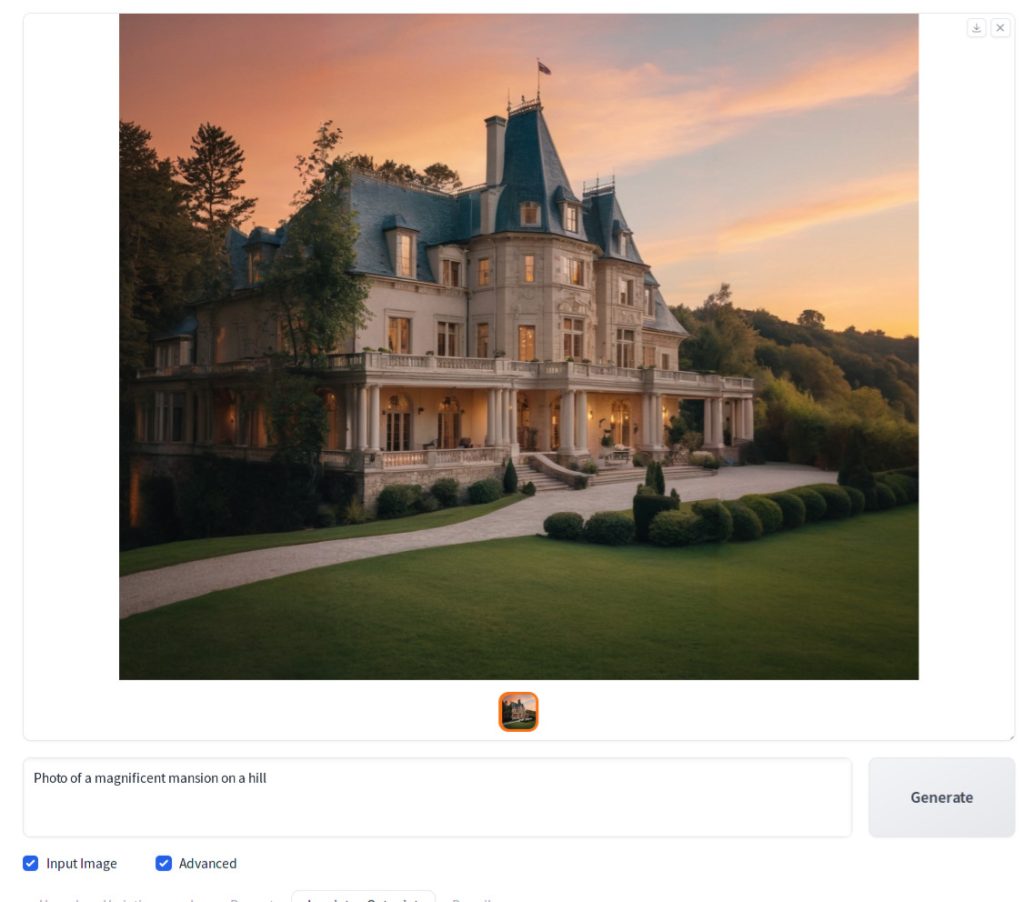
Now press Generate. You will see an image nicely extended to both sides.
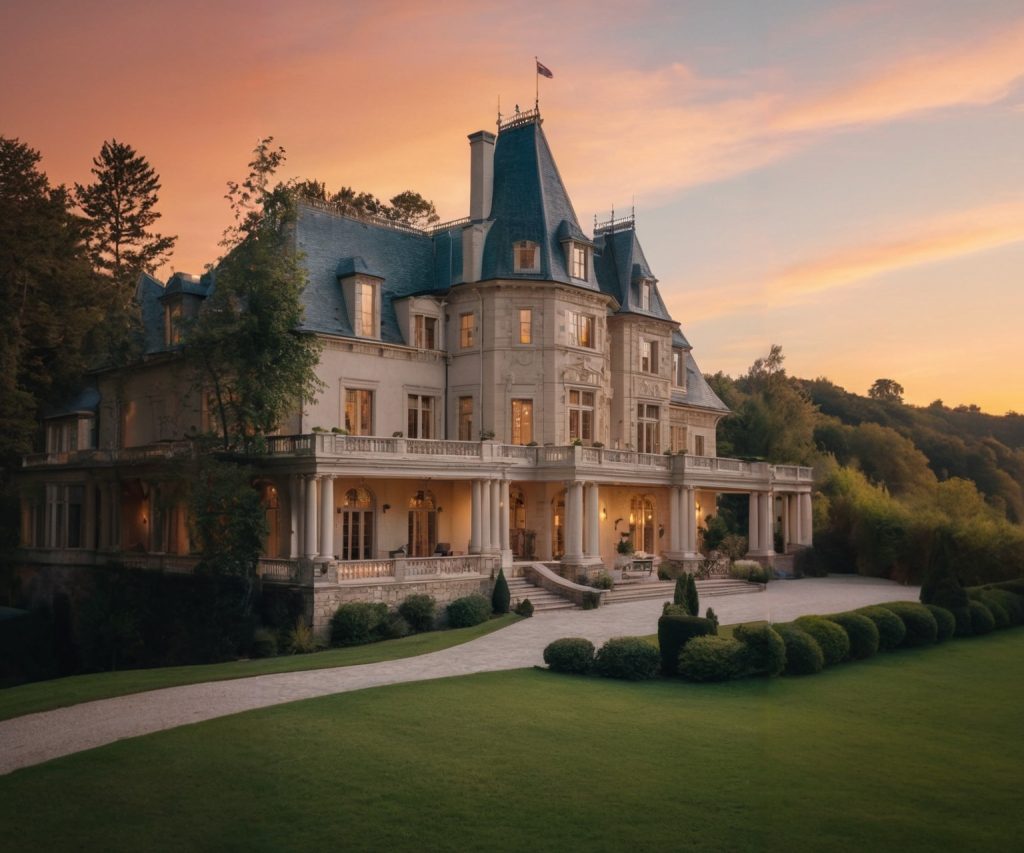
If you desire, you can further refine the extended area using inpainting. Below image is a touched up version to remove the reflection-like orange color on the left of the mansion.
Congratulations on mastering a new technique to enhance your images! This skill allows you to add extra space to your pictures as needed, which could significantly improve their overall quality.