
Overview
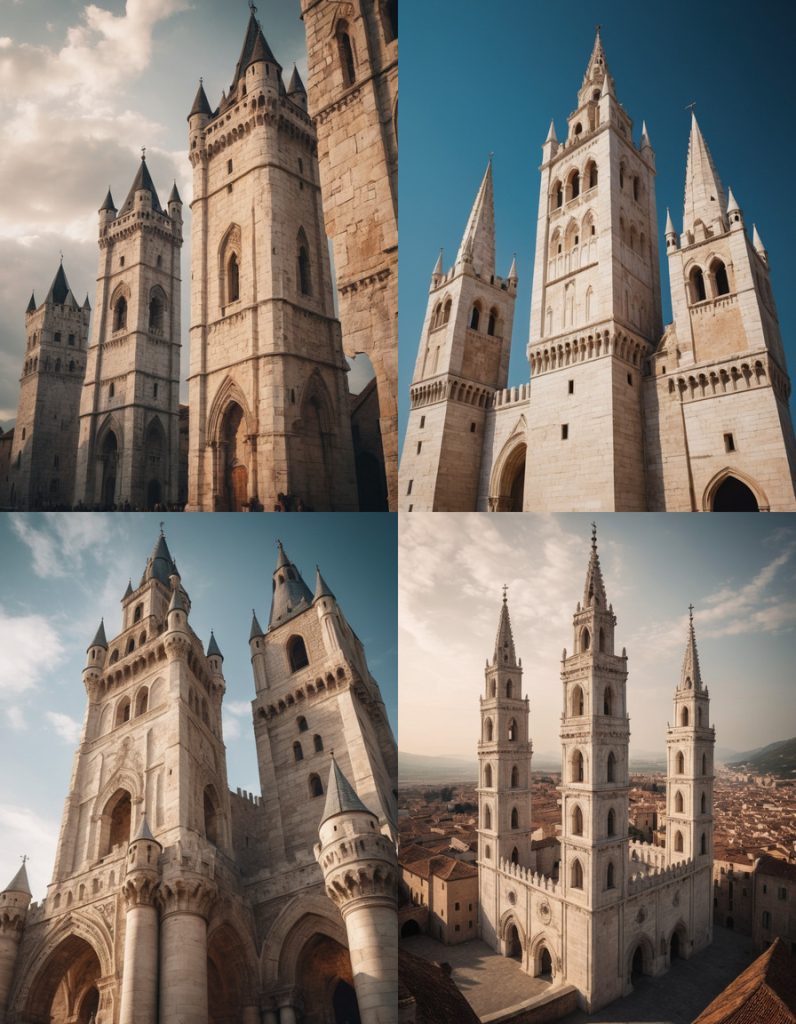
There are cases when you want to have a control over the shape of the generated image. For example, if you want to generate an image of marble towers in the Medieval age, typing: Towers made of marble in a medieval city would get you something like below:
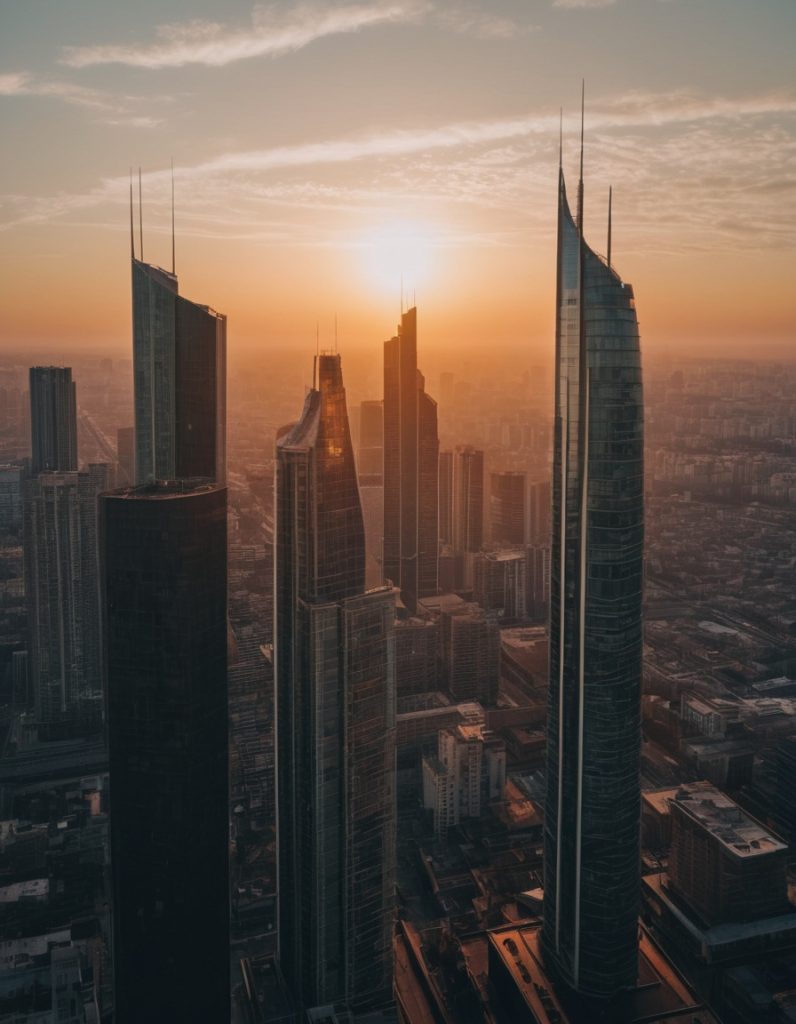
Let’s say what you had in mind is more like skyscrapers in modern era, but made out of marble. Ideally you just want to replace the material of the modern building like below with marble:
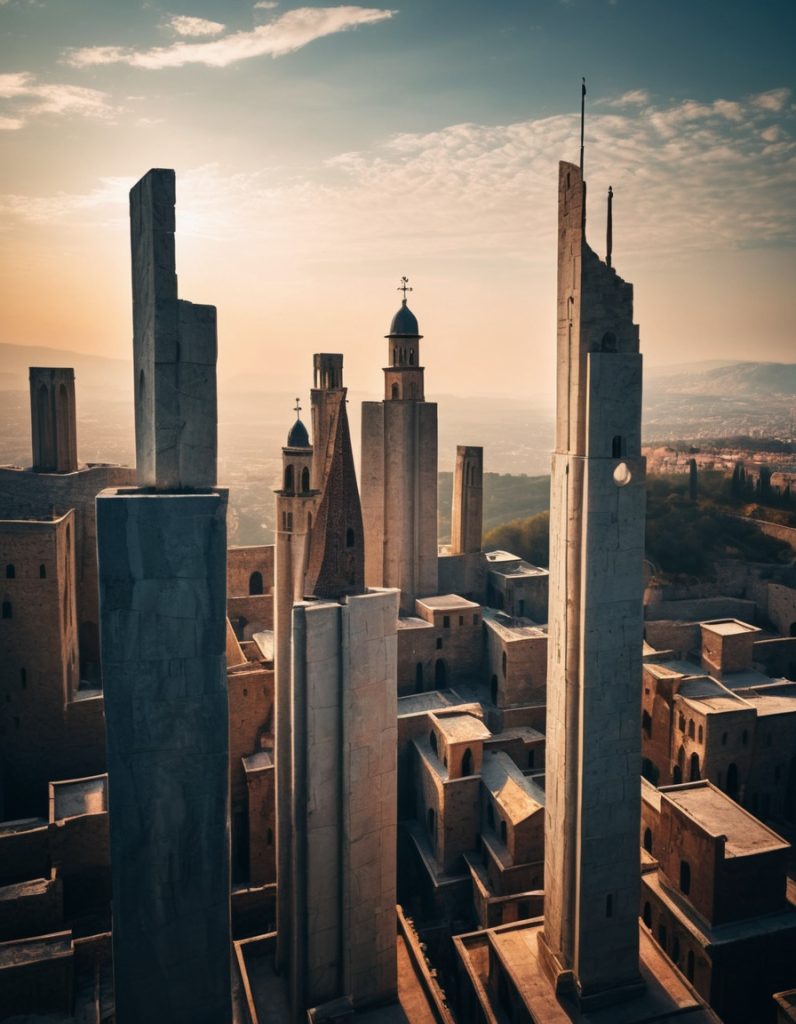
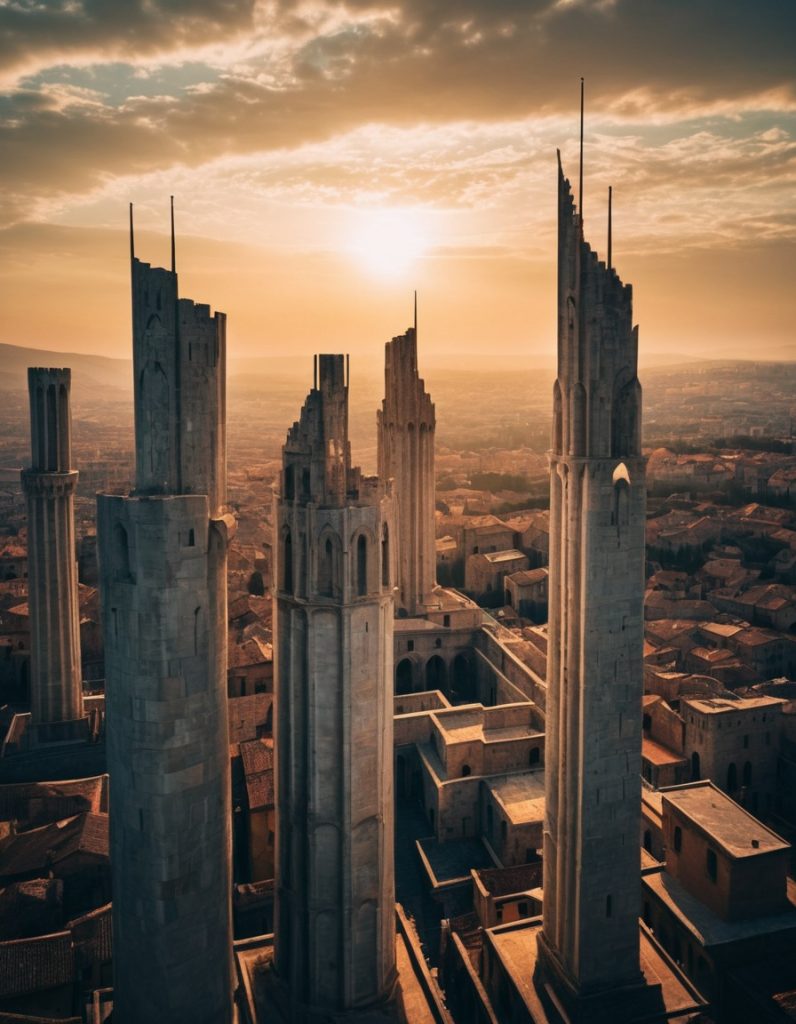
How can we do this? Fortunately, there is a way. Fooocus allows you to provide additional cue in the form of an image. You can provide two types of cues to control the image generation. One is called PyraCanny, another one is called CPDS. PyraCanny is an advanced version of Canny edge algorithm and it can be used to reflect the edges detected in the control image in the target image. CPDS is based on CPD which stands for contrast preserving decolorization [1]. It can also reflect the structure detected in the control image, but less details will be reflected in the target. Here are example images to illustrate the differences:
Generation parameters
- Prompt for the original image:
multiple high rises in a big city, sunset - Prompt for the generated image:
Towers made of marble in a medieval city - Seed:
8816634278478415356 - Model:
juggernautXL_version6Rundiffusion.safetensors
If you take a look at the building at the center, you can see PyraCanny tried to follow the edge of the building in the original, resulting in a flat-looking structure with a triangle-shaped top. However, CPDS produced more complex shape, which is more interesting. Does this mean that we should always use CPDS? No, it depends on your goal. Let’s dive in to learn how to use these methods and go over more examples.
How to use PyraCanny & CPDS
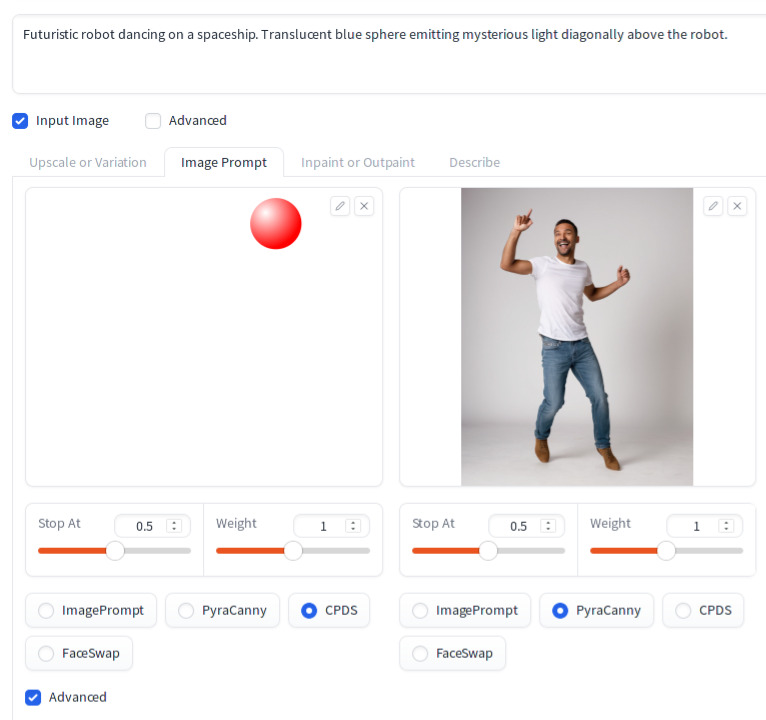
If you do not have an image that you want to use for img2img with PyraCanny or CPDS, first step is to generate an image. If you enter the above prompt and press Generate, you should get an image similar to the one shown on the left above. Now do the following:
- Modify the prompt to:
Towers made of marble in a medieval city - Check the
Input Imagecheckbox - Check the
Advancedcheckbox below the text prompt - Click the
Image Prompttab - Select
PyraCanny - Check the
Advancedcheckbox below the text prompt - Drag the source image from the output folder of Fooocus into the canvas under the
Image Prompttab

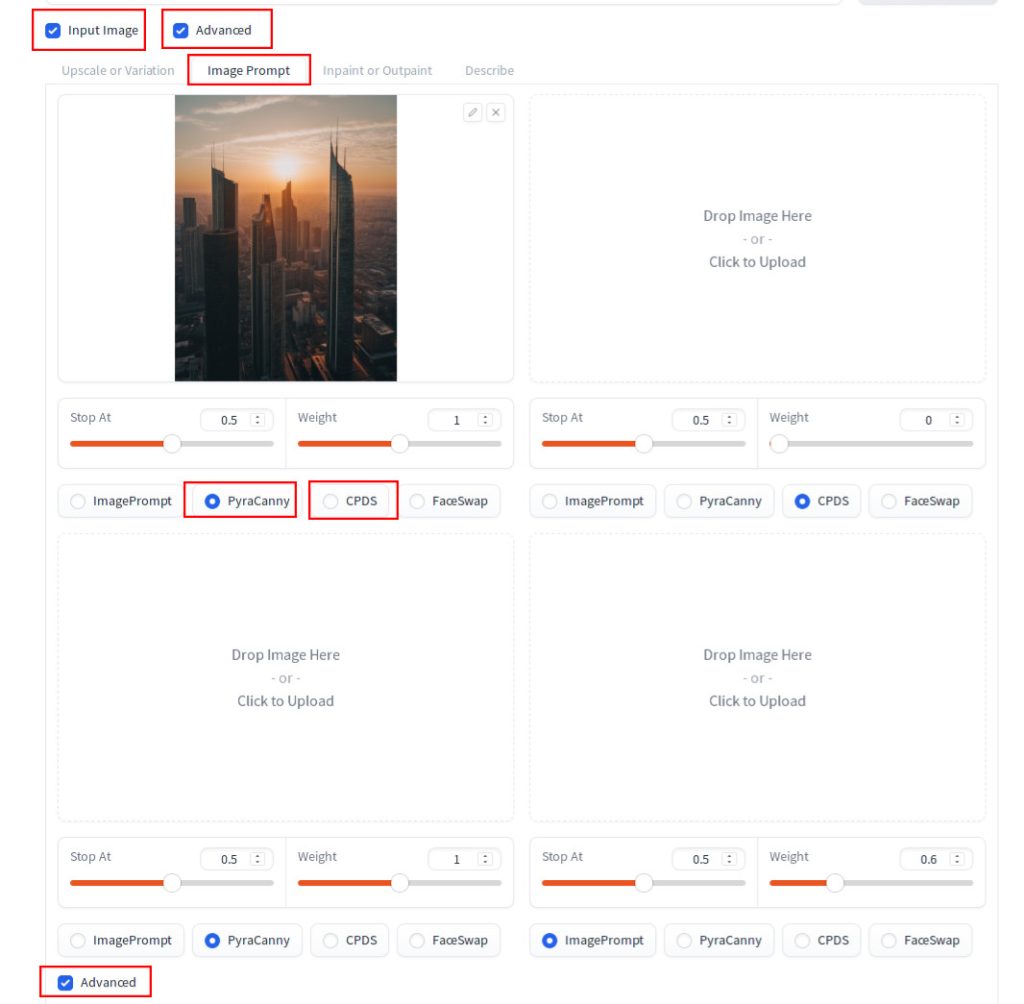
Now if you press Generate, you should see an image similar to the one in the middle of the comparison photos. To generate using CPDS, select CPDS instead of PyraCanny and press Generate again.
Now that we covered the basic usage of PyraCanny and CPDS, let’s move onto discuss another example where using PyraCanny may make more sense than CPDS. Let’s generate a new image using below parameters (the only difference from the urban skyscraper image is the prompt):
- Prompt for the original image:
Ultra photo-realistic image of a sports car, aerodynamic, futuristic, front view, fall color, mountain road, photographed by a professional photographer using Canon 5D mark iv. High resolution, raw photo, highly detailed, best quality, super realistic backdrop, magazine ads photo - Negative Prompt of the original image (on the Setting tab if the Advanced checkbox is checked):
drawing, 3d, render, bad quality, low quality - Prompt for the target image (the only difference is the addition of “red”):
Ultra photo-realistic image of a red sports car, aerodynamic, futuristic, front view, fall color, mountain road, photographed by a professional photographer using Canon 5D mark iv. High resolution, raw photo, highly detailed, best quality, super realistic backdrop, magazine ads photo - Seed:
8816634278478415356 - Model:
juggernautXL_version6Rundiffusion.safetensors
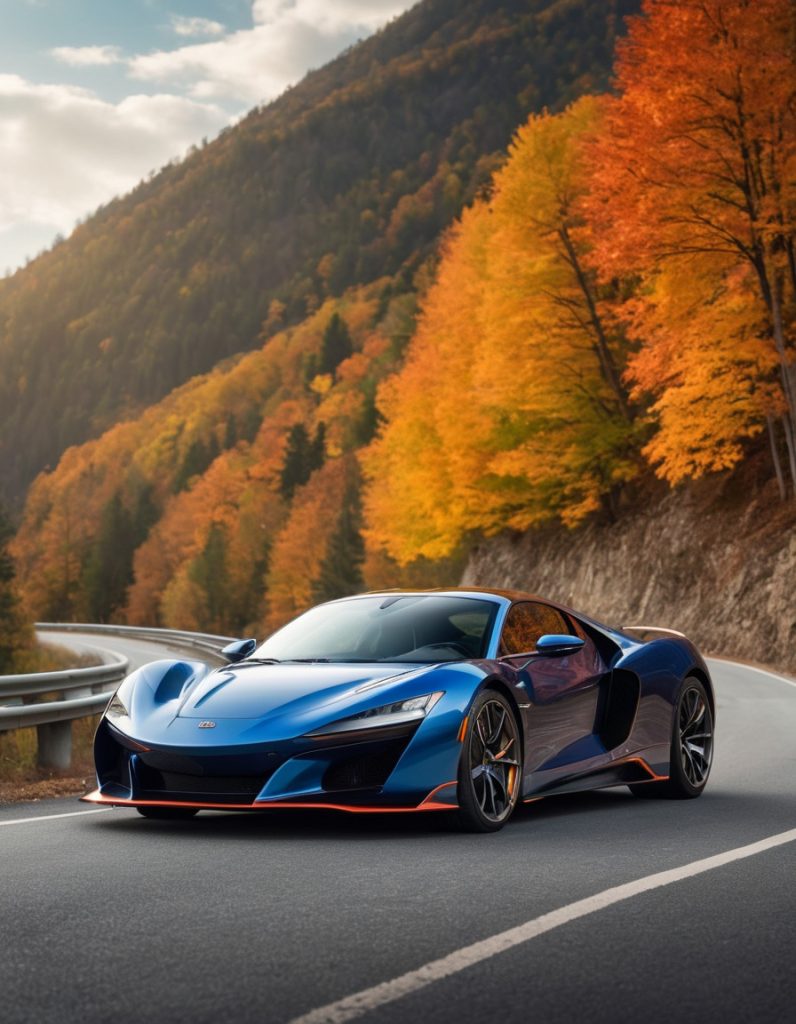
Let’s update the prompt to add “red” to generate the red version of the car using the same procedure as before. Here are the generation results (middle and right):

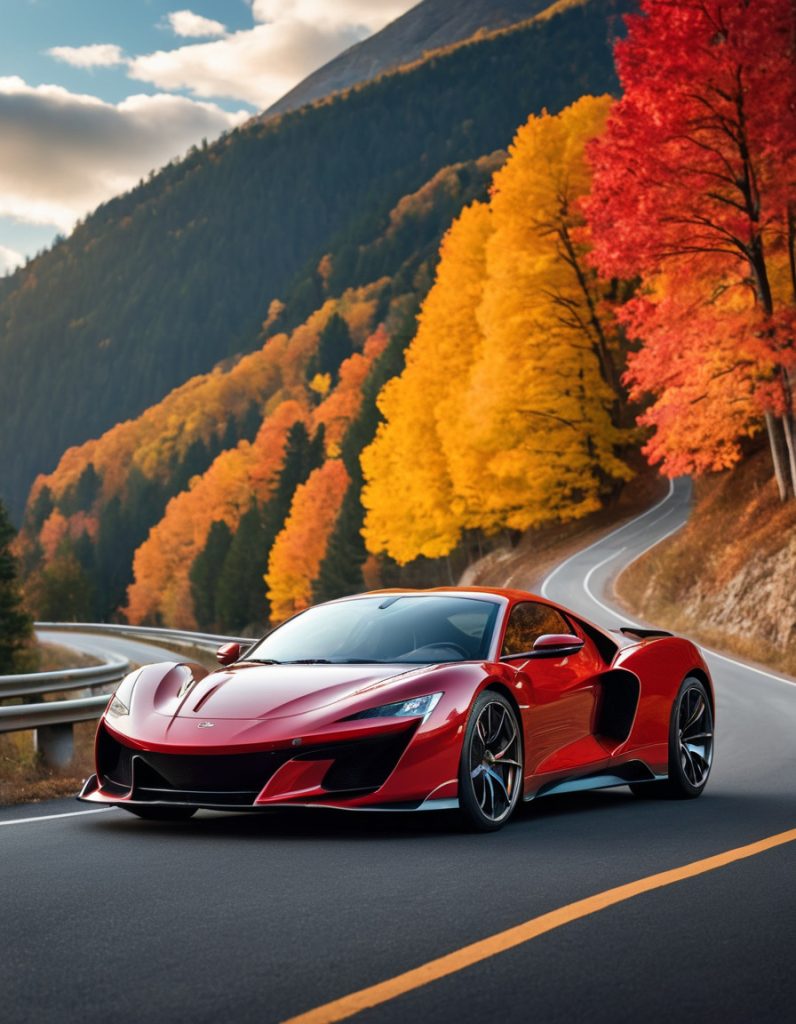
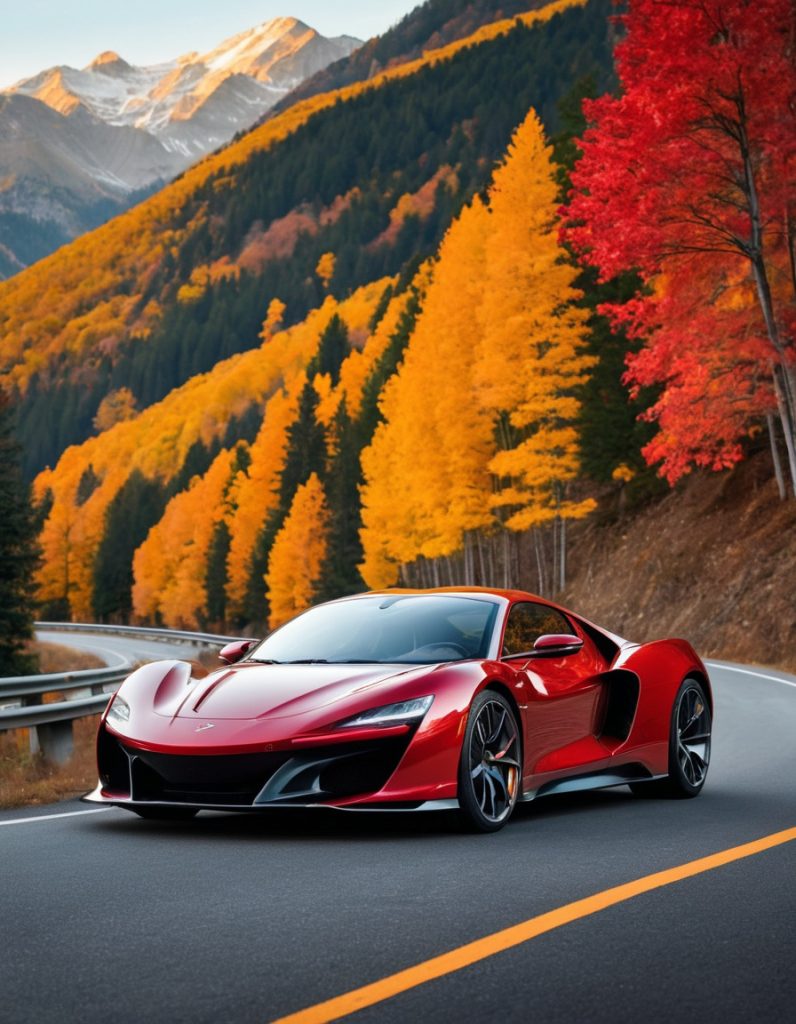
As you can see, PyraCanny is very similar to the original, but CPDS changed the clouds in the background to snow-capped mountains. Therefore, if you want the generated image to follow the original as much as possible, try PyraCanny first.
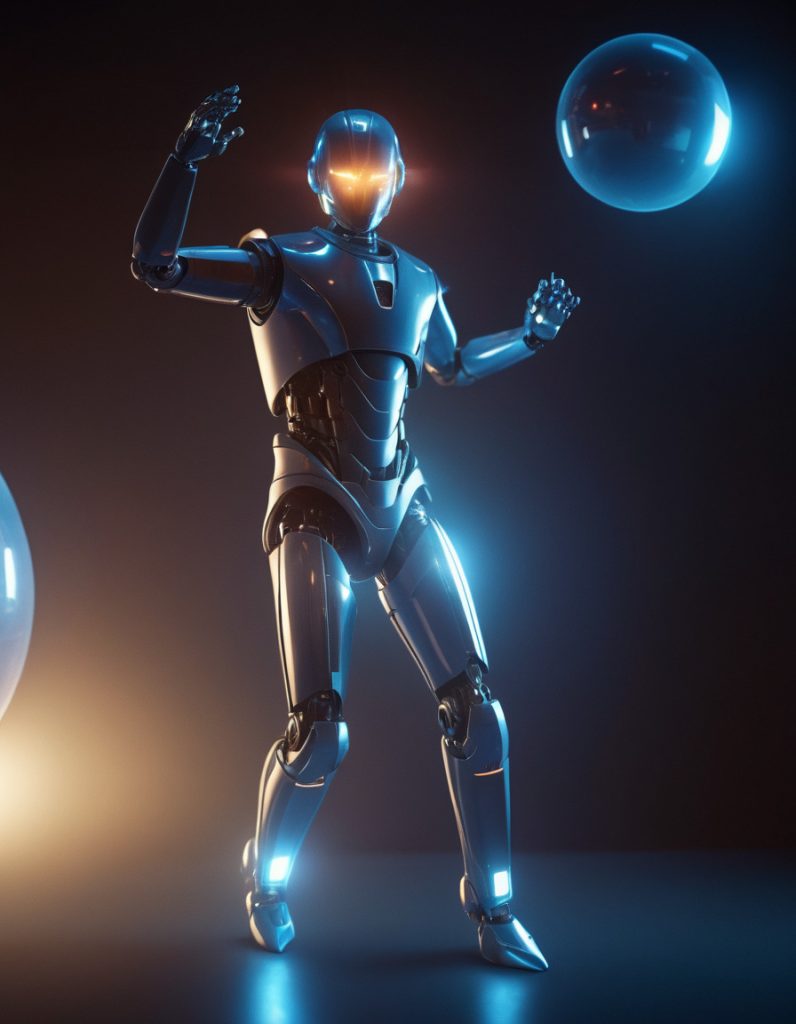
While tweaking images, you can also adjust Stop At, Weight parameters to change the way these methods influence the image generation. You can also combine CPDS with PyroCanny like below:
This resulted in the below image which reflect both control images:
References
[1] lllyasviel. Fooocus 2.1.0 Image Prompts (Midjourney Image Prompts) #557. Retrieved from https://github.com/lllyasviel/Fooocus/discussions/557.