Installation
ComfyUI is a powerful and flexible package to unleash the power of Stable Diffusion. You can install from https://github.com/comfyanonymous/ComfyUI. The page has detailed instructions that you can follow.
Basic Usage
Once you follow the instructions, activate your virtual environment and type python main.py. You should see console output similar to below. It will start the server and show you the URL to access. Now open up the browser and access the URL.
(ldm) ComfyUI-master $ python main.py
Total VRAM 24208 MB, total RAM 64032 MB
Set vram state to: NORMAL_VRAM
Device: cuda:0 NVIDIA GeForce RTX 4090 :
VAE dtype: torch.float32
Using sub quadratic optimization for cross attention, if you have memory or speed issues try using: --use-split-cross-attention
Starting server

To see the GUI go to: http://127.0.0.1:8188
Once you access the URL, you will see the UI similar to below. Note that what you see initially will be slightly different from below as nodes were rearranged a bit for clarity.
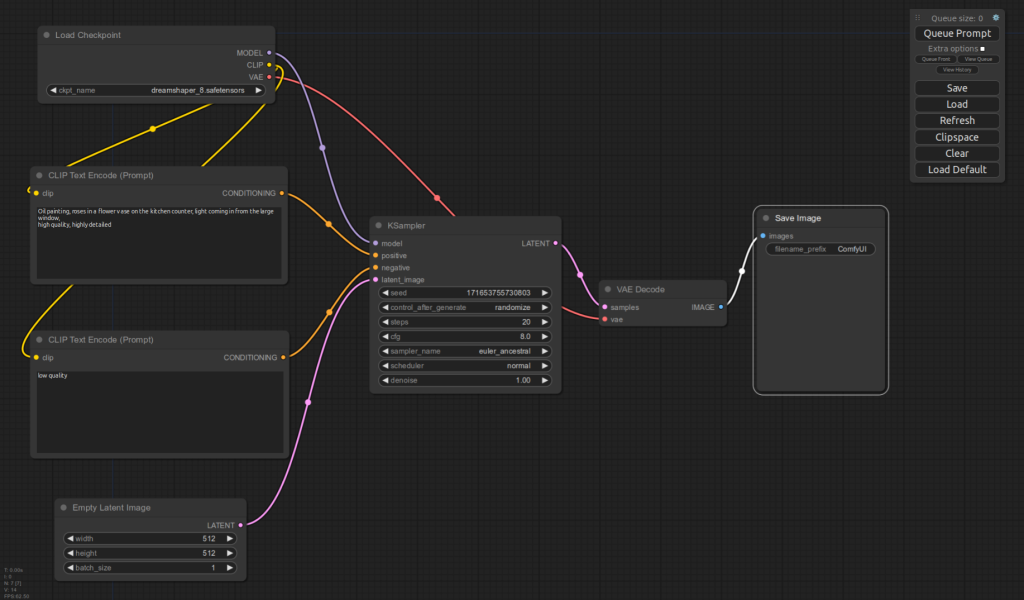
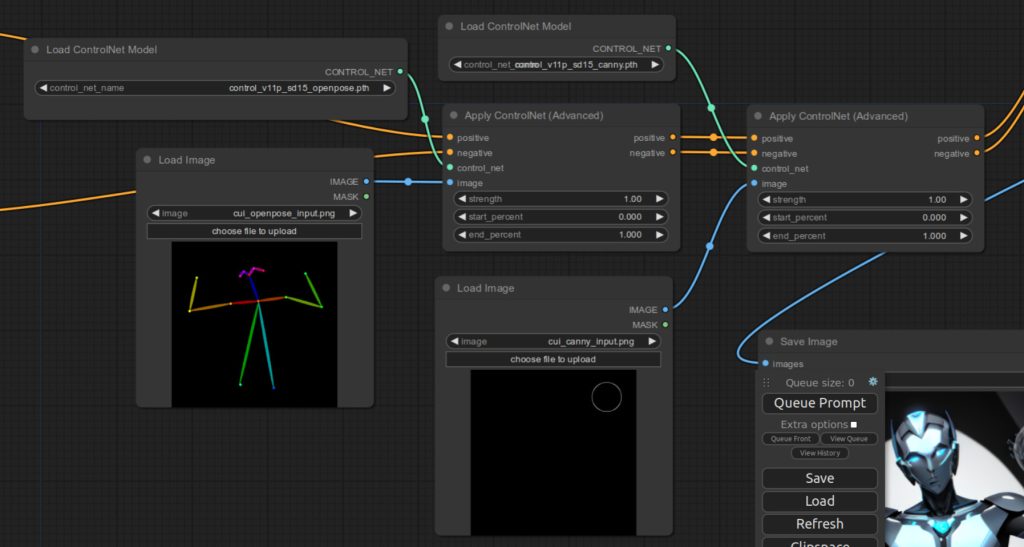
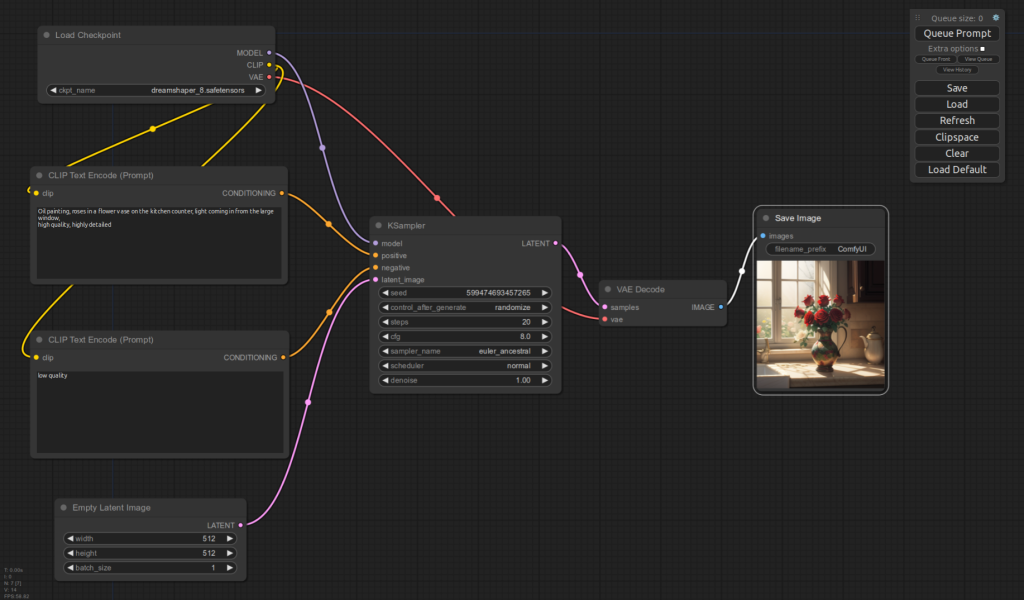
In order to generate an image, you need to enter pick a model and enter your prompts. For example:
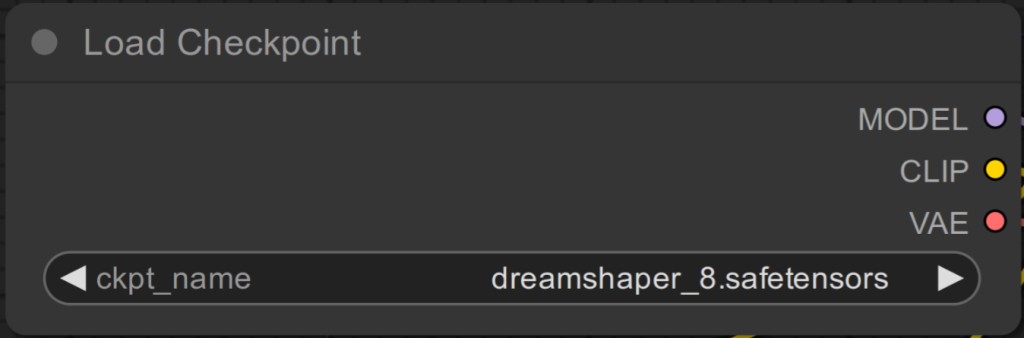
Pick a model from a drop-down list in Load Checkpoint nodedreamshaper_8
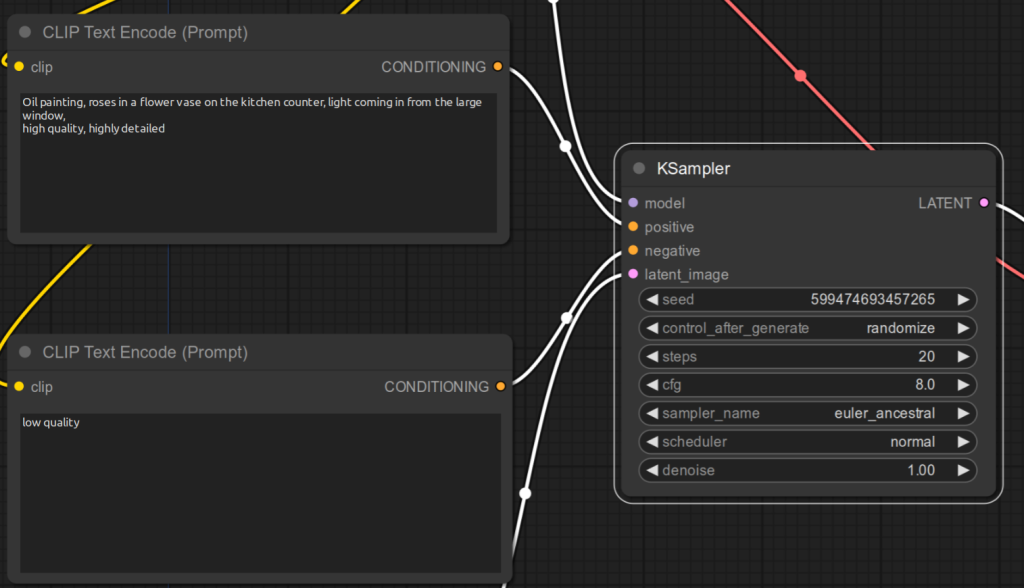
Enter positive prompt to CLIP Text Encode that is connected to the positive input of KSampler (upper one):Oil painting, roses in a flower vase on the kitchen counter, light coming in from the large window,
high quality, highly detailed
Enter negative prompt to CLIP Text Encode that is connected to the positive input of KSampler (lower one):low quality
Click Queue Prompt
Then you should see something similar to below:
Your image is saved under the output directory of the ComfyUI package (e.g. ComfyUI-master/output).