
Have you discovered an intriguing model or LoRA you’re eager to experiment within Google Colab, but find yourself uncertain about the setup process? This guide is designed to demystify the steps, taking you through the setup process with ease.
When it comes to utilizing external models in Google Colab, there are generally two situations you might encounter:
- Direct Programmatic Download: You have direct access to the model’s URL, and the hosting site permits programmatic downloading. This scenario is ideal for seamless integration and automation within Google Colab.
- Manual Download Required: Either the direct URL for the model is unavailable, or the hosting site restricts programmatic downloads. In this case, you would need to manually download the model to your local machine before proceeding. This scenario also covers the case where you have already downloaded the model to your machine and you want to upload the model to Google Colab to use with Fooocus,
In this tutorial, we’re diving into the first scenario – where you have the model’s URL, and the site supports programmatic downloads. We’ll guide you through obtaining the model and setting.
Step 1. Finding out the URL of the model and LoRA files
If you are already familiar with the URL of the model or the LoRA file, feel free to skip ahead. We will use Hugging Face as an example to illustrate the process. Please note that the format of URLs can vary across different websites, and direct programmatic download of the model may not always be possible. If you are using a different site to download models, ensure to check the site and determine if a direct download URL is available for the model you wish to use.
For example, a model sharing site that allows programmatic download of a model may require additional set up before you can download and you may see an error: “Username/Password Authentication Failed.” when you try to download the model file programmatically. In this case, look for a help document that site may have for downloading the model programmatically or via API. The solution can be creating an API key on the profile page of your account and use the API key with the download command according to the instruction of the website’s help page.
For illustrative purposes, we’ll reference the Animagine XL 2.0 model in this guide. On Hugging Face, after you find a model that you want to download, click the Files and versions tab, and look for a safetensors file. In this example, the name of the file is animagine-xl-2.0.safetensors. Go ahead and click the file.

The detail page for the model file should be displayed (URL is https://huggingface.co/Linaqruf/animagine-xl-2.0/blob/main/animagine-xl-2.0.safetensors).
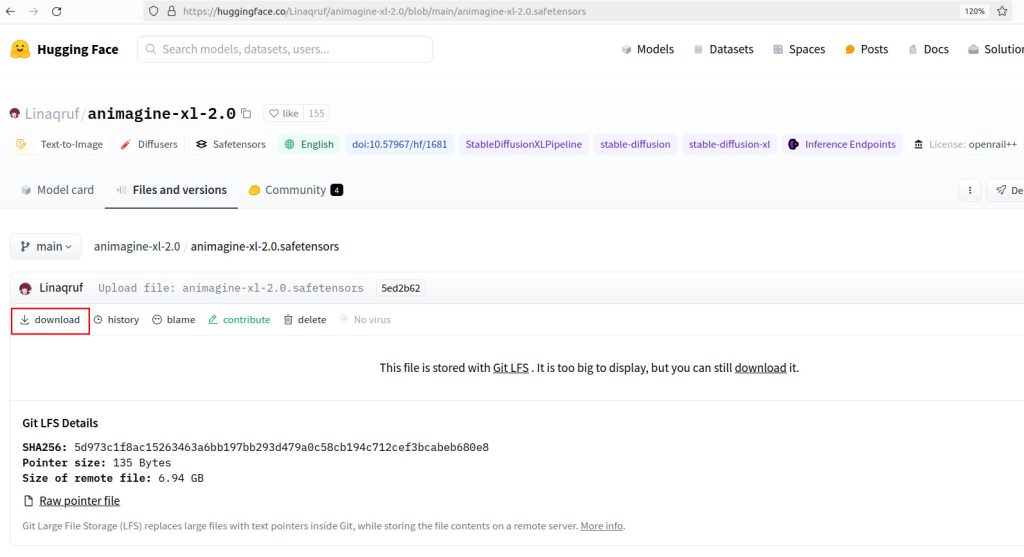
Hover your mouse over the download button, and right-click (not left-click) the button to display the pop-up menu of the browser. Select “Copy link” to copy the URL into the clipboard of your operating system. This menu item is dependent on the browser that you use, so the menu item may be different. Open a notepad application and paste the URL as we will be using this later. In this example, you should have the below URL:
https://huggingface.co/Linaqruf/animagine-xl-2.0/resolve/main/animagine-xl-2.0.safetensors?download=trueFor LoRA, we will be using https://huggingface.co/TheLastBen/Papercut_SDXL which enables you to generate a nice image that looks like paper cut art. Repeat the same process. The URL of the LoRA should be:
https://huggingface.co/TheLastBen/Papercut_SDXL/resolve/main/papercut.safetensors?download=trueStep 2. Modifying the Colab notebook
Now open your Colab notebook for Fooocus that you have saved on your Google Drive. If you have not created your Colab notebook, follow the instructions How to use Fooocus in Google Colab. You should see the following:
!pip install pygit2==1.12.2
%cd /content
!git clone https://github.com/lllyasviel/Fooocus.git
%cd /content/Fooocus
!python entry_with_update.py --share
To use a custom model and a LoRA, what we need to do is the following:
- Download a model file from Hugging Face and put the file into the checkpoint folder that Fooocus expects
- Download a LoRA file from Hugging Face and put the file into the LoRA folder that Fooocus expects
We need to modify the code above to do these. Let’s break down the required changes to smaller pieces.
Target folders to save files
The folders to save downloaded files are the following:
- LoRA folder: /content/Fooocus/models/loras
- Model file folder: /content/Fooocus/models/checkpoints
Understanding commands to download and list files
For individuals new to shell scripts, which are commonly used in Mac and Linux environments, let’s delve into a brief overview of a command known as wget. This command is a convenient tool for downloading files from the internet and is readily available in the Google Colab environment.
Typically, to download a file to the current directory, you would use the syntax wget <URL>. However, when downloading files from Hugging Face, the URL often includes the query parameter download=true, which, by default, becomes part of the downloaded file’s name. To circumvent this and specify a custom filename, we utilize the -O (uppercase letter O) option followed by the desired file name.
Additionally, it’s important to note that within the Colab notebook, shell commands must be prefixed with an exclamation point (!) to be executed. This signals Colab to run the command in the shell rather than as a line of Python code.
Syntax of wget:
- Basic command:
!wget <URL> - To specify a filename:
!wget -O desired_filename.ext <URL>
This syntax enables precise control over the download process, ensuring the file is saved with an appropriate name and in the expected location.
In addition to the download command, we will also be using another important command to list files called ls. This command is used to display the contents of the current directory, allowing us to verify that the file has been successfully downloaded. It’s a simple yet effective way to confirm the presence of newly downloaded files without leaving the Colab notebook interface.
Syntax of ls:
- Basic command to list files in the current folder:
!ls - To list files in the checkpoint (model) directory in Colab:
!ls /content/Fooocus/models/checkpoints
Bringing It All Together: Code Modifications
Now combining these little changes, here is what we add (shown in bold):
!pip install pygit2==1.12.2
%cd /content
!git clone https://github.com/lllyasviel/Fooocus.git

# Download a custom model to /content/Fooocus/models/checkpoints
%cd /content/Fooocus/models/checkpoints
!wget -O animagine-xl-2.0.safetensors https://huggingface.co/Linaqruf/animagine-xl-2.0/resolve/main/animagine-xl-2.0.safetensors?download=true
!ls

# Download a LoRA
%cd /content/Fooocus/models/loras
!wget -O papercut.safetensors https://huggingface.co/TheLastBen/Papercut_SDXL/resolve/main/papercut.safetensors?download=true
!ls

%cd /content/Fooocus
!python entry_with_update.py --share
Running the updated code
Now press the play button (the triangle icon on the left of the cell) to launch Fooocus. If things work as expected, you should see an output similar to below with !ls confirming that files have been downloaded correctly:
2024-02-02 01:33:13 (116 MB/s) - ‘animagine-xl-2.0.safetensors’ saved [6938414698/6938414698]
animagine-xl-2.0.safetensors put_checkpoints_here
...
2024-02-02 01:33:15 (163 MB/s) - ‘papercut.safetensors’ saved [340786114/340786114]
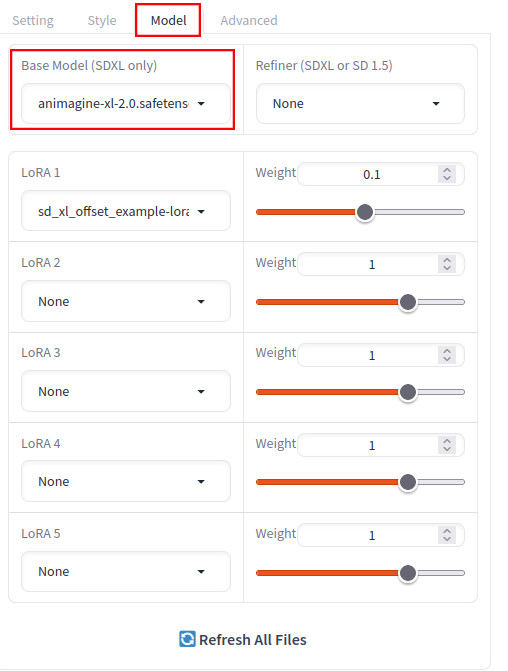
papercut.safetensors put_loras_hereAfter the notebook shows the Gradio link, access the link to show the main Fooocus screen. Click the Advanced checkbox at the bottom of the main screen to show the Model tab on the right. You can now select animagine-xl-2.0.safetensors from the Base Model dropdown list.
Enter your prompt and press Generate. You should see images that match your prompt. Here are a few example images.
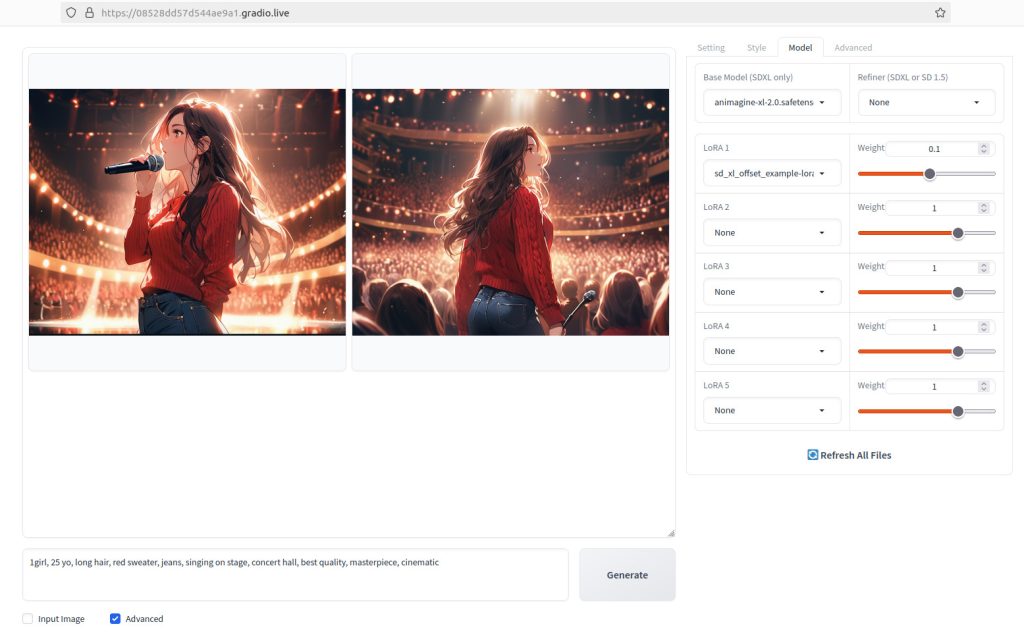
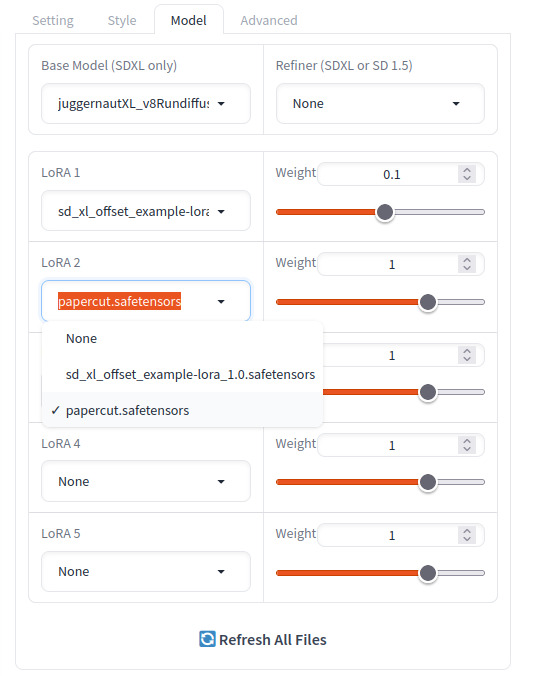
For LoRA, verification steps are exactly the same except that you will be using the LoRA2 dropdown list. Note that juggernautXL_v8Rundiffusion.safetensors was for the main model.
Here is the generation result:
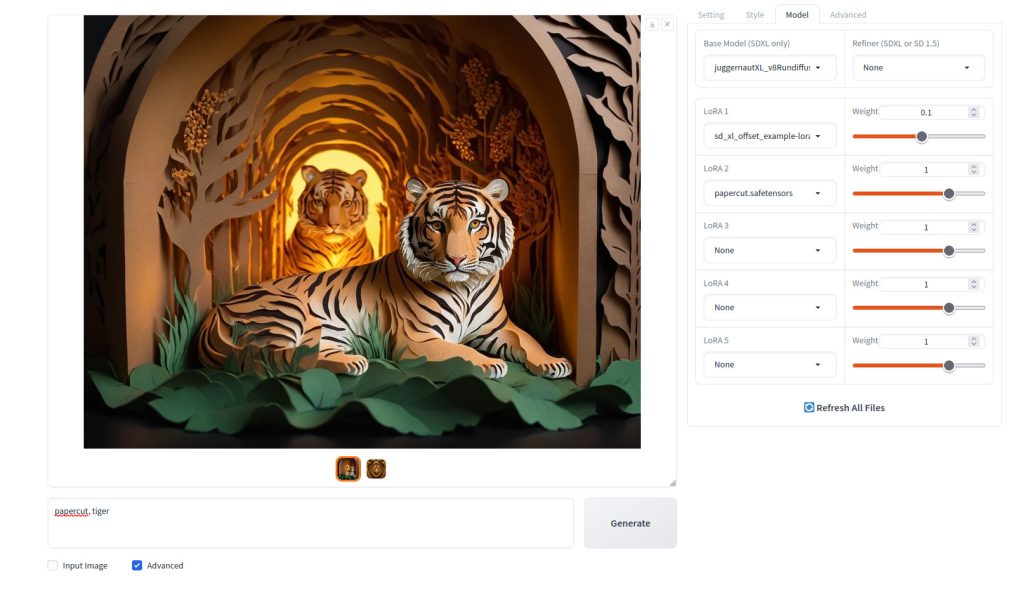
Congratulations! You’ve now mastered the skill of utilizing custom models and custom LoRAs from sites that support downloads via wget. This newfound knowledge is set to broaden the horizons of your artistic creativity. Enjoy exploring your expanded capabilities!