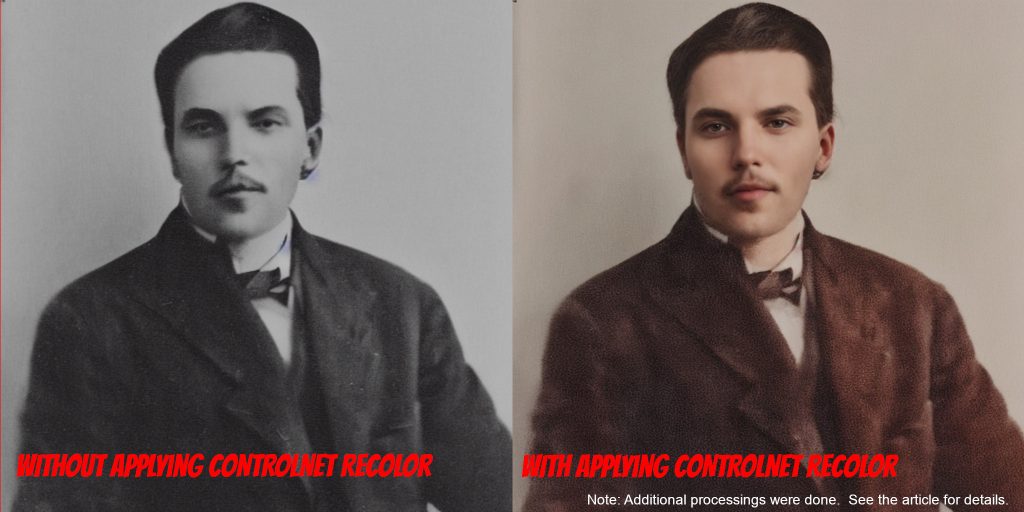
Have you ever seen a person in an old photo from a long time ago and wondered what the photo would have looked like if the image was captured in a digital camera? ControlNet Recolor model can satisfy your curiosity. Though you cannot really restore the original color, but it can show possible colors that the original image may have looked like. Using ControlNet Recolor is very easy. Let’s dive in.
Installation
Recolor model is ioclab_sd15_recolor.safetensors. You can download it from https://huggingface.co/lllyasviel/sd_control_collection/tree/main.
If you haven’t done so, please install the ControlNet extension to use this functionality. If you are not sure how to do it or where to put the downloaded model, check out our step by step tutorial How to use ControlNet in Automatic1111 Part 2: Installation.
Using ControlNet Recolor
First step is to pick an image to colorize. For this tutorial, we will be using this image that was generated in Stable Diffusion.

Now, go to the img2img tab. First load a high quality model that can generate image with rich colors. In this tutorial, we will be using Epic Realism Natural Sin. Leave both positive and negative text prompt fields empty.
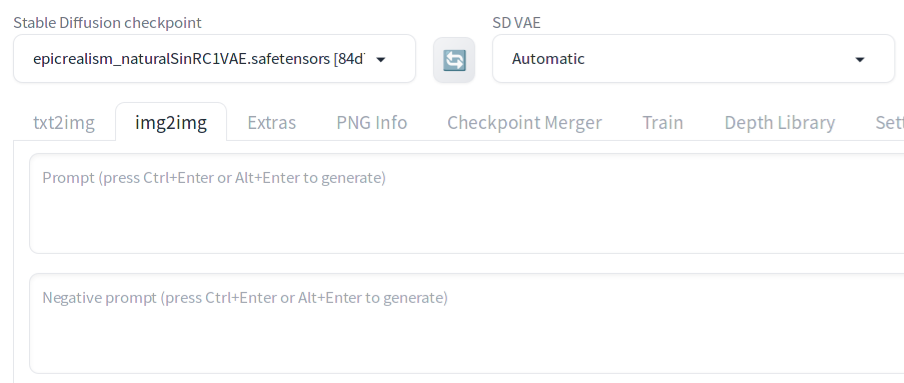
Now drag the black and white photo into the canvas below the img2img tab.

Set Denosing strength to 1.
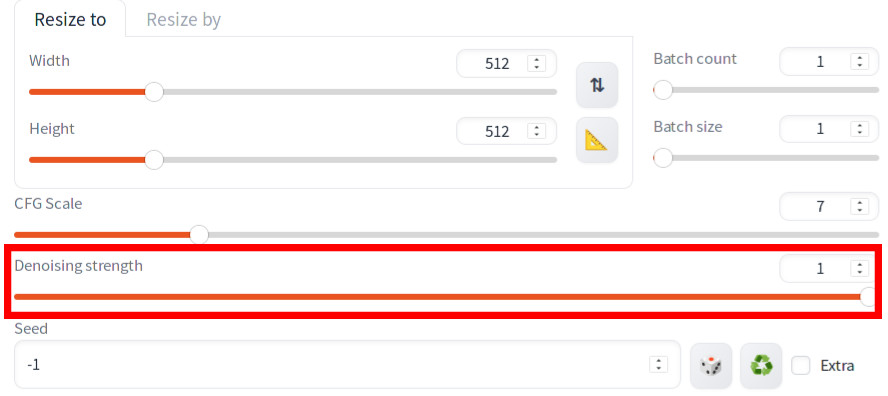
In the ControlNet section:
- Check
Enable - Check
Low VRAM - Check
Pixel Perfect - In
Preprocessor, selectrecolor_luminance - In
Control Type,checkRecolor
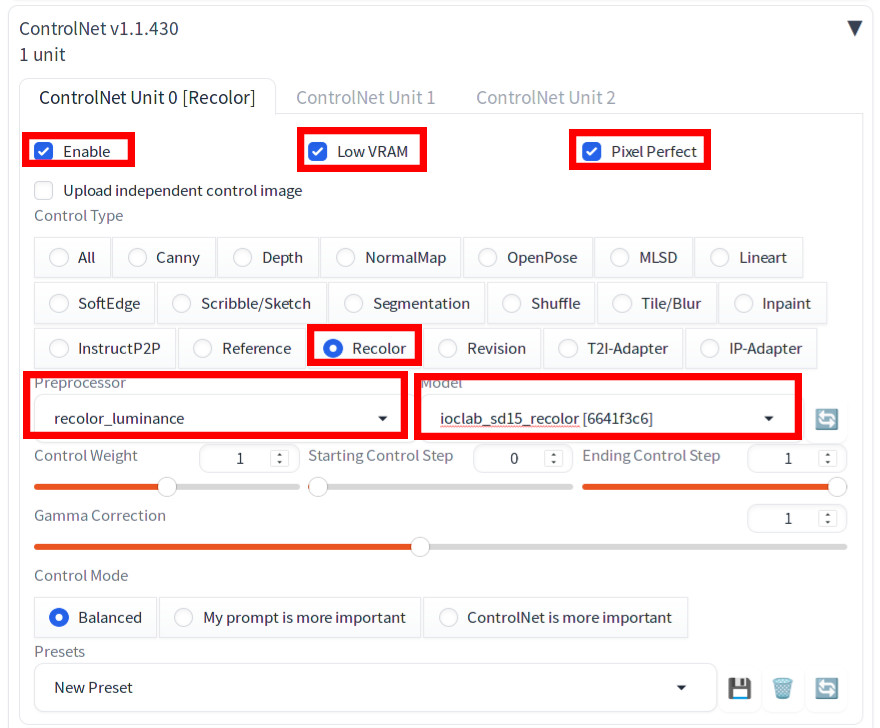
Now press Generate. You will see that your image is colorized.

Note that color can be controlled by text prompts. For example, in the below image,
(red tie:1.2)
BREAK
blue jacket
was specified for positive prompt. Negative prompt was empty.
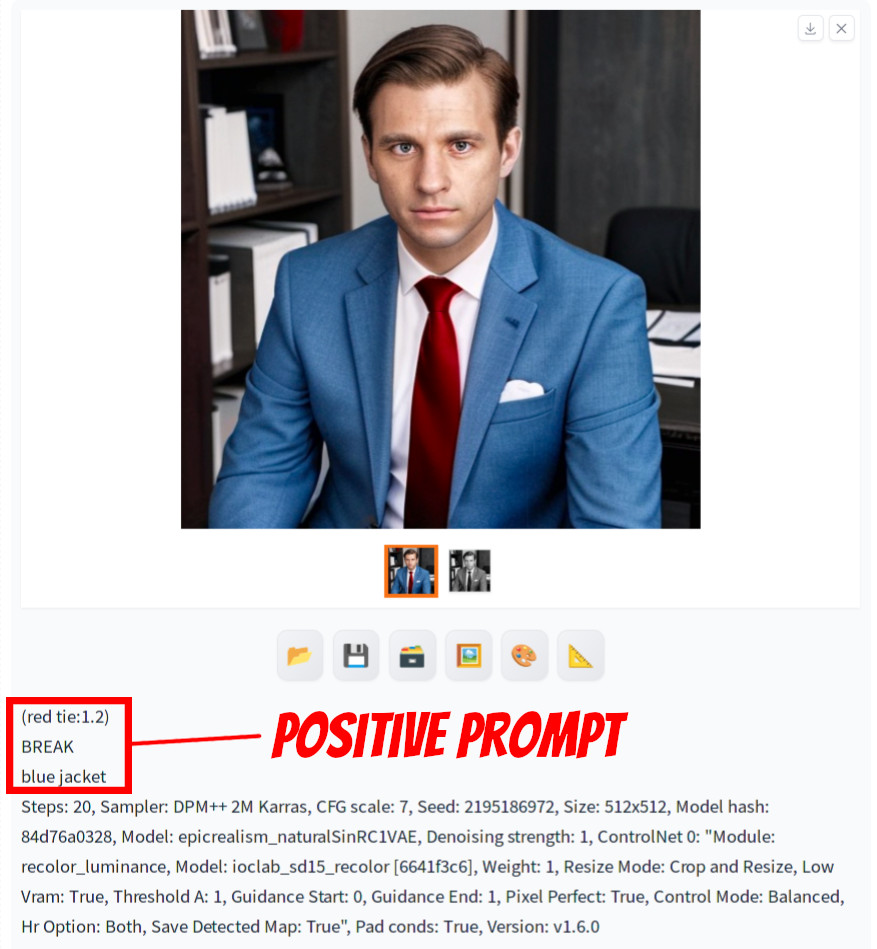
However, the color can bleed easy to other objects from the item you specify and it’s not straightforward to control, so you may need to be aware of that.
Colorizing a very old photo
To colorize a faded image or an image containing lots of noise whether it’s a synthetic or actual photo, you most likely need to conduct extra steps. The synthetic image to emulate an old photo that you see on top of this page was processed by the following steps.
- Repair the face using CodeFormer (see How to use CodeFormer in Automatic1111)
- Colorize
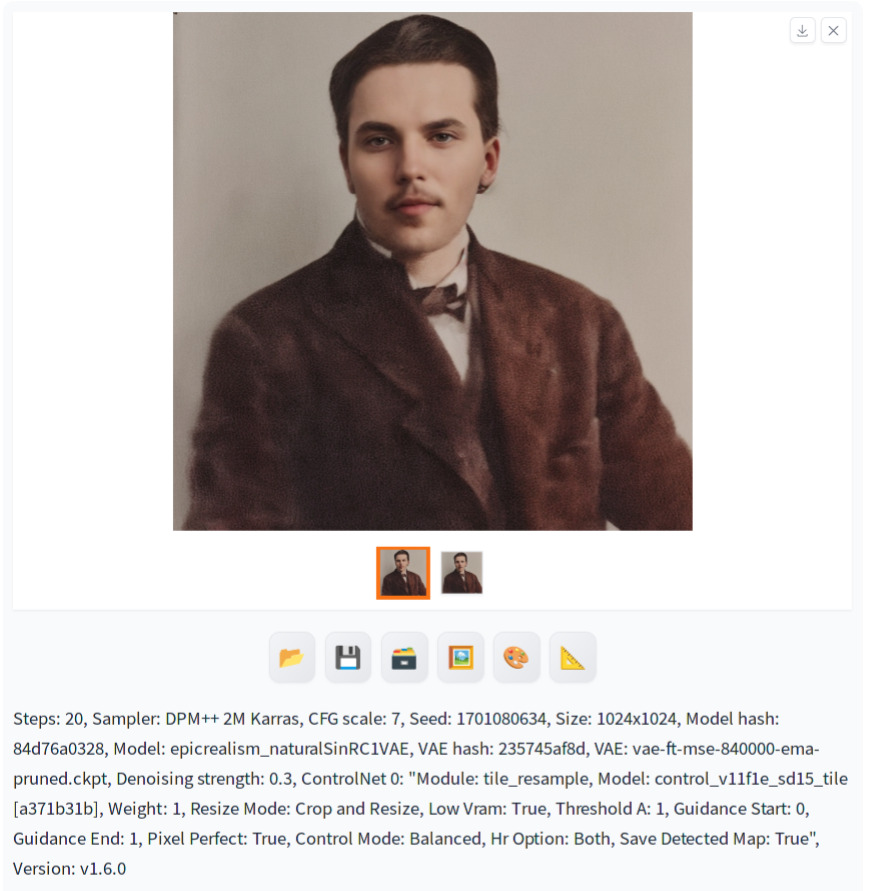
- Add details using ControlNet tile model (see How to use Ultimate SD Upscale extension with ControlNet Tile in Automatic1111 and settings below)
The process of colorizing this type of image can be quite complex, but the reward could be immensely satisfying. When you successfully recolor a faded image, it’s almost as if you bring the person in the image back to life. It creates a vivid impression, making you feel as though you are standing right in front of them.

This was very informative. I appreciate the clarity and depth.