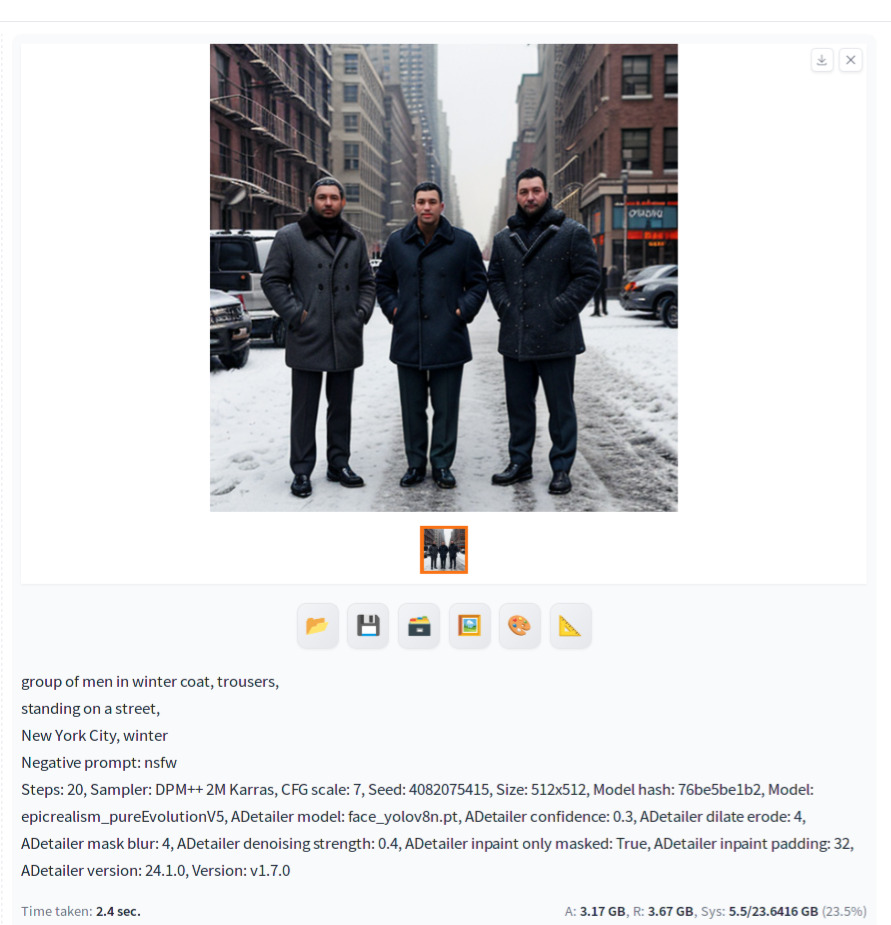
Let’s say you generate the following image of men standing on the street. Obviously, you need to fix faces. We have discussed multiple approaches to repair faces. ADetailer provides another way to fix faces in an automatic way.

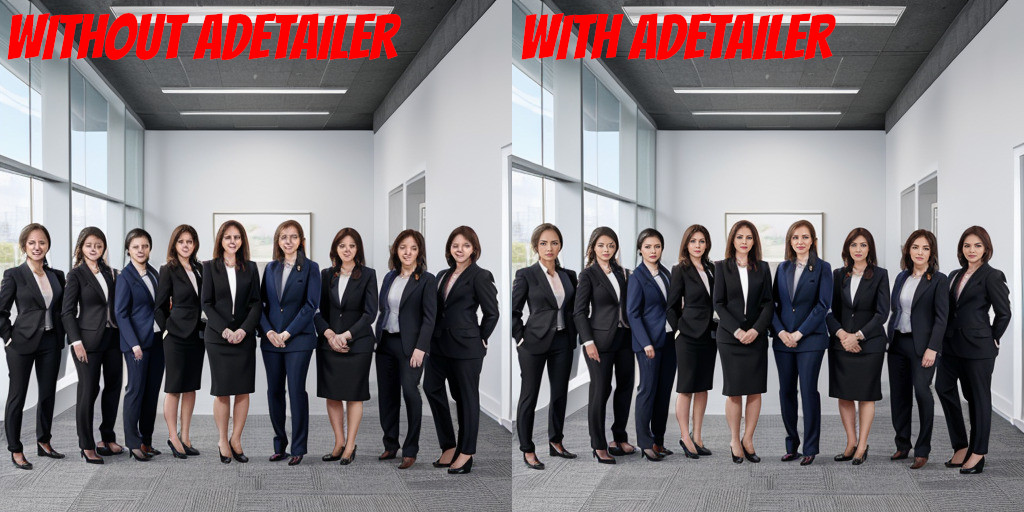
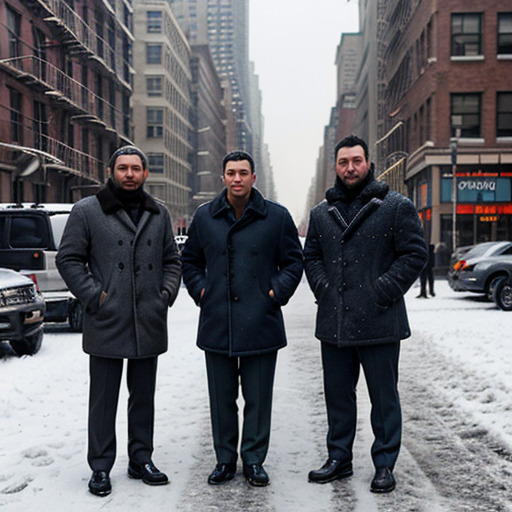
If you turn on ADetailer, then face repair is automatically done when an image is generated. Below is the result of turning on ADetailer.

Underneath the hood, ADetailer uses object detection to detect faces in an image, and for each image, applies Inpainting to reconstruct the face. Applying Inpainting is exactly the same as the manual steps that we have covered in our tutorial. The benefit of using ADetailer is that you will be freed from manual steps such as sending the image to another tab and specifying a mask. This is especially helpful when there are a large number of people in an image. Setting up and using ADetailer are very straightforward. Let’s dive in!
Installation
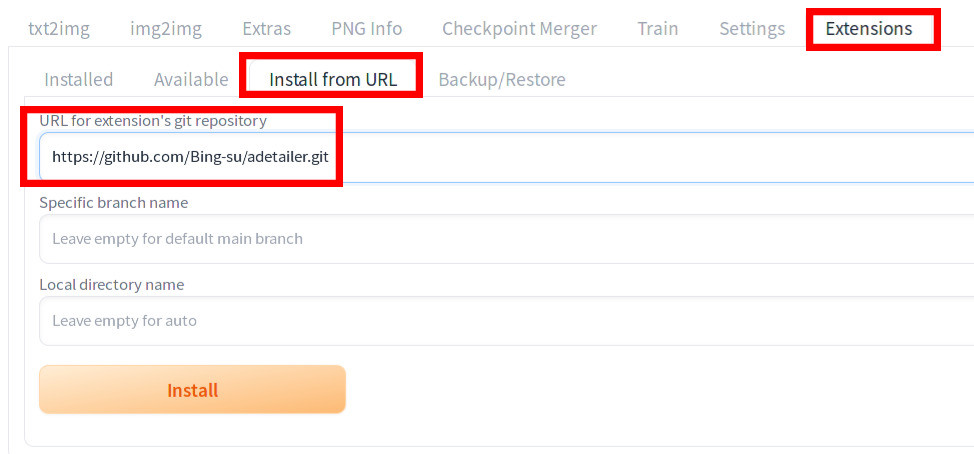
Installing Ultimate SD Upscale is simple. On Extensions | Install from URL tab, In the URL for extension's git repository , enter https://github.com/Bing-su/adetailer.git and press Install.
If you have never installed an extension and you need more information, see this step by step guide: How to install an extension in Automatic1111
Using ADetailer
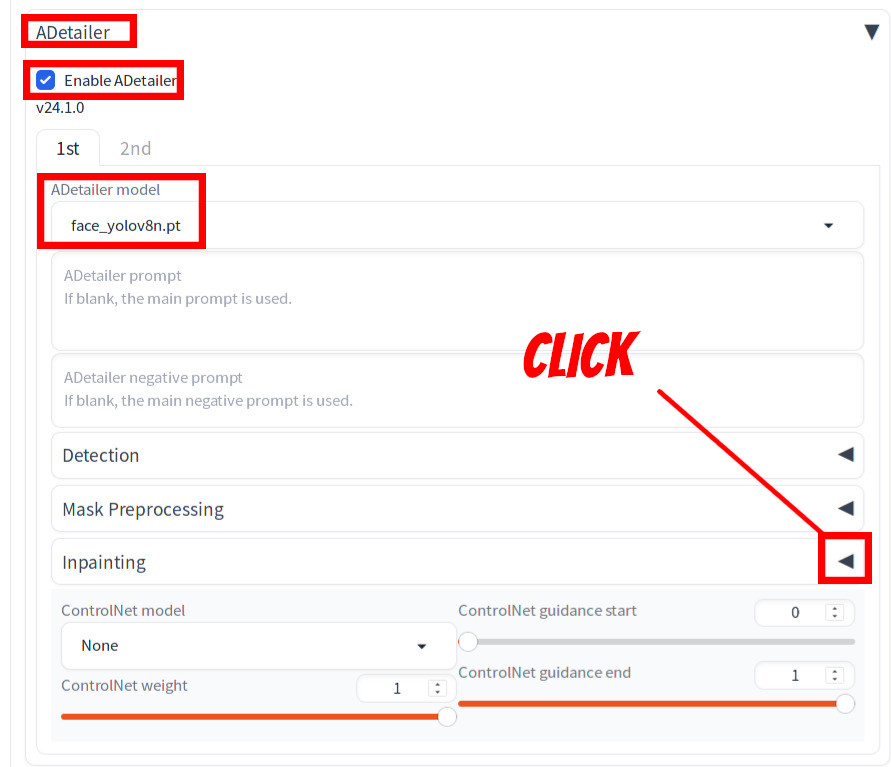
Once ADetailer is installed, go to the txt2img tab. You should see the ADetailer section now. In the section,
- Check
Enable ADetailer. - Verify
ADetailer modelis set toface_yolov8n.pt
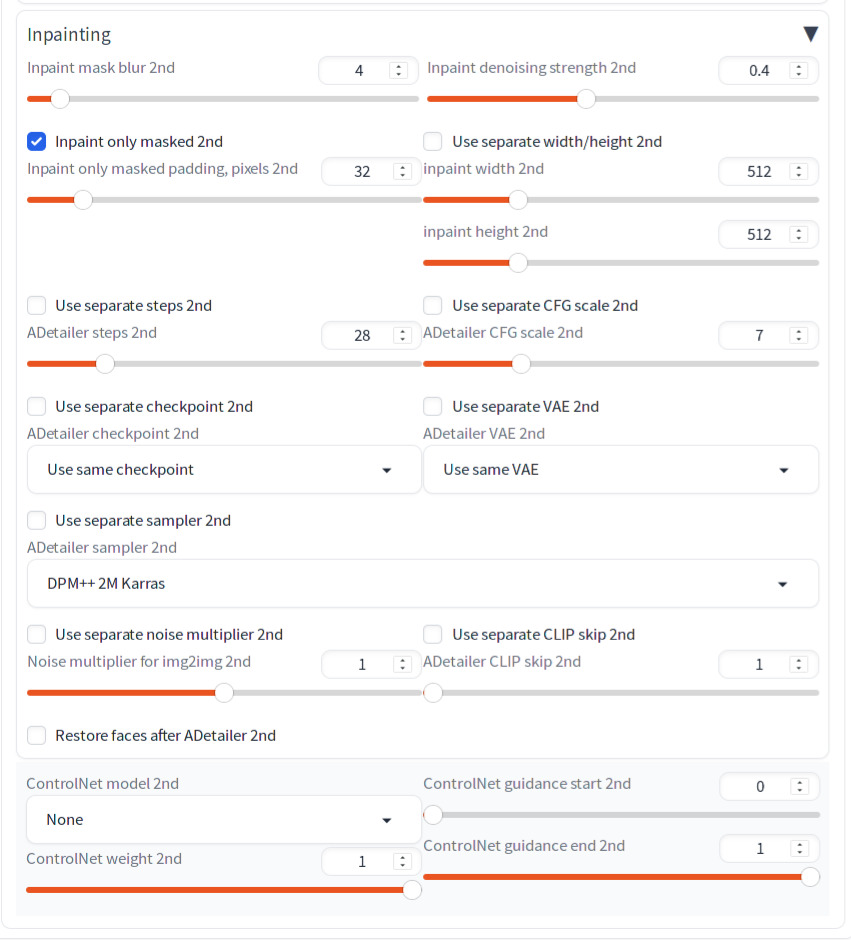
Then click the triangle to open the Inpainting section.
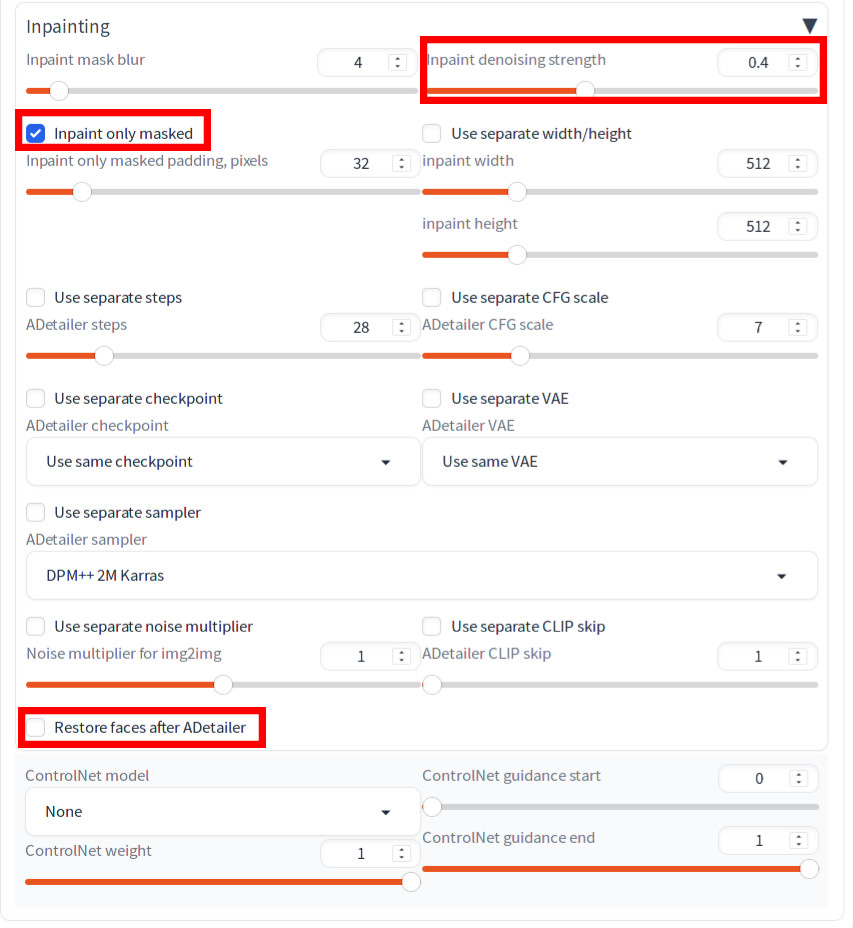
There are a lot of parameters but you can primarily focus on the following parameters:
- Inpaint denoising strength: Start with 0.3 or 0.4. If you don’t see the face repaired, increase the value by 0.1 or less. If the face is out of alignment then decrease by 0.1 or less.
- Inpaint only masked: Should be on.
- Restore faces after ADetailer: Start with off. Once you determine the denoising strength, turn it on to see if it enhances the face.
You are done with setting the parameters. Now if you hit Generate, you should see an image generated with all the faces fixed.
Shown below are the comparison for using different denoise strengths.


Face restore
Below shows the comparison of face restore switch. The right-most photo with face restore turned on shows slight improvement of the appearance in the eye area. As mentioned, you might want to change this setting only after you decide on the value of the denoise strength.

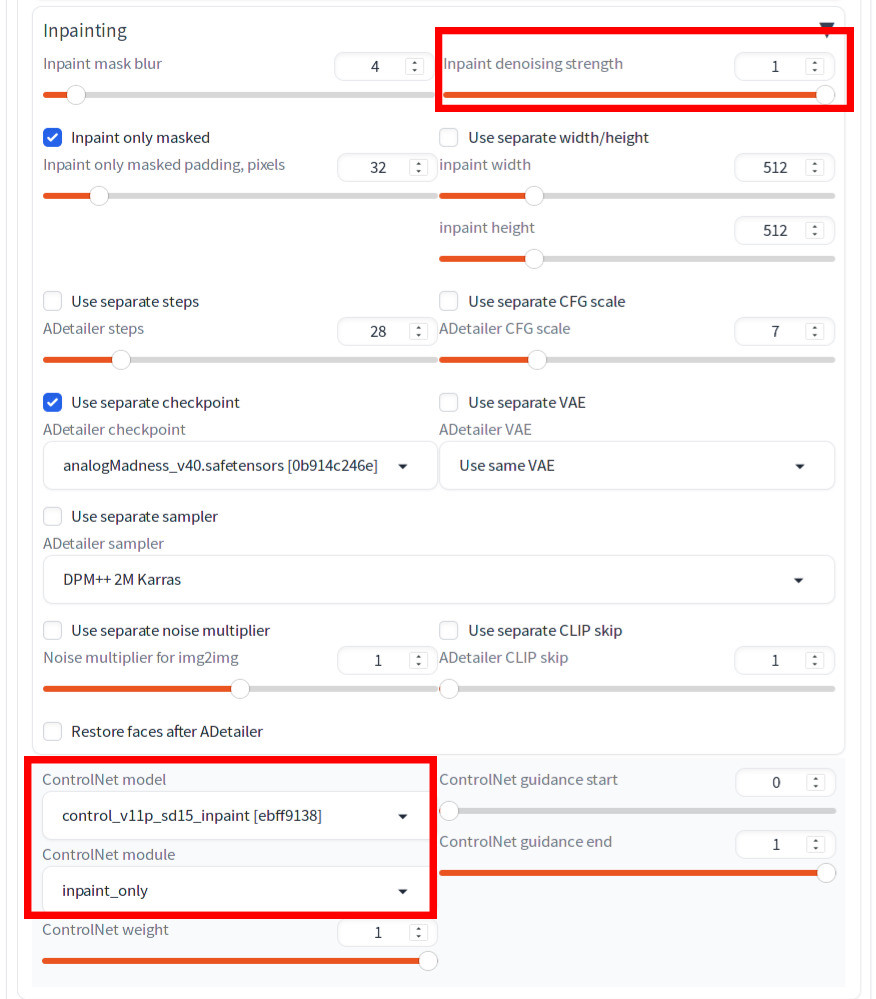
Use of ControlNet Inpainting model with ADetailer
If you’re looking to replace a face in an image using Inpainting, but prefer a different model for this task, it’s important to consider the denoise strength. For instance, you might be satisfied with the background rendered by one model but wish to generate a face using a different model. In such cases, a higher denoise strength is advisable. This approach effectively replaces the original face with the new one generated by the second model, rather than making minor modifications with a lower denoise strength. However, can we really use high denoise strength? Below is an image with denoise strength set to 1 and the Inpainting model set to a different model.
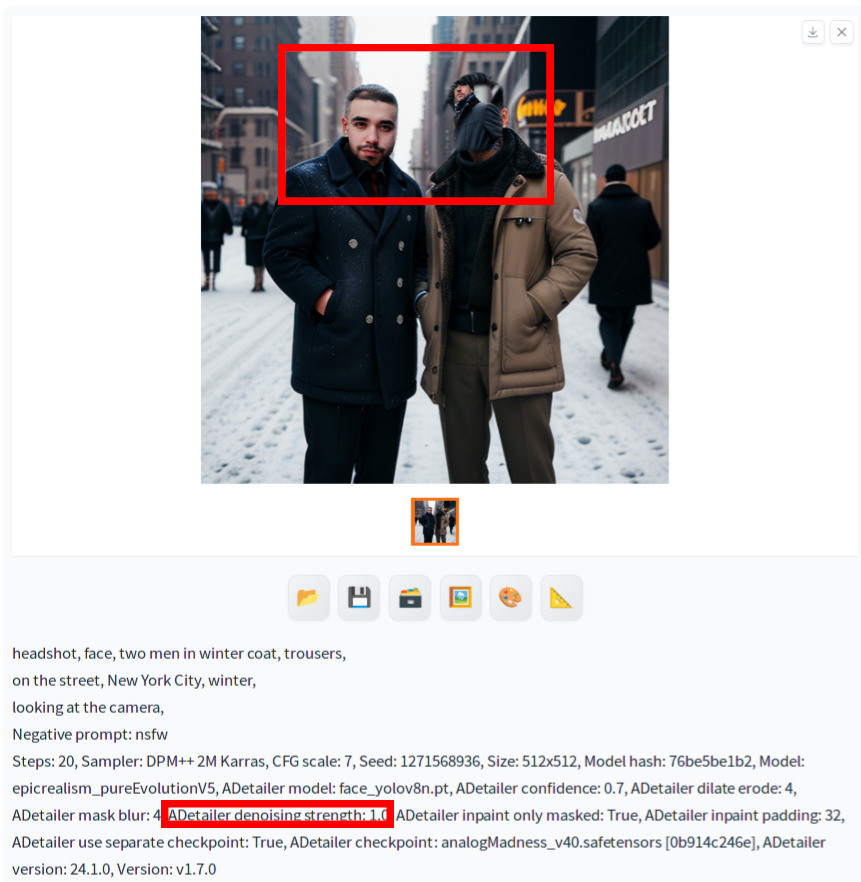
As you can see, the face on the right man is totally out of alignment. ControlNet provides a solution. ControlNet Inpaint model allows you to specify higher denoise strength. To apply ControlNet Inpaint model,
ControlNet modeltocontrol_v11p_sd15_inpaintControlNet moduletoinpaint_only
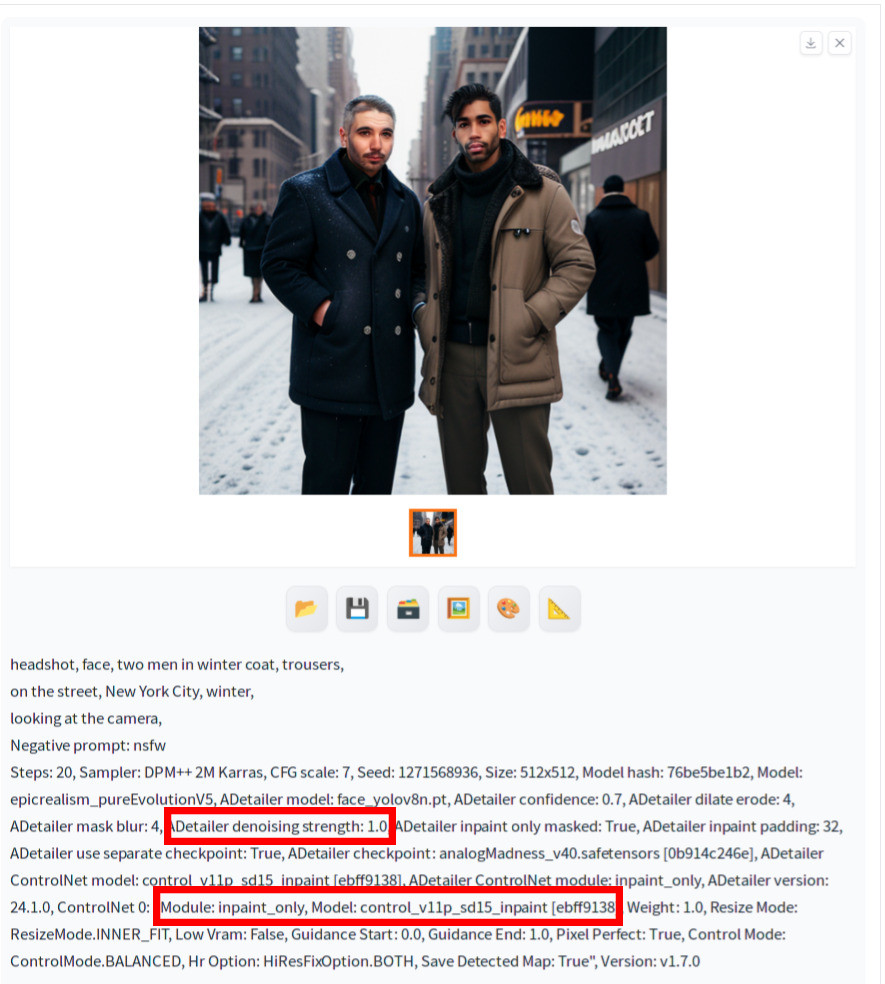
Now you hit generate, you can see that faces are in the right place.
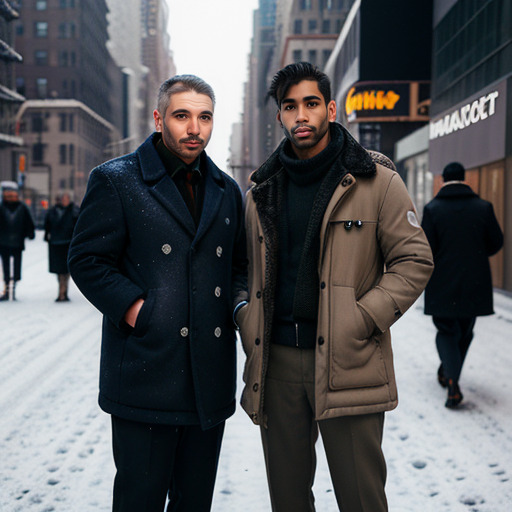
You can apply face restore to touch up. Here is the result. You can also decrease the denoise strength if alignment is off.
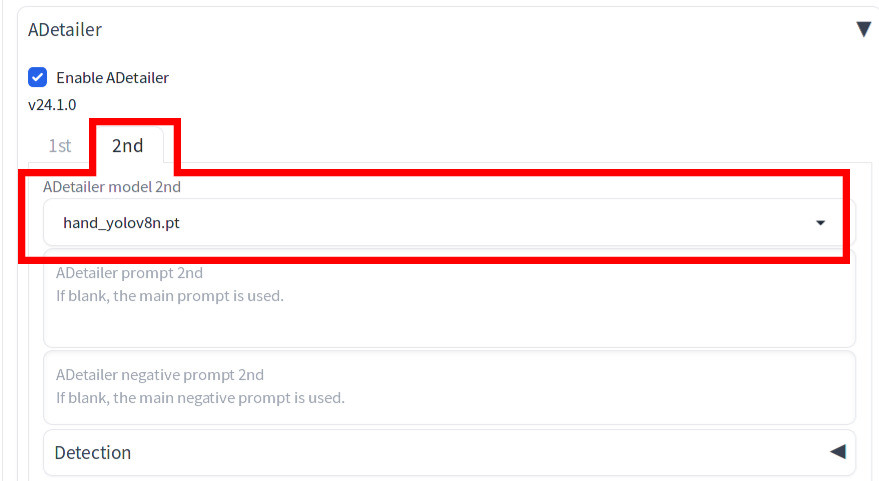
Fixing hands
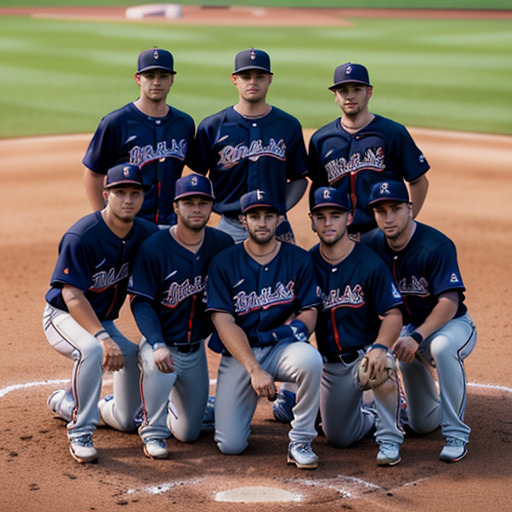
You can also use ADetailer to auto-fix hands. Please bear in mind that the result may not be a perfect fix so it may require further adjustment. This is the photo that we will apply auto hand fix to.

In the ADetailer section, click the 2nd tab and select hand_yolov8n.pt if not selected already.
You can start off with the default values for the Inpainting section.
Now hit Generate. You can see that the hands look more natural for players in front except for the person second from the right.
Other tips
- If face of a person in the background is restored when you don’t want it, raise Detection model confidence threshold (e.g from 0.3 to 0.7).
- If an image contains multiple people, check if the restored faces look similar. If so, you may need to manually Inpaint some of the faces with a different model to give them a different look.
References
[1] Bing-su Dowon. adetailer. Retrieved from https://github.com/Bing-su/adetailer
Appendix
Generation parameter for the original image
group of men in winter coat, trousers,
standing on a street,
New York City, winter
Negative prompt: nsfw
Steps: 20, Sampler: DPM++ 2M Karras, CFG scale: 7, Seed: 4082075415, Size: 512x512, Model hash: 76be5be1b2, Model: epicrealism_pureEvolutionV5