What is Upscaling?
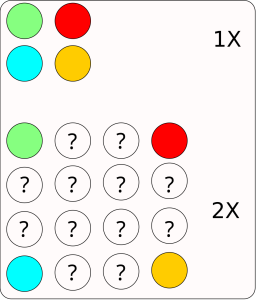
Before diving into the steps for upscaling an image in Automatic1111, let’s first understand what upscaling entails. Upscaling is a process used to enlarge an image. Consider the illustration below: it features a 2×2 image with four circles – green, red, blue, and orange – where each circle represents a pixel. If we were to double the width and height, transforming it into a 4×4 image, there would be additional pixels that don’t correspond to the original 2×2 configuration. These new pixels are marked with a ‘?’. Each of these ‘?’ pixels needs to be filled, a process known as interpolation.
Interpolation involves estimating the values of these new pixels. This can be done by adopting the value of the nearest original pixel or by gradually blending the colors between adjacent pixels. For instance, to interpolate a pixel between a green and a blue pixel, we would transition the color smoothly from green to blue. This interpolation can be achieved through algorithmic methods or model-based approaches. Automatic1111 offers multiple methods utilizing both techniques.
Steps
In this tutorial, we will be using the 512×512 image below.
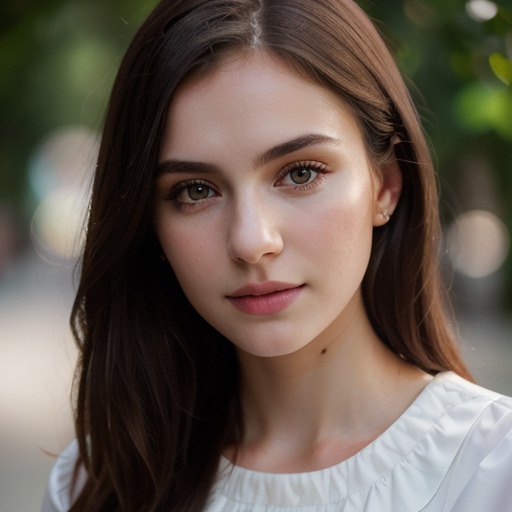
Here are the generation parameters. You are more than welcome to use this image if you’d rather skip image generation.
ultra-detailed, highly detailed, 8k, uhd, high quality,
face, headshot, portrait of a (beautiful:1.3) 20-year-old woman in a classy blouse,
skin imperfections, head tilted,
pale skin, slender,
raw photo, canon 5d mark iv, 85mm lens, sharp focus, depth of field, bokeh,
Negative prompt: nsfw, ugly, disfigured, drawing, 3d,
worst quality, low quality, bad quality,
text, watermark,
extra limb, mutated hand, fused hands, bad hands, extra hand,
bad fingers, fused fingers, extra fingers, malformed fingers,
extra digit, missing digit
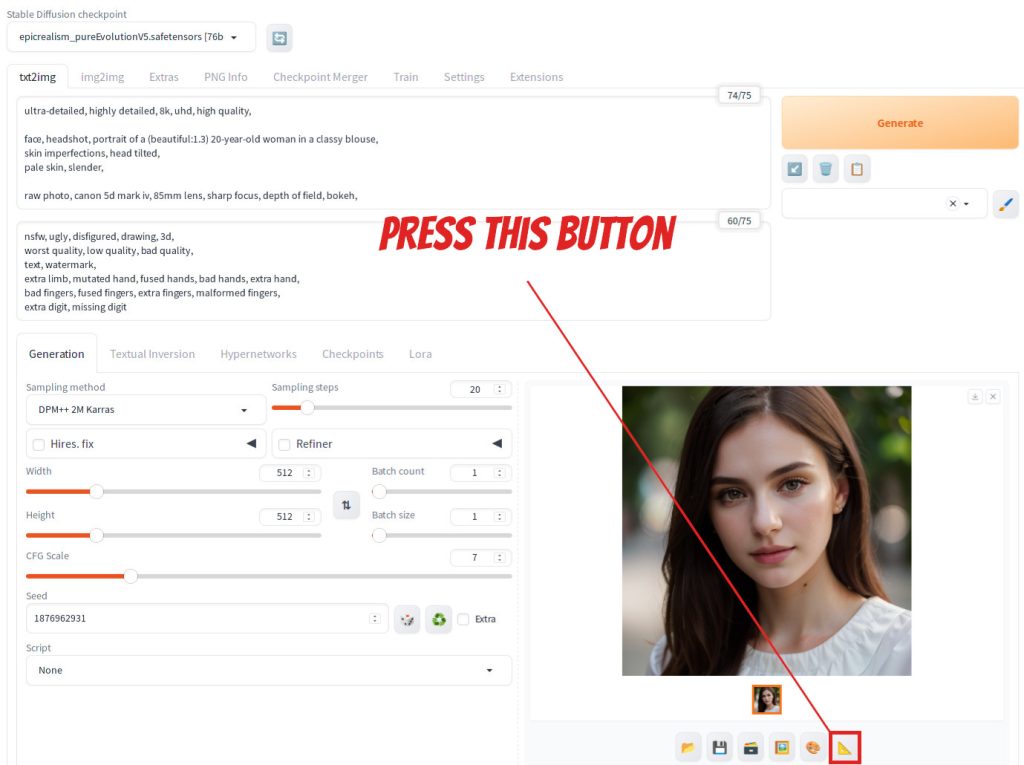
Steps: 20, Sampler: DPM++ 2M Karras, CFG scale: 7, Seed: 1876962931, Size: 512x512, Model hash: 76be5be1b2, Model: epicrealism_pureEvolutionV5Once you generated the image, while on the txt2img tab, press Send to Extras button below the generated image.
Then Extras screen below should be displayed. It’s important to note that depending on the version of Automatic1111 you are using, the list of fields displayed under Upscaler2 may be different from what’s shown in this screenshot. However, this should not be a concern as this post will focus solely on the primary upscaling features.
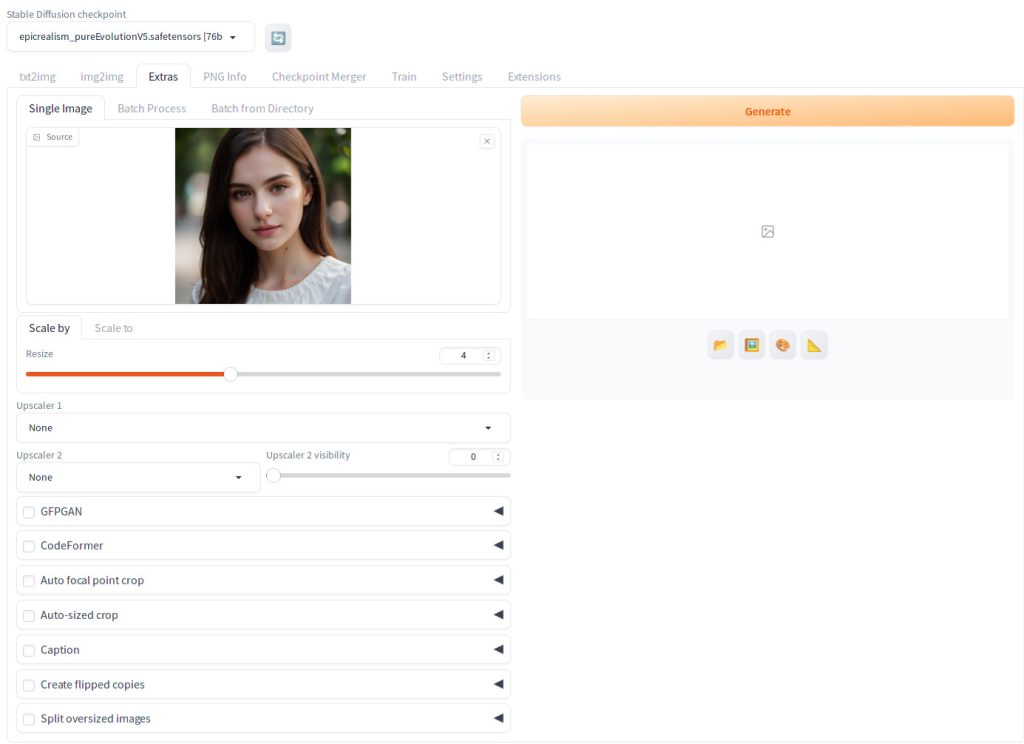
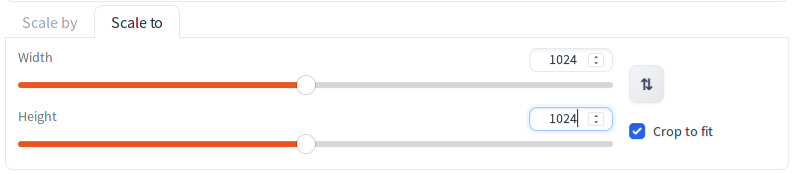
You have the option to define either the scale ratio or the target image resolution. To set the scale ratio, enter the desired value in the ‘Scale by’ tab. Alternatively, to specify the target image resolution, use the ‘Scale to’ tab.

For example, if you specify 4 on Scale by and your source image is 512×512, the generated image will be 2048×2048.
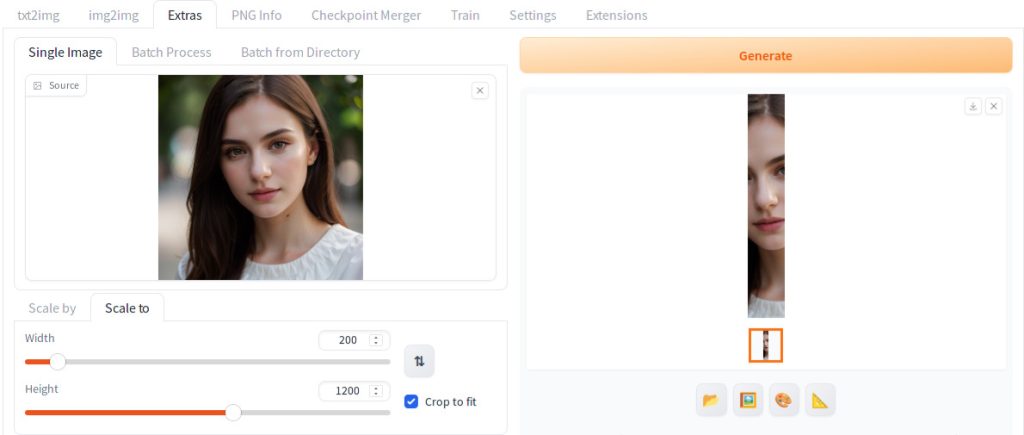
If you check Crop to fit, if the aspect ratio of the target image is different from the source image, it will crop a part of the image to fit the target dimension as shown below.
If you click Upscaler 1 drop down list, the following list of upscalers should be displayed:
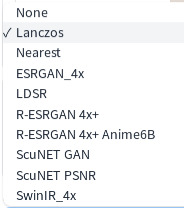
Lanczos and Nearest are algorithm-based upscalers and the remaining are model-based upscalers. Automatic1111 automatically download the required model if you haven’t downloaded yet. For example, if you specify LDSR, you should see a console output like below when you generate an image using LDSR for the first time:
Downloading: "https://heibox.uni-heidelberg.de/<hidden ...>" to <your Automatic1111 installation path ...>/stable-diffusion-webui/models/LDSR/model.ckpt
Comparison of upscaling methods
To assist you in selecting the most suitable upscaler, presented below is a 100% crop of the eye area from a sample image, upscaled by various upscalers. The sample was enlarged 4x using upscaling techniques, from a resolution of 512×512 to 2048×2048, with the eye area specifically extracted for detailed comparison.

R-ESRGAN 4x+ Anime 6B excels in creating a unique aesthetic with sharp edges and smooth textures, making it ideal for upscaling anime-style images. However, it may not be the best choice for realistic images, particularly if the goal is to achieve a photorealistic effect. I personally prefer LDSR and ESRGAN 4x for their detailed skin texture rendering, but ultimately, the choice depends on your preference. I selected the eye area as an example because it clearly illustrates the differences between these methods.
Upscaler 1 vs Upscaler 2
Instead of just using one upscaler, you can also specify the second upscaler. If you specify the second upscaler in Upscaler 2, the upscaled result from both upscalers are blended using the following formula [1], [2]:
out = upscaler1_image * (1.0 - upscaler_2_visibility) + upscaler2_image * upscaler_2_visibilityReferences
[1] AUTOMATIC1111. stable-diffusion-webui. Retrieved from https://github.com/AUTOMATIC1111/stable-diffusion-webui/blob/master/scripts/postprocessing_upscale.py#L113
[2] Pillow developers. Pillow (PIL Fork) 10.1.0 documentation. Retrieved from https://pillow.readthedocs.io/en/stable/reference/Image.html#PIL.Image.blend.