
Overview
In this tutorial, we’ll explore the various methods of upscaling images using ComfyUI. ComfyUI offers two distinct approaches to achieve this:
- Algorithmic Upscaling: This method enhances the image resolution through specific algorithms.
- Model-Based Upscaling: This approach leverages trained models to upscale images.
We will delve into both options, providing information on how to use each method for image upscaling in ComfyUI
Setting up
If you’re already familiar with using upscaling in Automatic1111, the setup process in ComfyUI is straightforward. Just follow these steps:
- Configure
extra_model_paths.yaml: Ensure this file correctly points to your existing Automatic1111 installation. If you’re unsure about this step, please refer to Installing models section in this tutorial. - Verify Model Files: This step is not required if you are only interested in algorithic upscaling. However, if you want to upscale using a model, it is a required step. In the
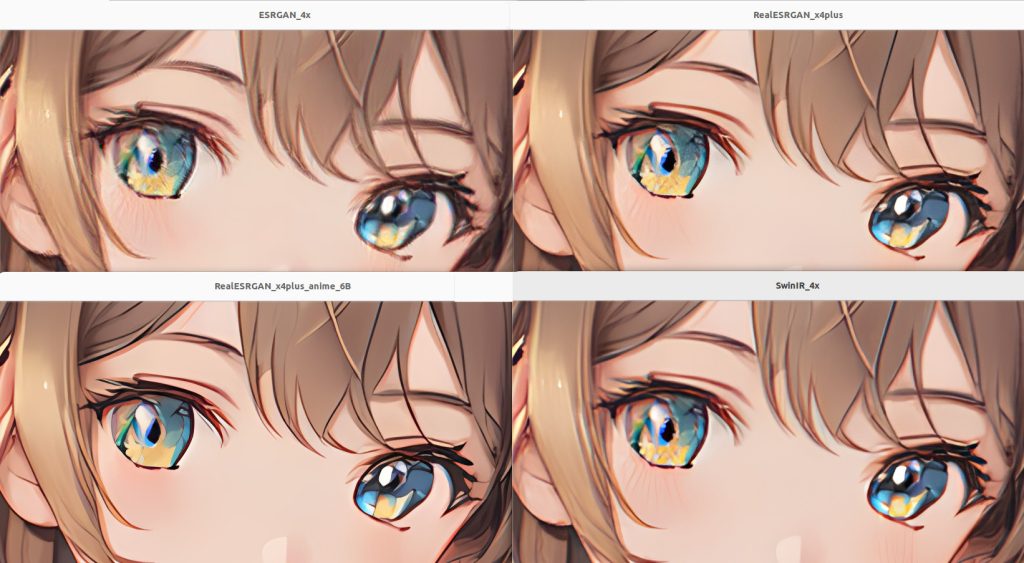
stable-diffusion-webui/modelsdirectory, confirm the presence of the following files:ESRGAN/ESRGAN_4x.pthRealESRGAN/RealESRGAN_x4plus.pthRealESRGAN/RealESRGAN_x4plus_anime_6B.pthSwinIR/SwinIR_4x.pth
If you’re not utilizing the Automatic1111 directory, ensure that your upscale models are located in <ComfyUI installation directory>/models/upscale_models.
1. Algorithmic Upscaling
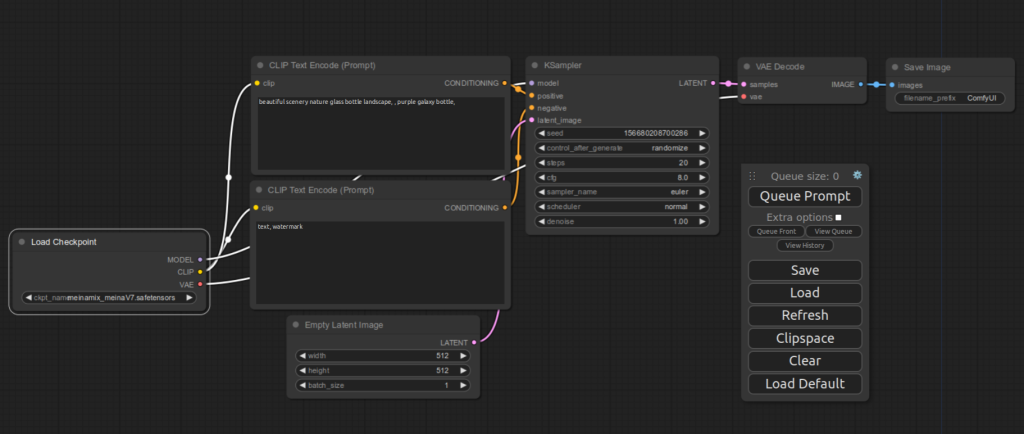
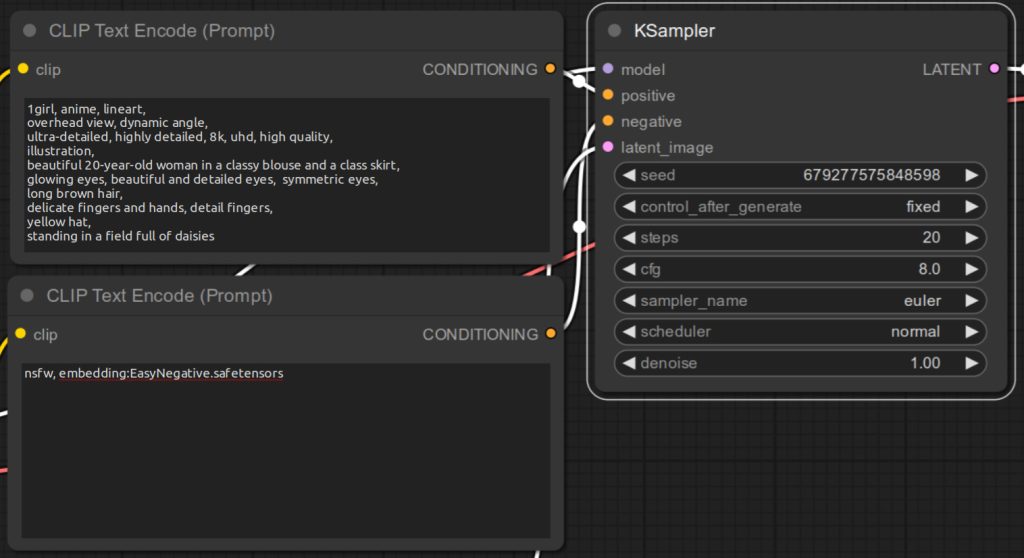
As with our other lessons, we’ll begin with the default text-to-image generation workflow in ComfyUI.
If you haven’t done so, press Load Default button on the main menu to load the default UI. You should see the following flow for text to image.
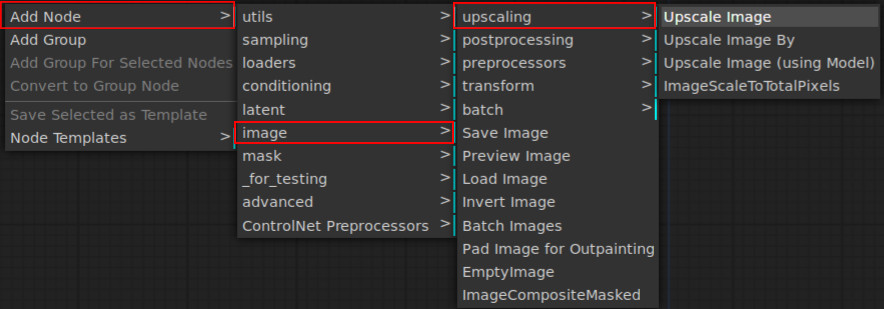
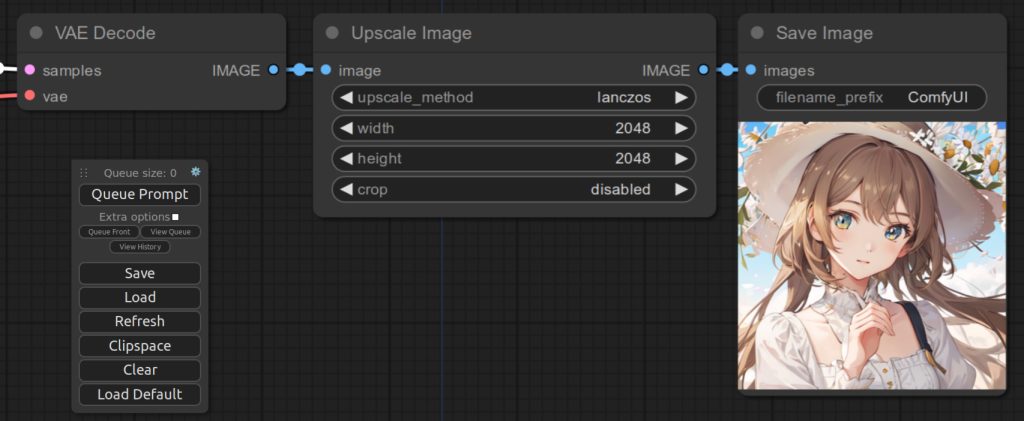
Right-click an empty space on the UI and select Add Node | image | upscaling | Upscale image.
Upscale Image mode is created.
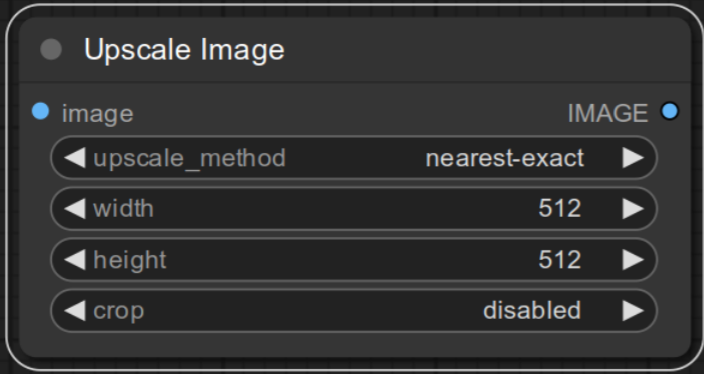
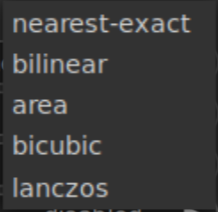
If you click upscale_method, list of algorithms are displayed. Pick the one that you like. In this tutorial, we will be using lanczos.
Adjust the width and height to the target dimension. We will be using 2048px for both for this tutorial. Now in the default configuration, IMAGE output of VAE Decode node is connected to images input of Save Image node. Put Upscale Image node between them as shown below. Congratulations, you are done with wiring.

Adjust prompts as needed. For this tutorial, meinamix_meinaV7.safetensors was used as the main model.
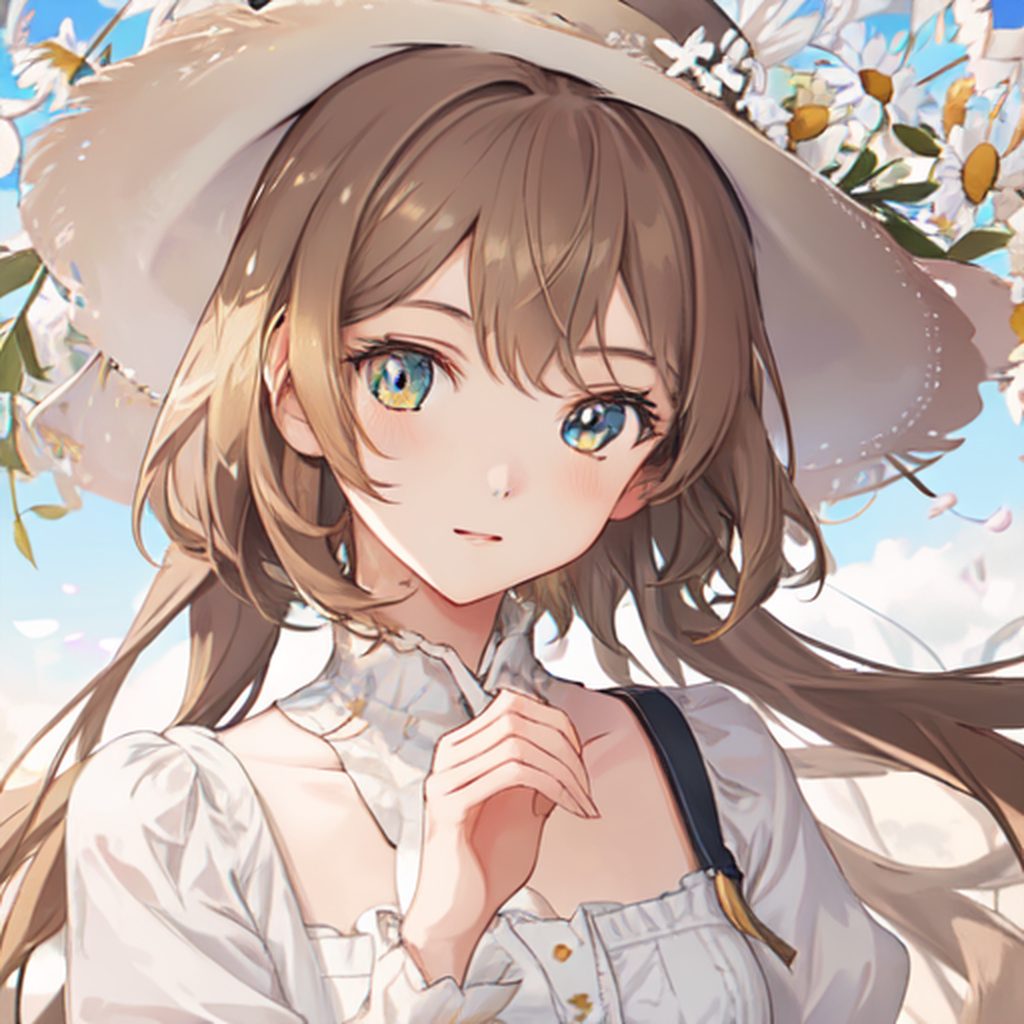
Now click Queue Prompt. Your image should be generated in 2048px by 2048px.
Upscaling Images by Scale Ratio
As an alternative to specifying the exact pixel dimensions for the upscaled image, you can upscale by setting a scale ratio. Follow these steps to do so:
- Select ‘Upscale Image By’: In the menu below, choose the
Upscale Image Byoption. - Create the Upscale Node: This action will generate an
Upscale Image Bynode in your workflow. - Rewire the Node: Just like with the
Upscale Imagenode, reconfigure the connections for this new node. - Set the Scale Parameter: By entering a value in the
scale_byparameter, you determine the scaling factor. For instance, specifying ‘3’ will transform a 512×512 image into one that is 1536px by 1536px.
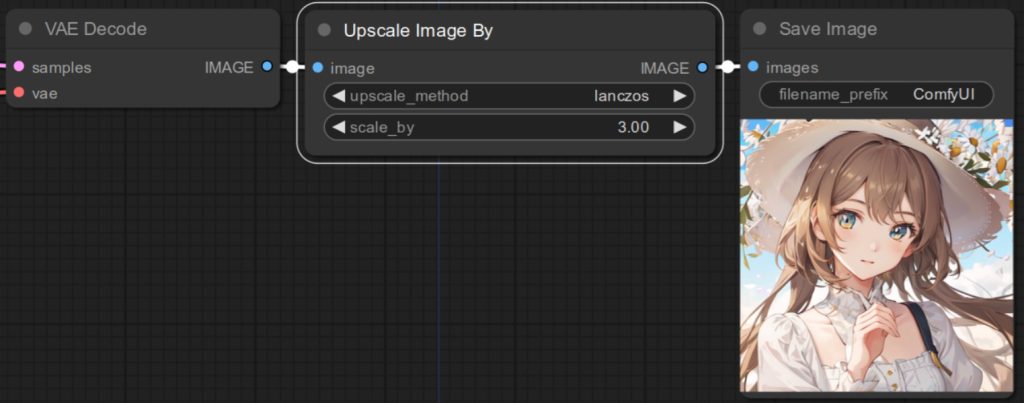
This method provides an easy way to upscale images based on a multiplier of their original dimensions. Similarly, ImageScaleToTotalPixels allow you to specify the total number of pixels in your image. For example, if you specify 4, the total number of pixels will be 4 x 1024 x 1024, resulting in 2048 x 2048 image [1].
2. Model-Based Upscaling
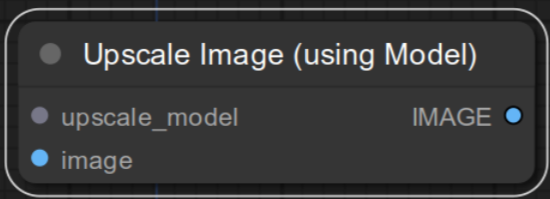
To upscale your image using model-based upscaling, select Upscale Image (using Model) from the menu below.
An Upscale Image (using Model) node is now created as shown below.
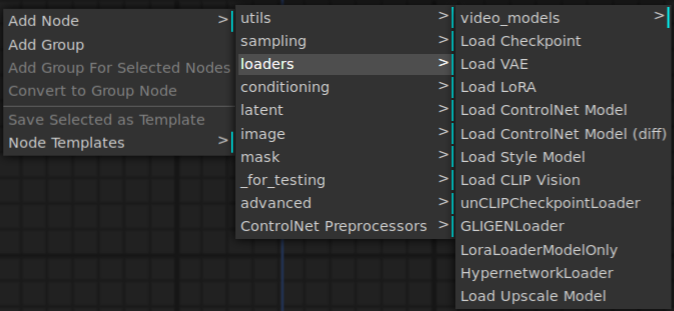
Right-click an empty area of UI and select Add Node | loaders | Load Upscale Model.
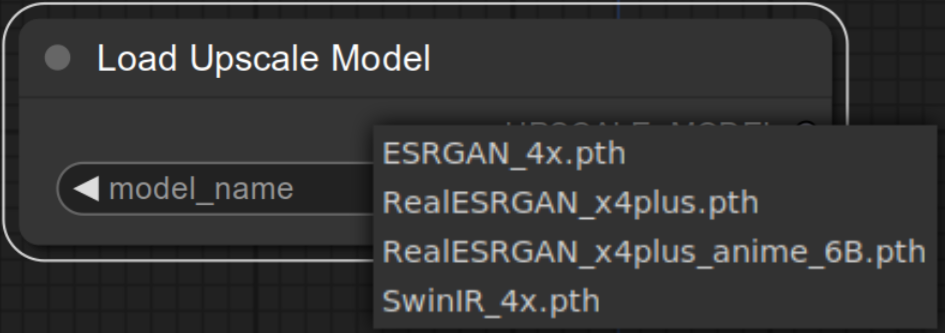
Once a Load Upscale Model node is created, you can select the model that you want to use by clicking the drop down list.
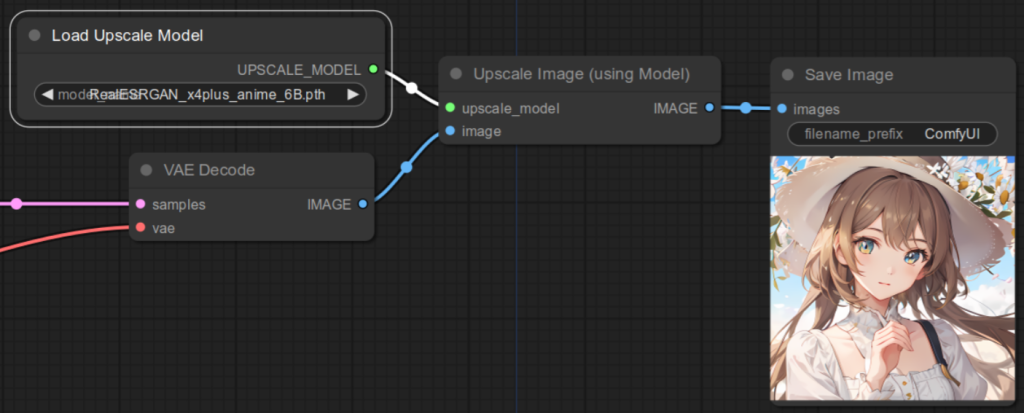
Wire the UPSCALE_MODEL output of Load Upscale Model to upscale_model input of Upscale Image (using Model) and connect Upscale Image (using Model) to both VAE Decode and Save Image. Congratulations! You are done. If you click Queue Prompt, your image will be generated. Note that for an anime like image, RealESRGAN_x4plus_anime_6B model can generate a sharper line than other models
References
comfyanonymous. ComfyUI. Retrieved from https://github.com/comfyanonymous/ComfyUI/blob/master/comfy_extras/nodes_post_processing.py#L259.