Overview
Inpainting is a crucial tool for adding details or modifying specific parts of an image. Using Inpainting with ComfyUI is remarkably straightforward. In this tutorial, we’ll explore how to seamlessly add a puppy beside a lady on a bench, demonstrating the power and ease of inpainting in ComfyUI.
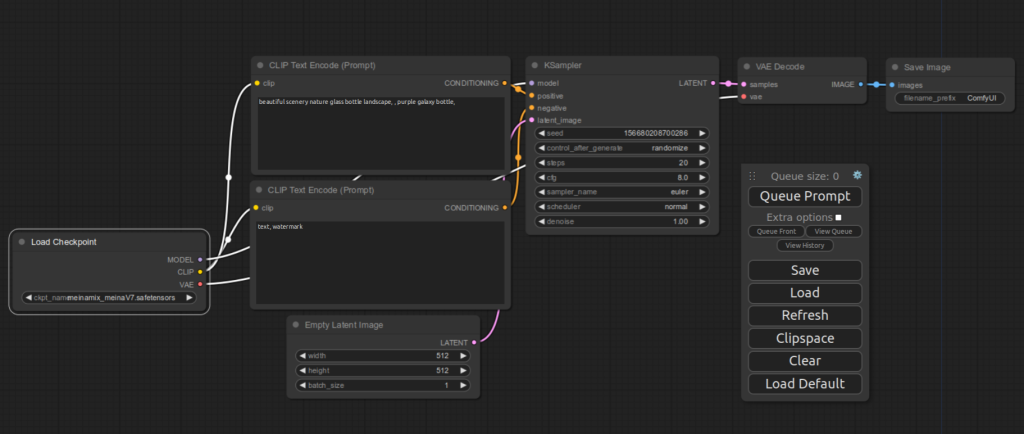
As with our other lessons, we’ll begin with the default text-to-image generation workflow in ComfyUI.
Instead of an empty latent (noise) image, KSampler uses a ‘masked image’ for image generation. A masked image is one where the user has specifically marked a portion of the image. In a Stable Diffusion inpainting workflow, it’s generally more convenient to mark the area you wish to replace, although the opposite approach is also possible.
ComfyUI features a built-in editor for mask creation. In this editor, you’ll paint the area you want to replace in black.
After preparing your masked image, you can process it through KSampler, which denoises only the masked area. Similar to the Image-to-Image process, KSampler requires the image in a latent form. Therefore, you’ll need to convert your masked image into a latent image using a specialized VAE Encode node for inpainting.
To summarize, the following modifications are necessary:
- Remove the
Empty Latent Imagenode, as it’s not needed. - Choose an Inpainting model.
- Insert a
Load Imagenode. - Create a mask using the MaskEditor, accessible from the ‘Load Image’ node.
- Add a
VAE Encode (for inpainting)node. - Adjust the wiring of these nodes accordingly.
- Specify text in positive and negative prompts for the image that you want to set in the masked region.
Let’s dive in and get started.
1. Choose an Inpainting model
If you haven’t done so, press Load Default button on the main menu to load the default UI. You should see the following flow for text to image.
First, delete Empty Latent Image node at the bottom that we don’t need. Select the node then press the DELETE key.
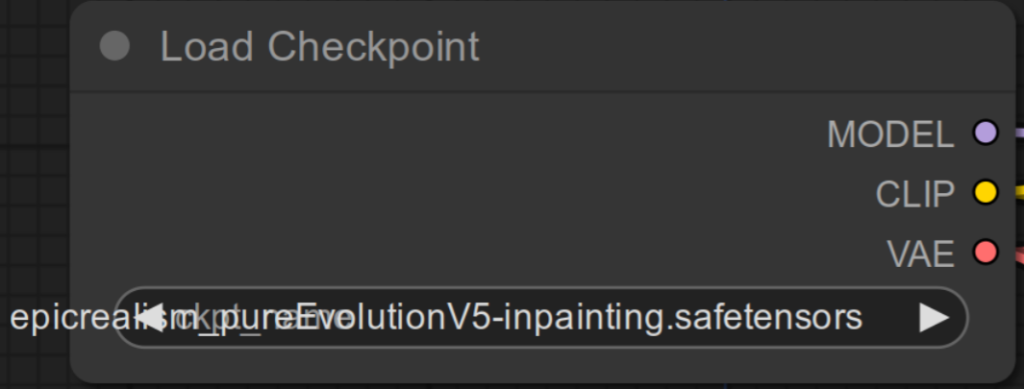
Then, click the drop down list in Load Checkpoint node, and select an Inpaint model. An Inpaint model is a special model that is designed to work for Inpainting. If you don’t have any, please download from a model website of your choice before proceeding further. In this tutorial, we will be using epicrealism_pureEvolutionV5-inpainting.safetensors.
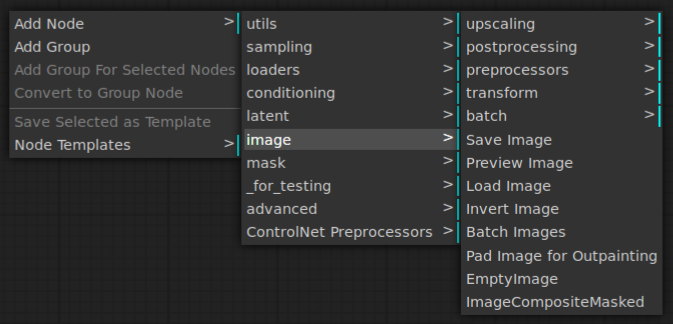
2. Insert a Load Image node
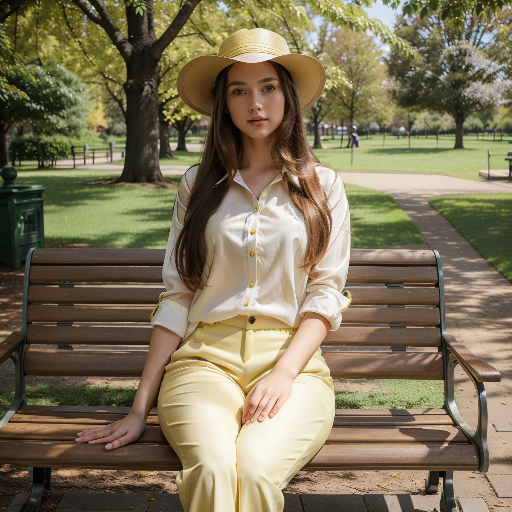
Right-click an empty space on the UI and select Add Node | image | Load Image menu item.
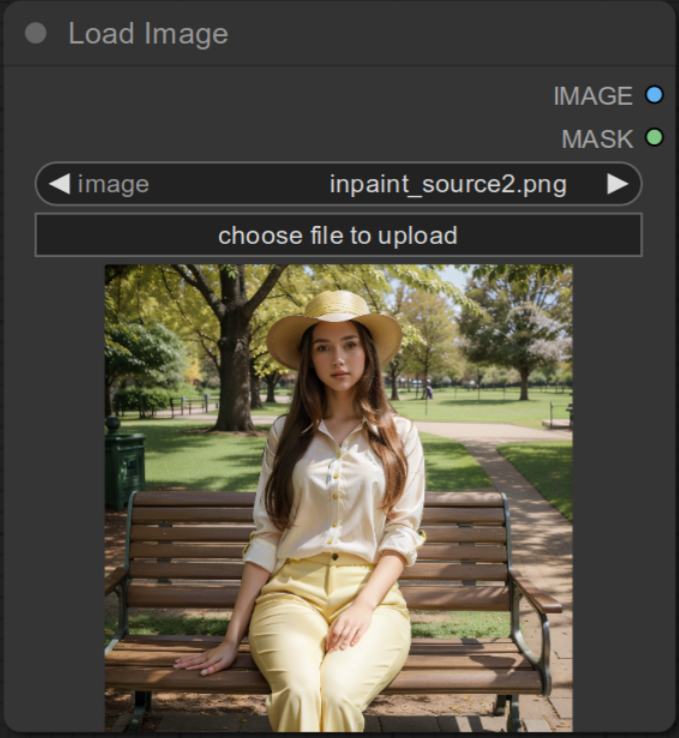
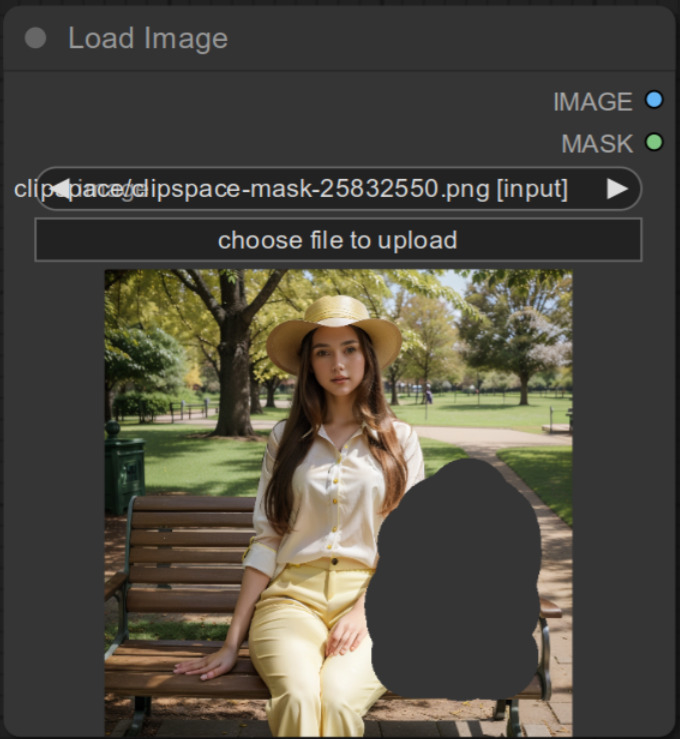
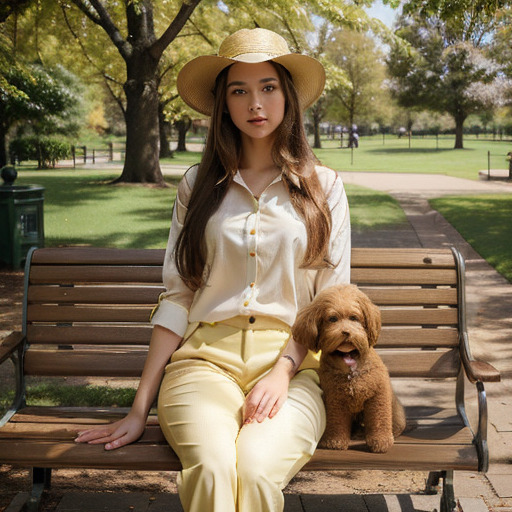
Once the Load Image node is created, select a source image by pressing choose file to upload. Once the file is uploaded, you should see the image appear on the node as shown below.
3. Create a mask using the MaskEditor
Right-click anywhere on the Load Image node. You should see a pop-up menu like below.
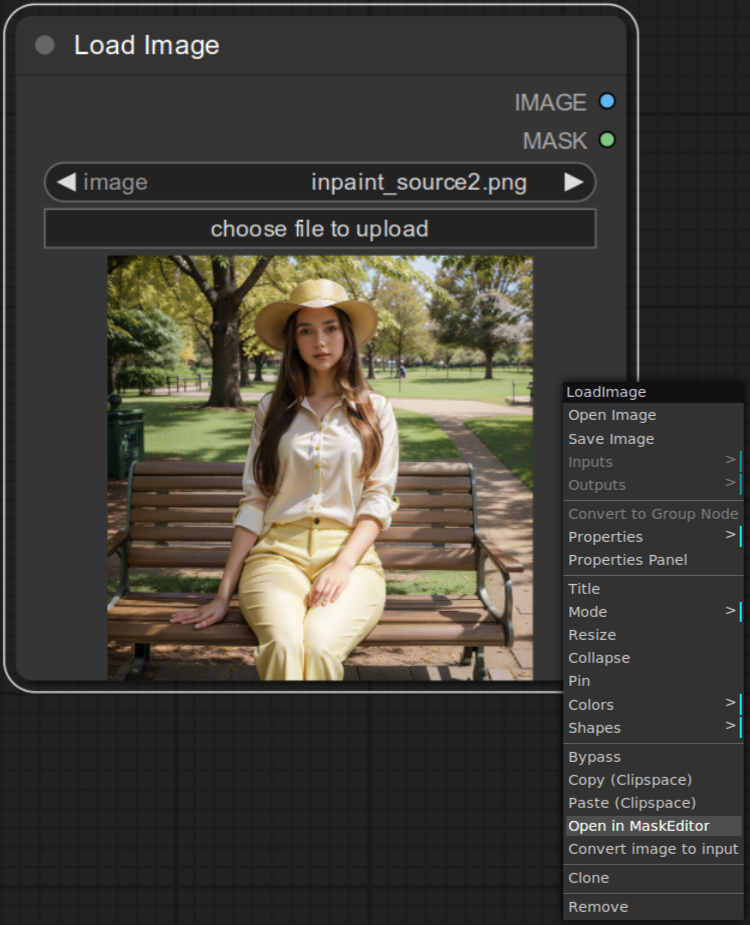
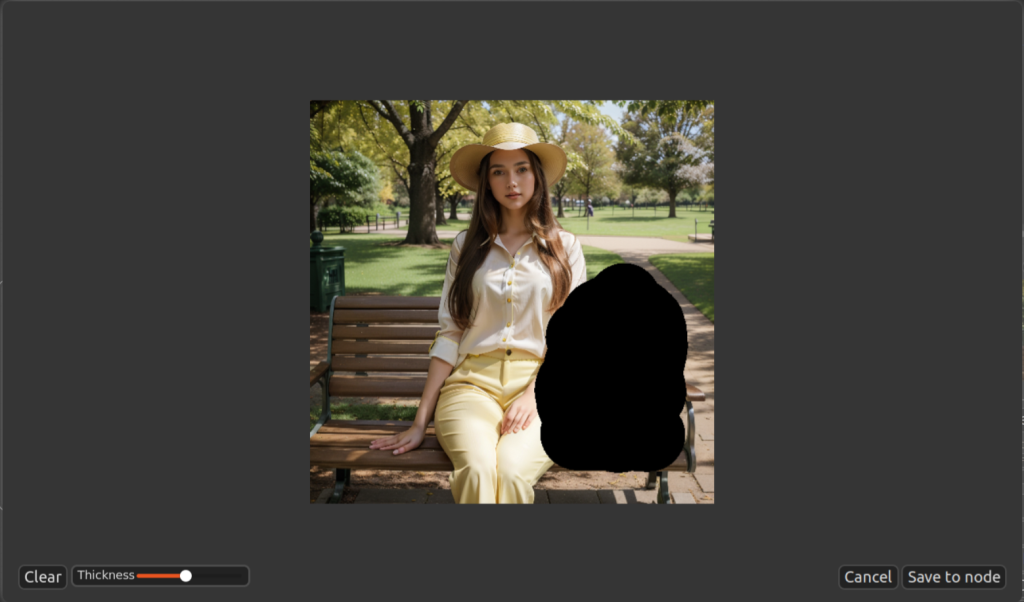
Select Open in MaskEditor. The editor opens up.
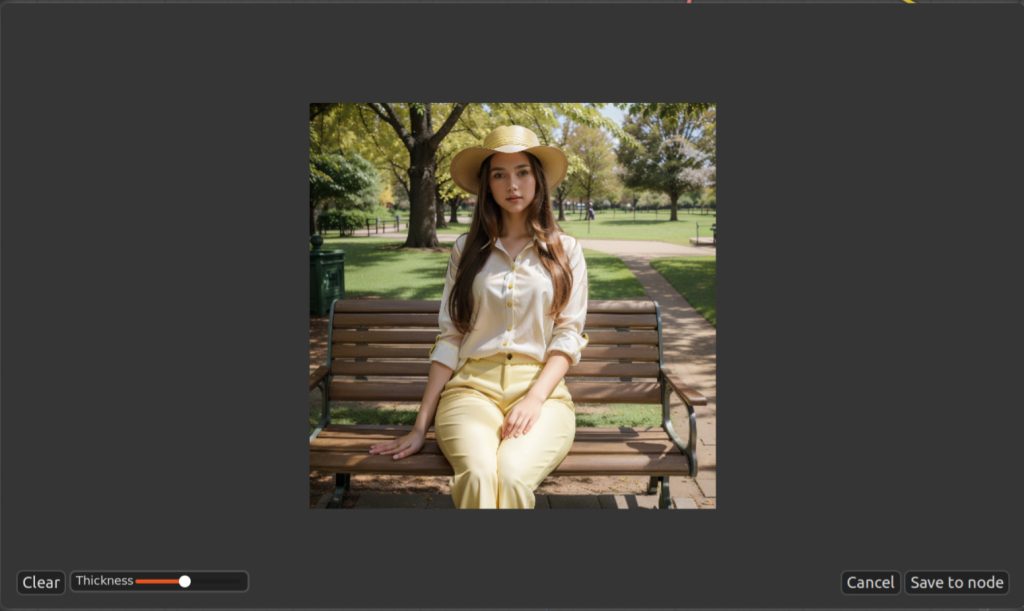
Paint the area to the right of the lady from the viewer. This is the area where we want to put a puppy.
Once you are done, press Save to node. You will see that the masked image is now set to Load Image. Note that the file name has changed to an auto-generated file name that contains the mask.
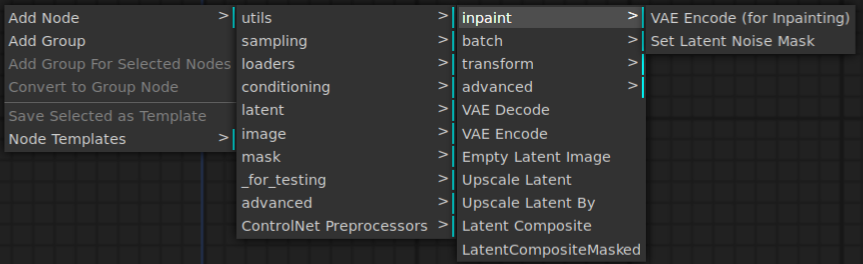
4. Add a VAE Encode (for inpainting) node.
Right-click an empty space on the UI and select Add Node | latent | inpaint | VAE Encode (for inpainting) menu item.
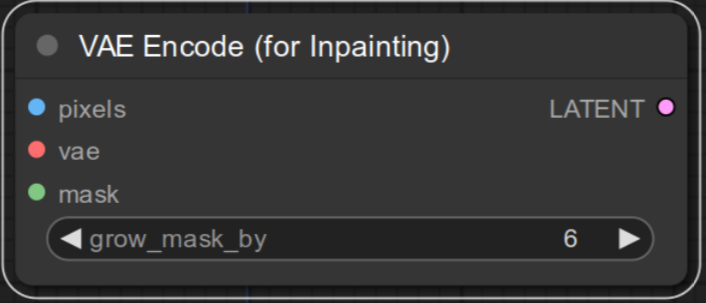
You should see the new VAE Encode (for Inpainting) is created. You are done with adding node. Let’s move onto rewiring.
5. Adjust the wiring
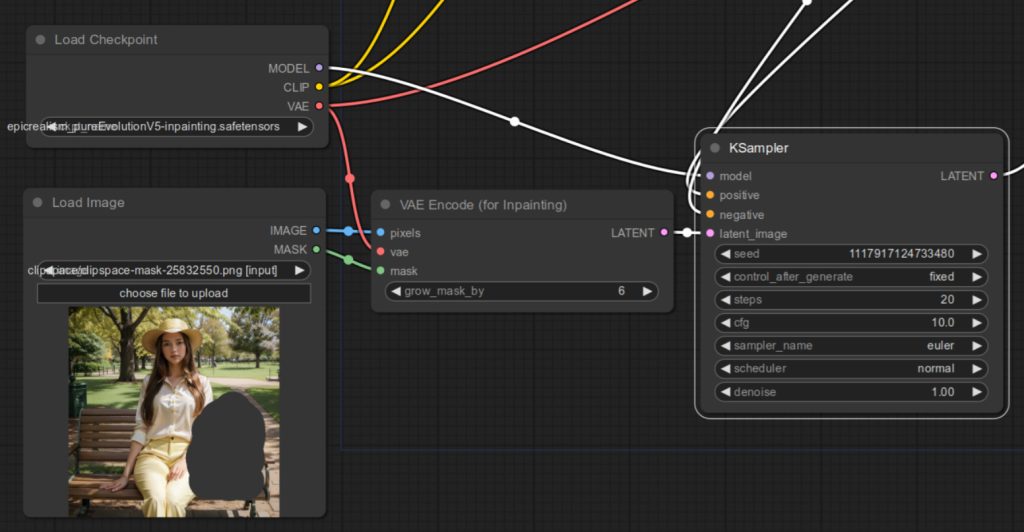
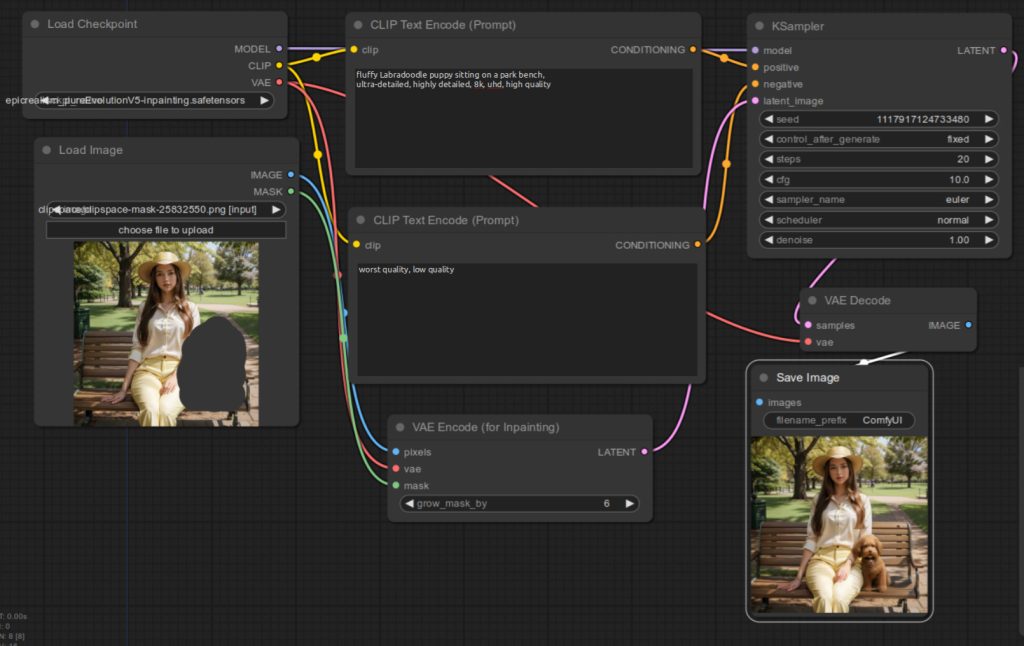
Below figure contains all the rewiring that is needed. Here are the changes:
- Connect
VAEoutput of Load Checkpoint tovaeinput of VAE Encode (for Inpainting). - Connect
IMAGEoutput of Load Image topixelsinput of VAE Encode (for Inpainting). - Connect
MASKoutput of Load Image tomaskinput of VAE Encode (for Inpainting). - Connect
LATENToutput of VAE Encode (for Inpainting) tolatent_imageinput of KSampler.
6. Specify text in positive and negative prompts for the Inpainting image
Our final task is to specify text in positive and negative prompts that describe the image that you want to set in the masked region.
For this tutorial, let’s use:
Positive prompt:fluffy Labradoodle puppy sitting on a park bench,
ultra-detailed, highly detailed, 8k, uhd, high quality
Negative prompt:worst quality, low quality
You are done. If you click Queue Prompt, you should see a fluffy puppy next to the lady.
As long you are using an Inpaint model, you should be able to specify 1.00 for the denoise parameter in KSampler, but if you see any issues, try adjusting this parameter as well.
Here is the entire workflow.
References
[1] comfyanonymous. Inpaint Examples. Retrieved from https://comfyanonymous.github.io/ComfyUI_examples/inpaint/.